Guida video per illuminare il buio con Wondershare Filmora
Non ha senso mostrare video di scarsa qualità. Ecco una guida passo-passo su come illuminare un video usando Wondershare Filmora.
Key Steps of This Video Tutorial To Follow
Guide to using Filmora AI Tools
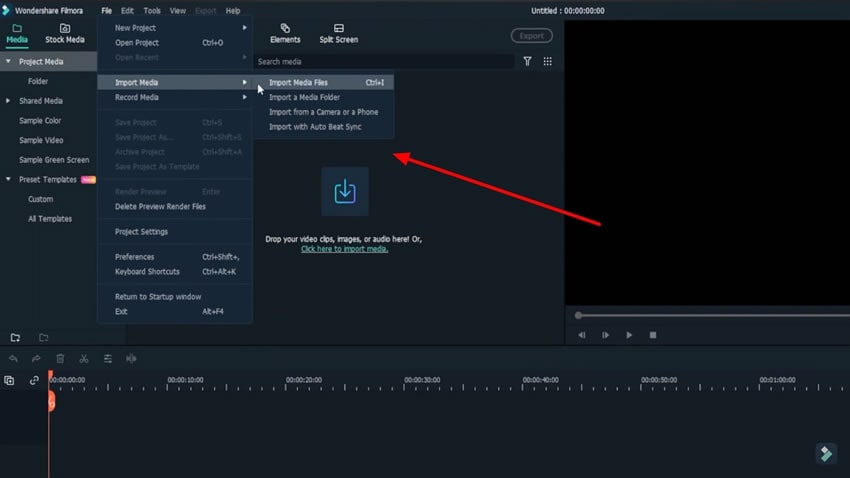
È necessario importare tutti i file multimediali in Filmora, per farlo è necessario fare clic su Nuovo progetto per aprire una nuova finestra. Utilizzare il pulsante "Importa" sullo schermo per continuare a importare il file corrispondente.
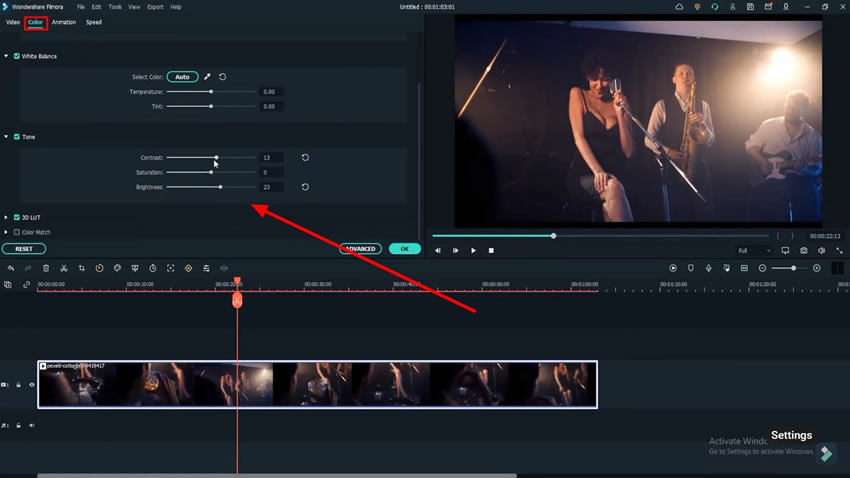
Drag the video onto the timeline and double-click to open its video settings. Proceed to the "Color" tab and look for the options for adjusting the color of the video. Here, you can change the Brightness and Contrast values within the "Tone" section. Upon viewing the results in real time, constantly change the color settings according to your requirements.
For changing the exposure in the video, change the "Exposure" value to any required position to light up the video easily.
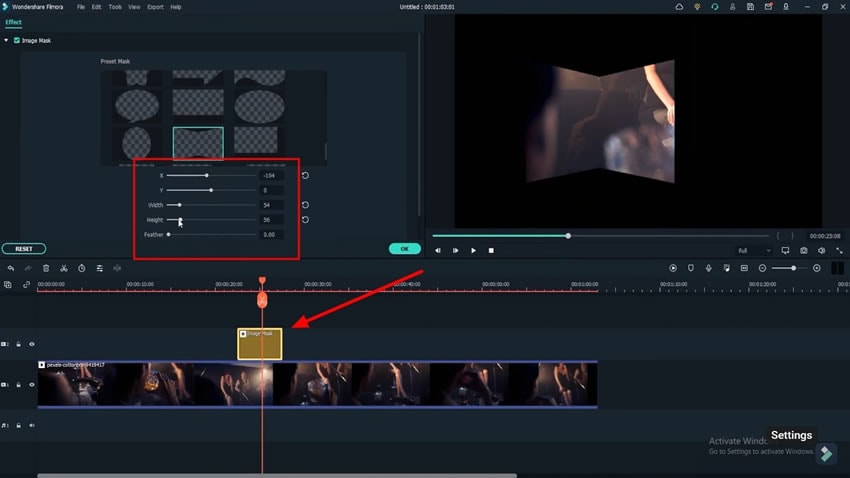
For brightening a specific area within the video, lead to the "Effects" tab and add the "Image Mask" from the "Utility" section. Drop the mask and select the desired shape to specify the area you want to brighten. Adjust the metrics of the mask, which includes the "X," "Y," "Position," and other settings. Once completed, click "OK" to save the settings.
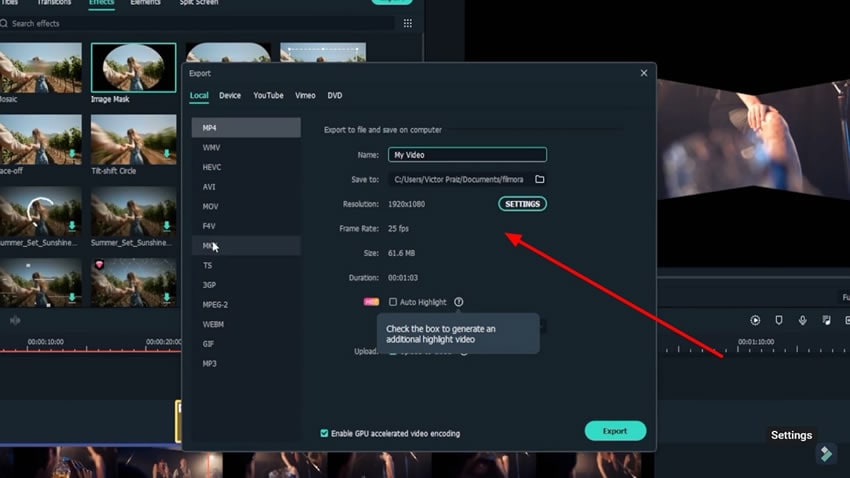
As you have lightened up your video, you can have it exported to your device. Click the "Export" button and select any respective platform where you want to export it to. Select a device or add it to a DVD if needed.
With the features mentioned, you can easily improve the lighting of your video on Wondershare Filmora. As you aim to make the video more transparent and brighter, you will figure out how to lighten up dark video con la configuración correcta. Esto te ayudará a conectarte con audiencias más grandes y mejores para tus creaciones de video.


