Guida alla realizzazione di effetti beat audio in video musicali con Filmora
In questo video troverai il modo giusto per creare un effetto beat audio in qualsiasi video musicale. Otterrai risultati perfetti con le funzionalità efficaci fornite da Wondershare Filmora.
Key Steps of This Video Tutorial To Follow
Guide to using Filmora AI Tools
首先,通过将音乐效果拖放到时间轴上的音轨上来启动该过程。现在选择第一个镜头,并将其放置在第一个轨道上。将第一个镜头保留在时间轴上几帧,并选择第二个镜头,并将其直接放置在同一轨道上的第一个镜头旁边。将第二个镜头在同一轨道上保留几秒钟。
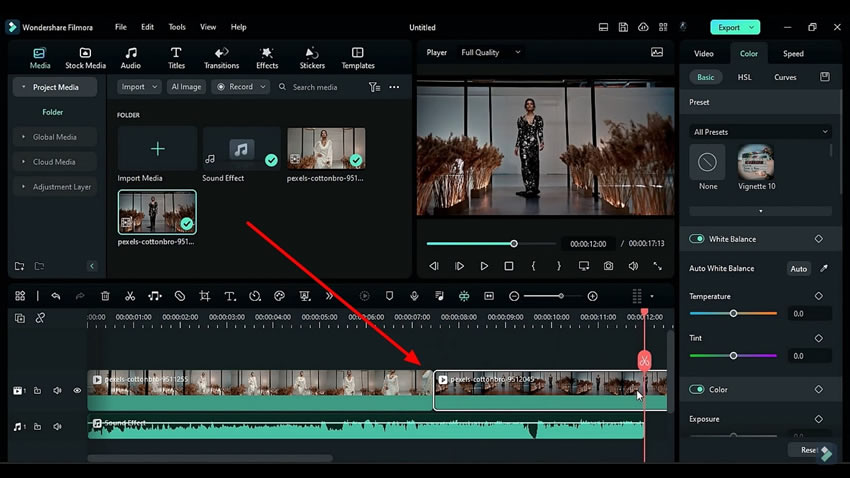
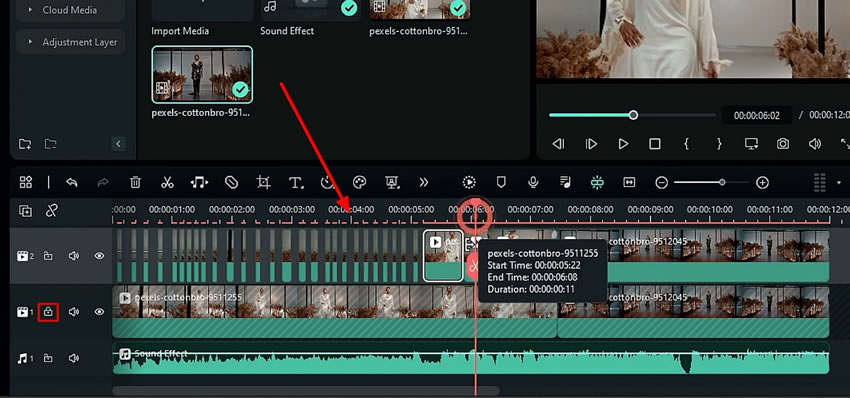
选择第一个轨道上的两个镜头并将其粘贴到第二个轨道上。锁定第一个轨道并在第一个镜头上识别出节拍。在那些节拍上分割第一个镜头,并删除其余部分。
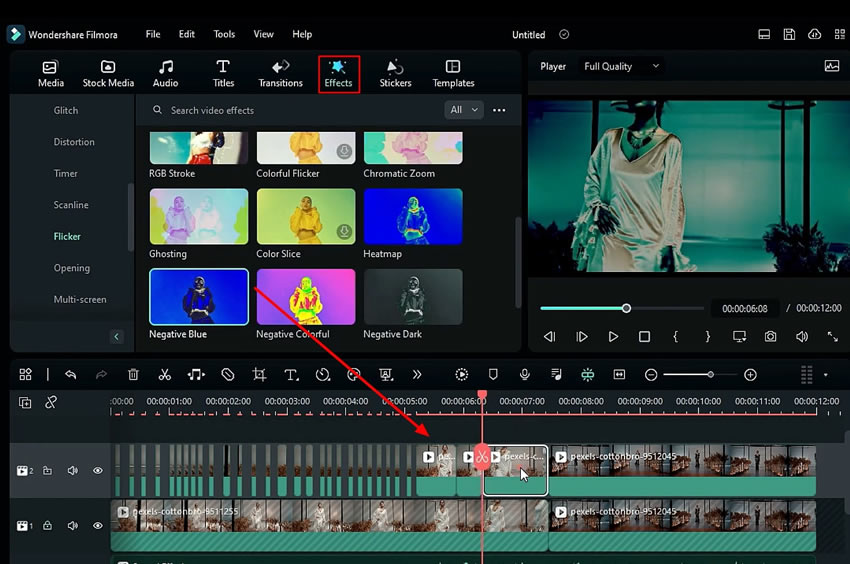
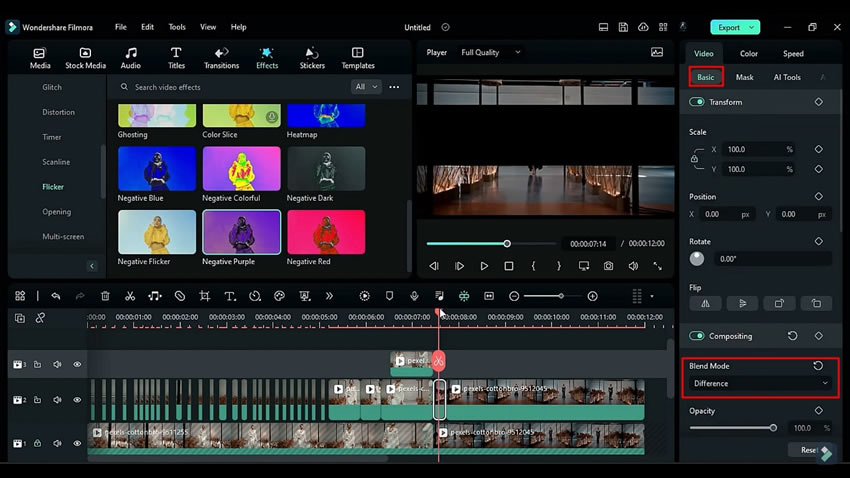
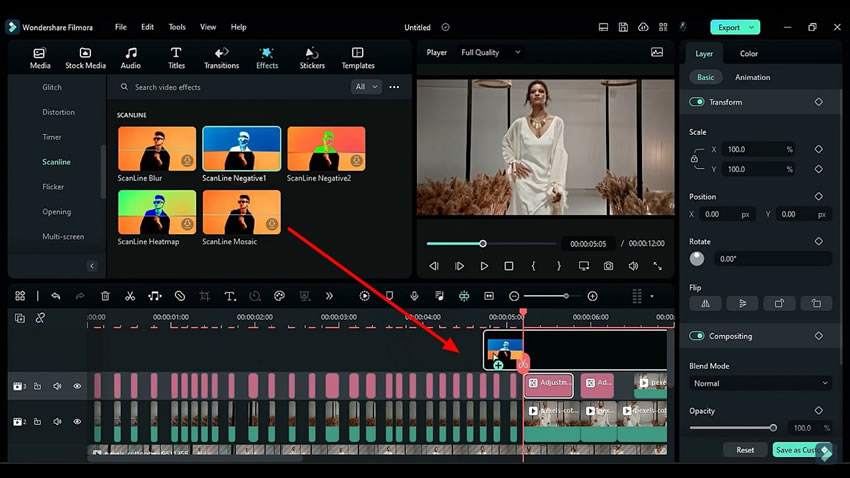
选择剩下的剪辑部分,然后转到“视频”标签。在“基础”部分中,您可以更改“混合模式”。转到“效果”,您可以选择任何效果并将其应用于视频。
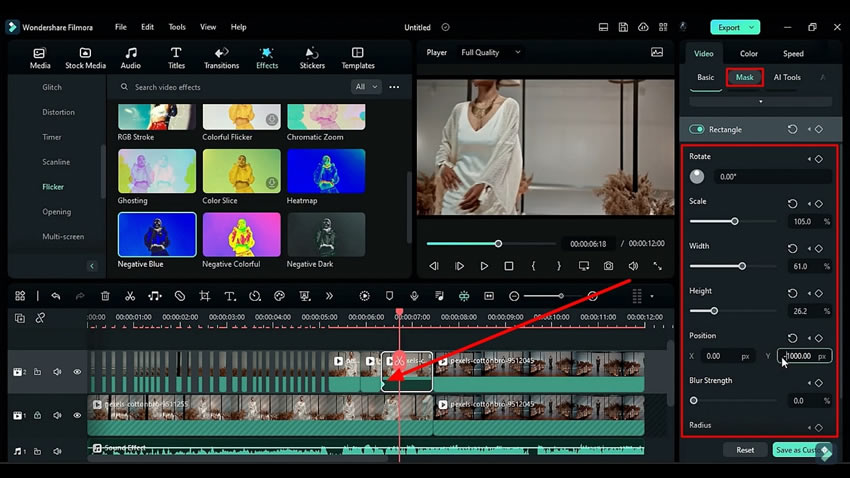
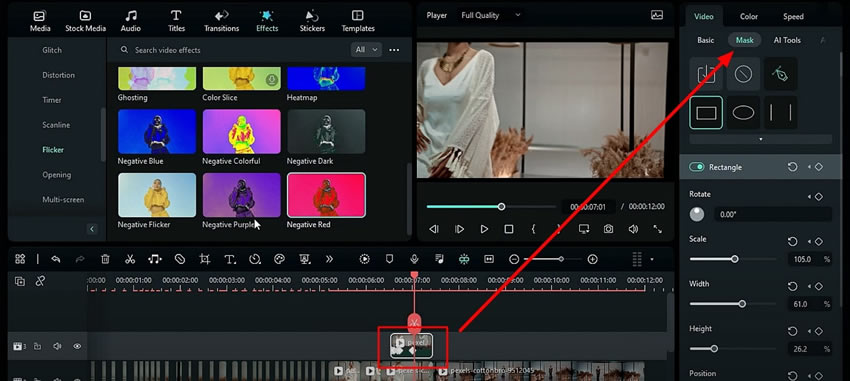
将播放头放在剪辑的开头,并在设置窗口中找到“基本”旁边的“遮罩”部分。向下滚动“遮罩”部分,您可以调整所选遮罩的“缩放”,“宽度”,高度和“Y轴位置”。
在“遮罩”选项卡下的右上角位置添加关键帧。将播放头向前移动几帧,并将“Y轴位置”更改为负值。现在复制此效果并将其粘贴到第三个轨道上。将此“剪辑”在新轨道上向后移动几帧并缩小它。
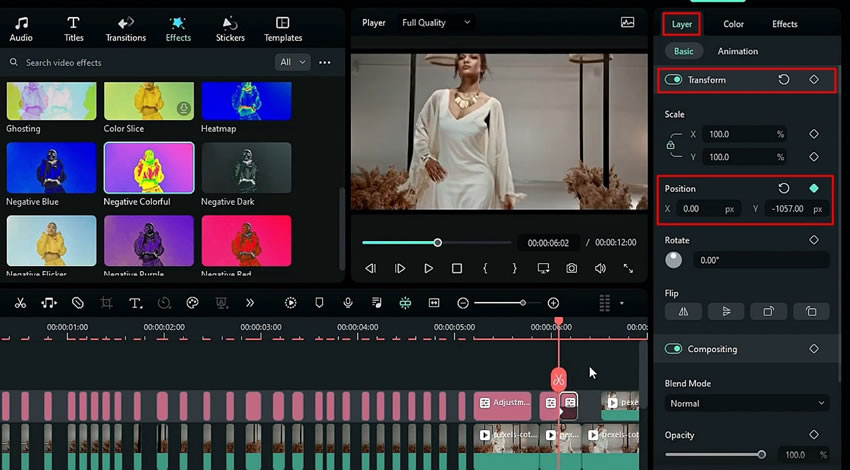
Adj. the mask on the clip on the 3rd track by moving 1 keyframe forward. Go to the "Effects" tab and apply diff. effects on the track. Place the playhead at the req. footage of the 2nd track and split the footage. Place the playhead at the req. part and go back to the "Mask" tab.
Choose "Parallel Line" from the "Mask" tab. Then, under the "Parallel Lines" section, set the values for "Rotate," "Width," and "Position" for the "Y" axis as per req. Again, change the "Y" value a few frames forward.
After that, head to the "Basic" tab, and under the "Compositing" section, choose the required "Blending Mode” from the dropdown list and apply effects, if needed. Continue this operation until you are done with the entire video, with the required masking and effects.
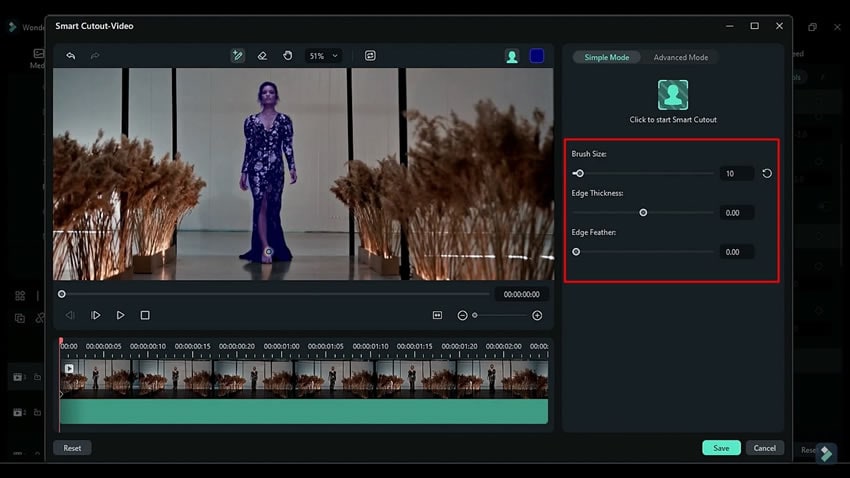
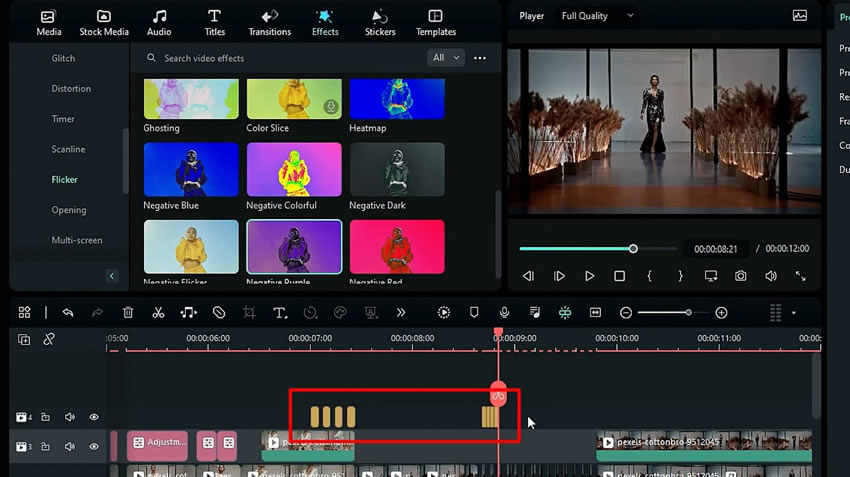
Enter the “AI Tools” tab and select the clip on the third track. Scroll down the section, turn on the "Smart Cutout," and adjust the settings by clicking on it. Set the "Brush Size,” "Edge Thickness," and "Edge Feather" as per requirements. Add more "Effects" on the clip, and blend multiple effects to create new effects.
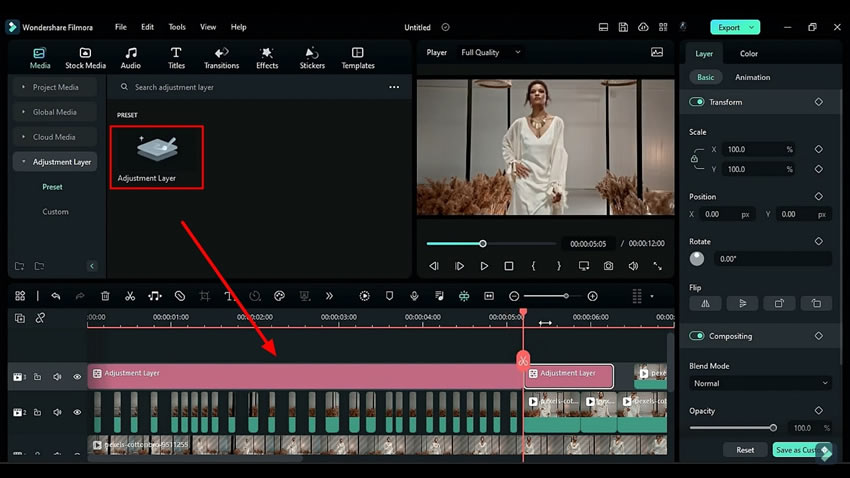
Enter the "Media" tab from the top left corner and select the "Adjustment Layer" option from the left panel. Then, apply the "Adjustment Layer" on track 3 and keep it till the required timeframe. Split the rest of the parts and set the start time of the last split part at the required timeframe.
Split the first adjustment layer on the third track according to the clip you’ve split on the second track and delete the non-beat parts of the adjustment layer accordingly. Select the second split part of the adjustment layer and apply the effect on this layer. Double-click the effect you've applied and enter the settings. Here you can adjust the "Duration" of this effect from the "Effects" tab.
Head towards the last split part and apply the effect on this part from the “Effects” tab. From the settings under the “Layer” tab, look for the "Transform" option, turn on the keyframes, and set the "Position" at "Y" at the end and start of the clip.
Sie können diese Anpassungsebene weiter in der Mitte teilen, um sie interessanter zu machen, ändern Sie die musik beat effekt aus dem Register "Effekte" für den zweiten Teil der Hälfte wählen und die "Position" auf "Y" einstellen.
Teilen Sie den ersten Clip und wenden Sie verschiedene "Effekte" auf jeden geteilten Teil an und passen Sie die Position nach Bedarf an. Setzen Sie nun Ihren Abspielkopf am Anfang des Frames und wenden Sie die "Effekte" für die ersten paar Frames an. Kopieren Sie einen weiteren Effekt und wenden Sie ihn an beliebiger Stelle auf diesen Videoclip an. Ihr Video ist bereit; Sie können es rendern, um die endgültige Vorschau zu sehen.
Um die Aufmerksamkeit der Zuschauer zu erregen, müssen Ihre Videos attraktiv sein. Dieser Artikel bietet eine schrittweise Anleitung zum Hinzufügen von Musikbeat-Effekten zu Ihrer Audioaufnahme. Sie können auch Videobearbeitungstechniken erlernen, indem Sie mehrere Effekte auf Videos anwenden, um Kreativität in Ihre Videos zu bringen und sie mit Wondershare Filmora unterhaltsamer zu gestalten.


