- Home
- DIY Special Effects
- Come fare un'animazione in Filmora
Transkrip
Pertama, mari kita pergi ke tag judul. Letakkan judul default di track 3 dan pertahankan selama 4 detik. Kemudian, klik dua kali pada label dan ubah jenis hurufnya menjadi Bankir-Retro.
Sesuaikan ukurannya menjadi 100, ketik kata-kata Anda, dan ubah jarak teksnya. Akhirnya, ambil gambar layar dari bingkai ini.
Selanjutnya, buat snapshot lain. Klik dua kali pada judul default, ubah warna teksnya, dan ambil snapshot.
Buka panel lanjutan, klik Tambah Bentuk dan pilih bentuk persegi panjang. Sementara itu, matikan Pengisian Teks.
Ubah warna pengisian bentuk menjadi putih. Sesuaikan bentuknya, putar, dan pindahkan posisinya. Kemudian hapus lapisan teks dan pergi ke tab animasi. Pilih zoom keliling.
Temukan jendela pengeditan utama pada frame ke-5 dan jadikan titik awal klip judul default.
Pindahkan penanda pemutaran 3 frame lebih jauh dan seret klip snapshot pertama ke Track 1 pada posisi penanda pemutaran. Pertahankan klip snapshot selama 30 menit dan 20 detik.
Pergi ke sampel warna, pilih warna hitam, letakkan di Track 2, dan perkecil ukuran sampel warna. Putar dan ratakan untuk membuat masker setengah snapshot. Kurangi durasi untuk memperbaiki klip.
Located at the start of the snapshot clip. Change the X-axis position to make the text slide into the line and black color.
Place the play head 10 frames further and reset the position values.
Go ahead to the position of 3 seconds and the 10th frame. To add another keyframe, place the play head at the end of the snapshot clip. Change the X-axis position.
Go back to the first frame and reduce the opacity to zero percent. This will create a sliding effect from right to left.
Export this clip at a higher rate. Select all pins on the timeline and move them to one track above. Meanwhile, drop the second snapshot on Track 2 and adjust its duration.
Select the black color clip and change the black color position from right to left. As the first snapshot, hide the clip-on Track 2 but make it slide from right to left.
Export this at a higher rate.
Drop the music clip on Track 1, then drop zero one clip on Track 2 and make it four seconds long only. Then, change the duration of the background clip to four seconds.
Now change the blending mode of zero one clip to lighten.
Copy it and take the play head further. Finally, paste the elements and align their position as per the line effect; to see the final preview click on the render preview.
Come fare un'animazione in Filmora
Devi prepararti:
- Computer (Windows o macOS)
- Tuo materiale video.
- Editor video di Filmora
Visita il sito filmora.wondershare.com eScarica Filmora. Install the program and wait for it to Run. Then, click on New Project.
Go to File → Project Settings and set the FPS to 60. Also, ensure that the project is in Full Resolution (1920x1080). Click OK.

Open the TitlesTasto tab e trascinaTitolo predefinitoAlla linea temporale. Quindi, fai doppio clic sul titolo predefinito e fai clicAvanzato.
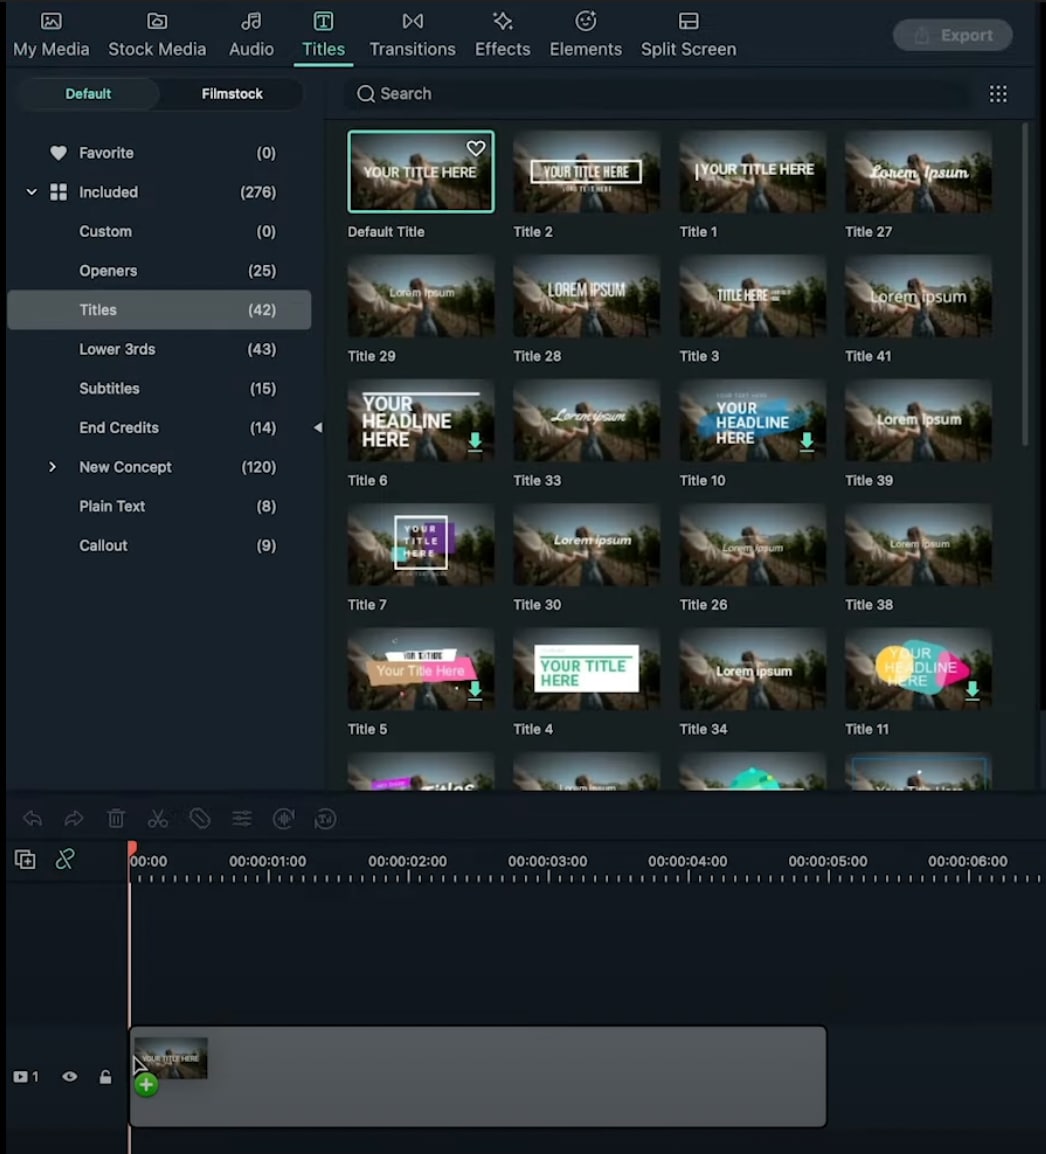
Dal pannello Impostazioni avanzate, rimuovi il testo esistente e aggiungiUn rettangolo.

& DisabilitaRiempi il testoand the Shape Border options from the panel on the left side.

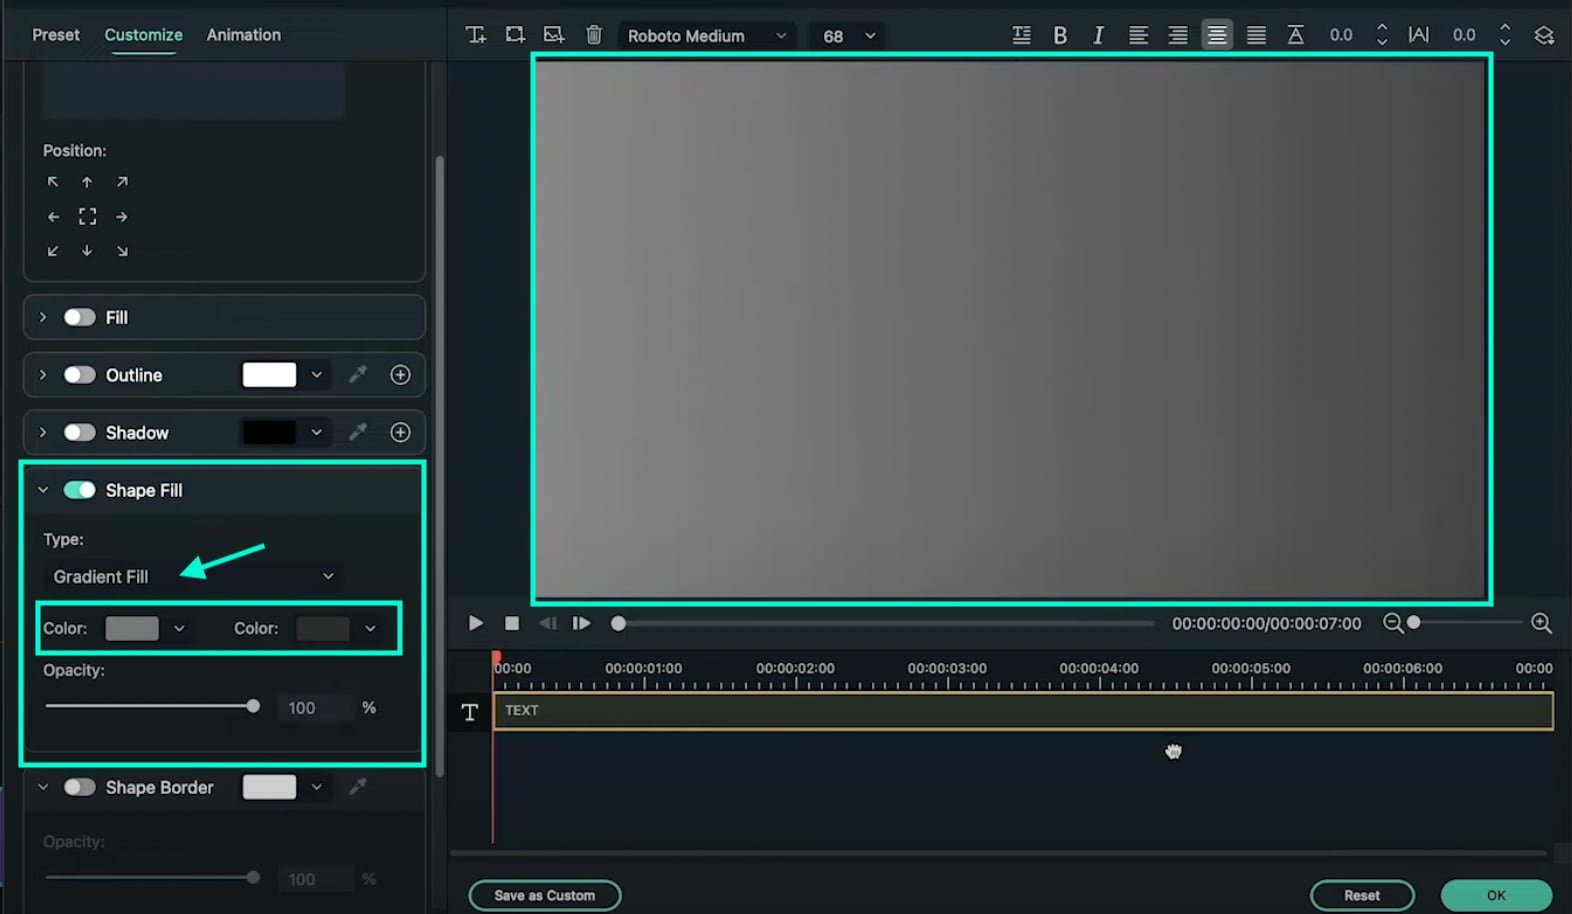
Click the drop-down arrow on the Shape Fill option and change the Type to Gradient Fill. Then, adjust the two color pallets from lighter to darker to create a gradient effect. Finally, adjust the rectangle to fit the entire screen. Click OK.
Vai aLa transizioneEtichettatura→ Ricerca "La spinta” → Trascina la transizione push sul titolo predefinito nella sequenza temporale. Quindi, sposta l'intestazione di riproduzione sul tag 1 secondo e sposta un altro titolo predefinito daTitlesLe etichette.

Fare doppio clic sul nuovo titolo predefinito→ Vai aAvanzato.Rimuovi il testo predefinito e aggiungiCerchioQuesta volta è una forma invece di un rettangolo. & DisabilitaRiempimento testo e riempimento formaQuesta volta è un'opzione.
Scorri verso il basso fino aForma del bordo and increase the Thickness bar all the way up. Then, change the circle’s color to match your background as closely as possible. Click OK.

Copy the Title you just edited and paste it into the above layer. Then, double-click on the copied Title and go to its Advanced settings panel.

In the Advanced panel, copy the circle and paste it somewhere else on the screen. Change its size if you want, and change the shade of its color to match the background once more. You can add as many new copies of the Default Titles and copy as many circles as you want. Click OK.
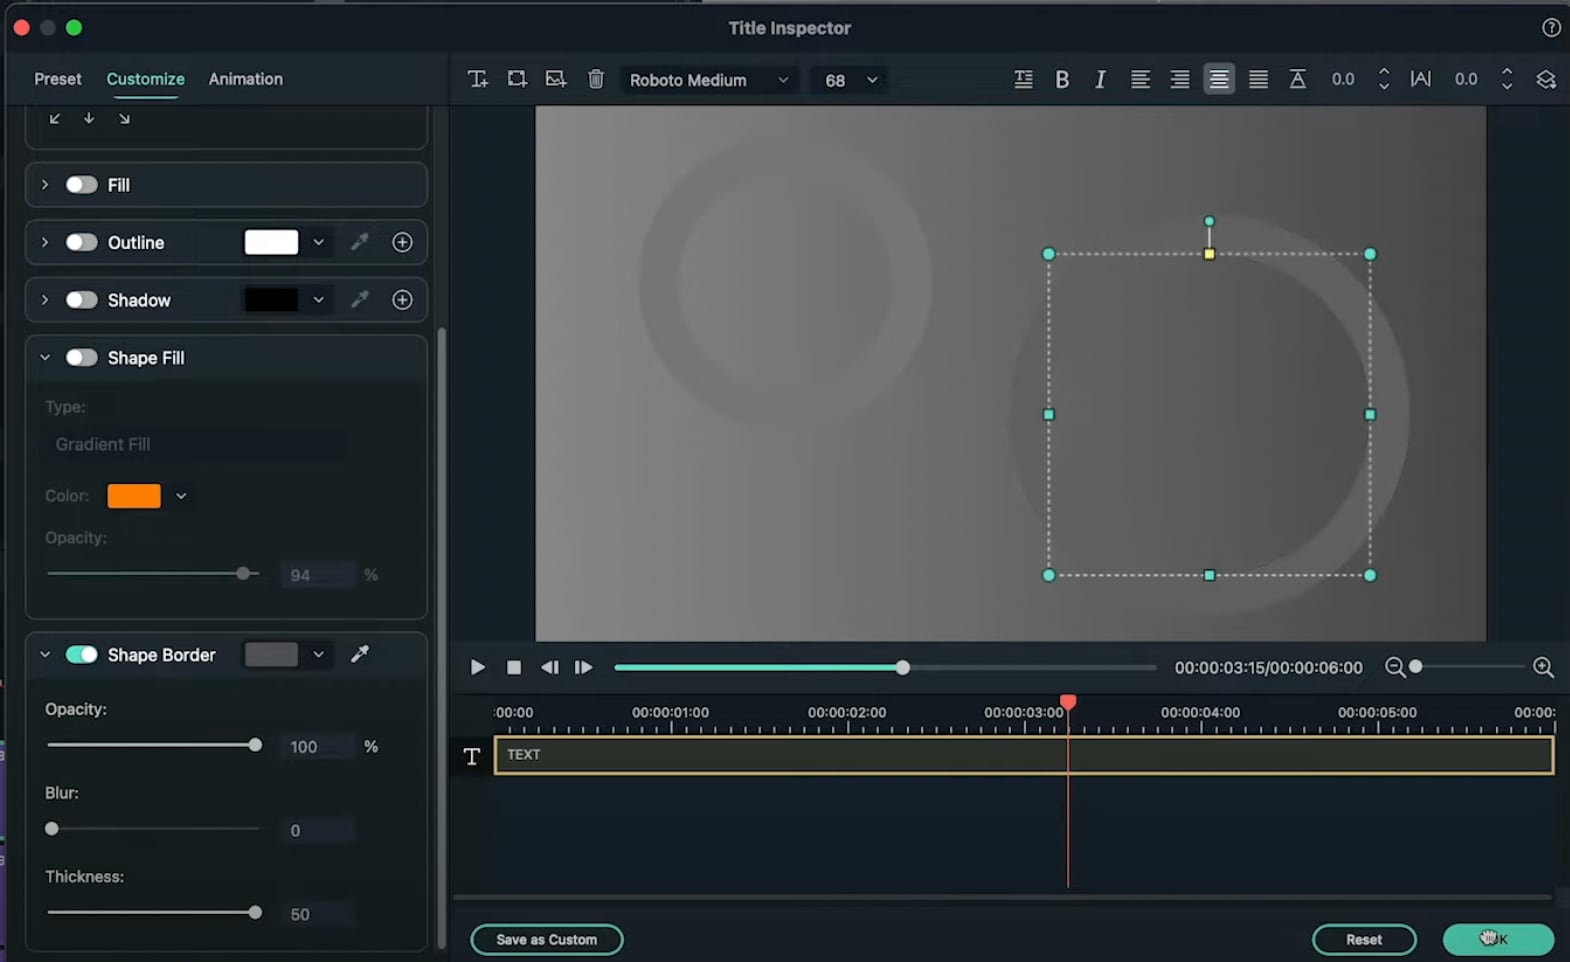
After you’re done copying and pasting more Default Titles with more Circles inside, you can start animating them. Start with the first one. Double-click on the first Default Title with the Circle inside. Make sure you place the Playhead at the beginning of that clip. Then, go to the Animation tab.Animationtab.

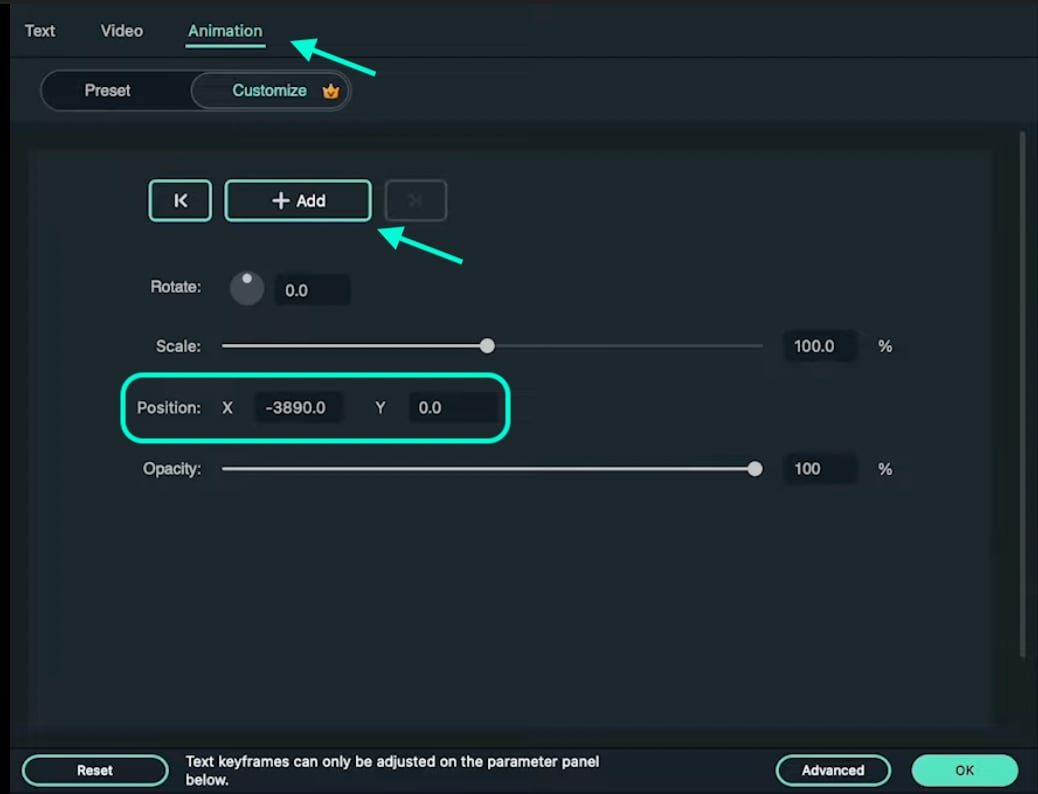
You need to add 3 keyframes. Add the first one right now. Just click on the “+Add” button. Then, move the Playhead somewhere in the middle and click “” again. Last, move the Playhead at the end of the clip, and click “” again to add the third keyframe.+ AggiungiPulsante. Quindi, sposta la testa di riproduzione in una posizione al centro e fai clic su "+ Aggiungi"Eccolo di nuovo. Infine, sposta la testa di riproduzione alla fine della clip e clicca"+ Aggiungi"Aggiungi di nuovo un terzo fotogramma chiave.

Maintenant, revenez à la première image clé pour modifier ses paramètres. Cliquez sur les flèches pour naviguer entre les images clés. Une fois que vous êtes sur la première, commencez à diminuer la Échelle et les valeurs de Position pendant que vous déplacez la Tête de lecture vers la deuxième image clé. Il n'y a pas de règles ici. Déplacez chaque valeur en fonction de ce qui vous semble le mieux.
Pour la deuxième image clé, augmentez simplement la Échelle et ajustez la Position valeur basée sur son apparence à l'écran.

Maintenant, appliquez la même méthode que dansStep 14 à tous les autres cercles de votre vidéo. Ensuite, ajustez les positions des keyframes pour toutes les couches afin de créer un mouvement plus unique dans toute la vidéo.
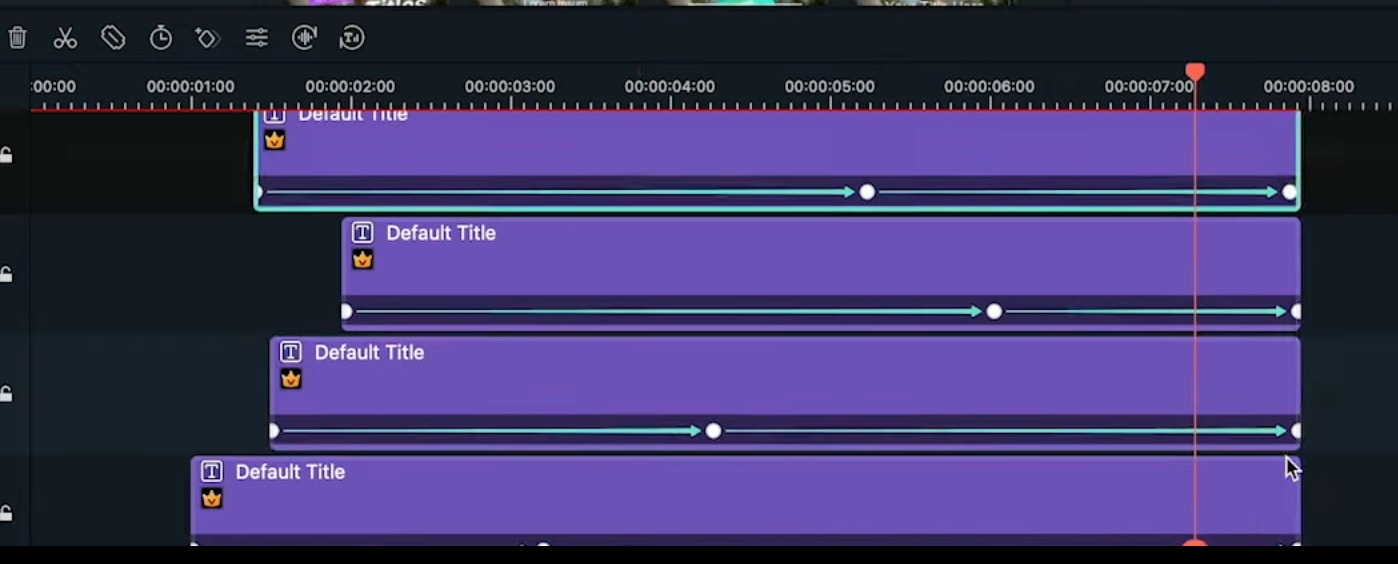
Déplacez la ligne de lecture à 1 seconde et 30 images. Ensuite, ajoutez un nouveau titre par défaut dans la timeline et accédez à son panneau de paramètres avancés. À partir de là, Activer l'Contour option et & DisabilitaQuesto qui...Riempi conOpzioni. Nell'opzione Contorno, cambia il colore in bianco, imposta l'opacità al 50% e riduce lo spessore a 1.

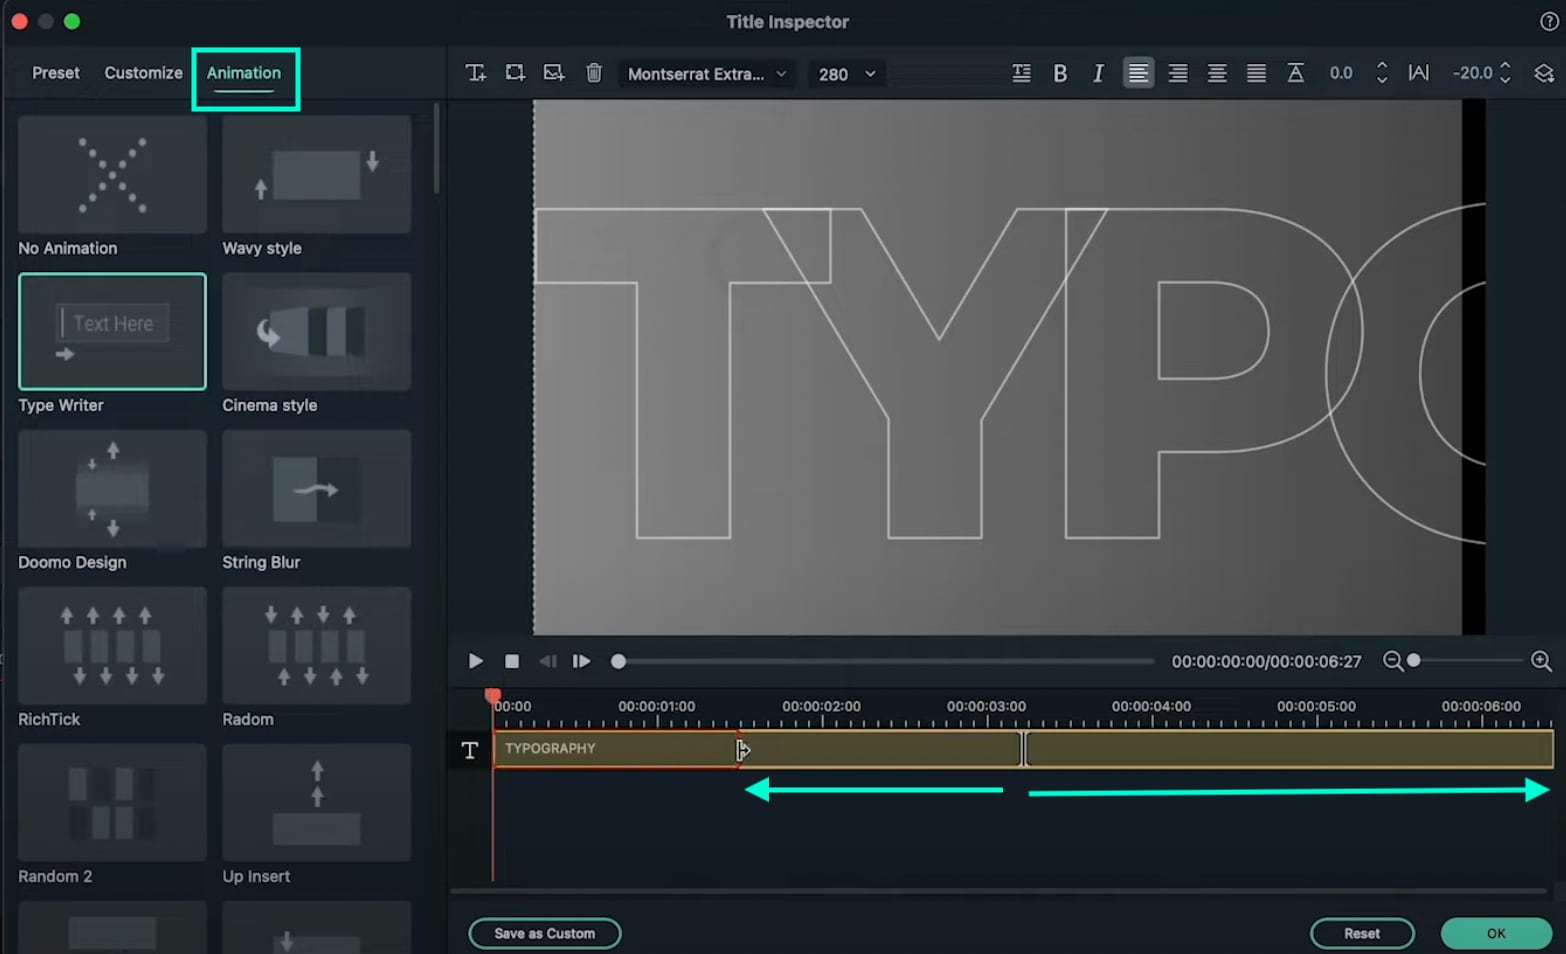
Quindi, seleziona il tuo carattere preferito e inserisci il tuo testo nella casella di testo. Quindi, cambia il valore evidenziato in questa immagine in "-20". Infine, aumenta la dimensione del testo in modo che si adatti quasi all'intero schermo. Non preoccuparti di non poter vedere tutto sullo schermo.

Vai aAnimationScheda e applicazione"Macchina da scrivere"Animazione. Quindi, trascina la linea gialla in basso, come l'immagine che vedi qui. Le frecce indicano la lunghezza di queste righe che devono essere trascinate. Clicca suOK.
将播放头设置为1秒40帧。现在,双击刚刚创建的最后一个默认标题,并转到其动画设置。注意:这次不要打开其高级设置。接下来,添加一个关键帧。然后,将播放头移动到时间轴中该剪辑的末尾附近。现在,将X位置向左拖动,直到屏幕上出现您的文本的最后一个字母。点击OK.
现在,在时间轴上添加另一个默认标题。打开其高级设置并输入您的主要文本。然后,转到其动画选项卡,并应用“Random 2”动画。根据您的喜好更改其起始和结束时间。点击确定。

E' questo il punto. Hai finito! Sentiti libero di visualizzare in anteprima e rendere il video. Congratulazioni per aver creato un'animazione unica in Filmora.
Cosa hai imparato:
- Come creare animazioni personalizzate in Filmora
- Come modificare e aggiungere animazioni al titolo in Filmora
- Personalizza testo e forma in Filmora

Speak Your Mind