Transcript
In this video, we will show you how to create a Star Wars intro in Wondershare Filmora.
First, drop "Default Title" on track 1 and change the font to "Star Jedi Hollow." Go to "Advance" and enter your first word. Change the font size to 232, place the word upward, and select this yellow "Preset." Add another text, enter your word, change the font size to 210, and adjust its position. Click on "Apply" and take a snapshot of it.
Delete the title from the timeline. Add a few more tracks, drop a snapshot on track 4, and make it 8 seconds long. Unlock the "Scale," change "X" to 145 and "Y" to 129. Turn on "Transform" keyframes and "Opacity" keyframes. Set "Opacity" to 0, set "Opacity" to 100 in two frames, and change the "X" value to 0.6 and "Y" to 0.5 at the end. Now, you can see how it's going on. Change the "Y-Position" "X" value to 2.92 and the "Y" value to 1.95. Now, we have a slightly straight zoom animation.
Now, drop the start background footage on track 3 and change its “Blending Mode” to “Screen.” Then go to 5 seconds and 9th frame. Go to the "Title" and drop the "Default Title" on track 1, and stretch it until 20 seconds.
Now, create your text and paste it into the text column. Adjust the text in the center, change the "Scale" to 51, select your main words, and increase their “Size” to 40. Use the "Color Pick" tool to select the yellow color from your snapshot.
Then go to the start of the default title, turn on the "Position" keyframe, and change the "Y" value to negative 398. Then, change the value to 290 at 7 seconds and the 19thCadre. Allez deux cadres avant la fin du titre et changez la valeur de "Y" en 257. Maintenant, vous pouvez voir comment le texte descend vers le haut.
Ensuite, allez dans les médias et déposez une "Couche d'ajustement" sur la piste 2. Étirez-la sur 20 secondes, puis allez dans les "Effets". Sous "Restauration d'image", appliquez l'effet "Correction d'objectif BCC" sur la couche d'ajustement. Allez dans les paramètres des "Effets"; vous pouvez voir que nous obtenons nos effets Star Wars.
Inoltre, cambiare "Correzione" a 4.1, "Scala Master" a 118, "Scala X" a 121, "Scala Y" a 53 e "Prospettiva verticale" a -35. Ora, come potete vedere, stiamo per avere la nostra introduzione a Star Wars. Basta cambiare "prospettiva verticale" in -23 e "scala X" in 128. Quindi ora il testo esce anche dagli angoli sinistro e destro. "Renderla".
Come creare una guida agli effetti di Star Wars in Filmora
What you need to prepare:
- A computer (Windows or macOS)
- Your video materials.
- Filmora video editor
Start a New Project in Filmora
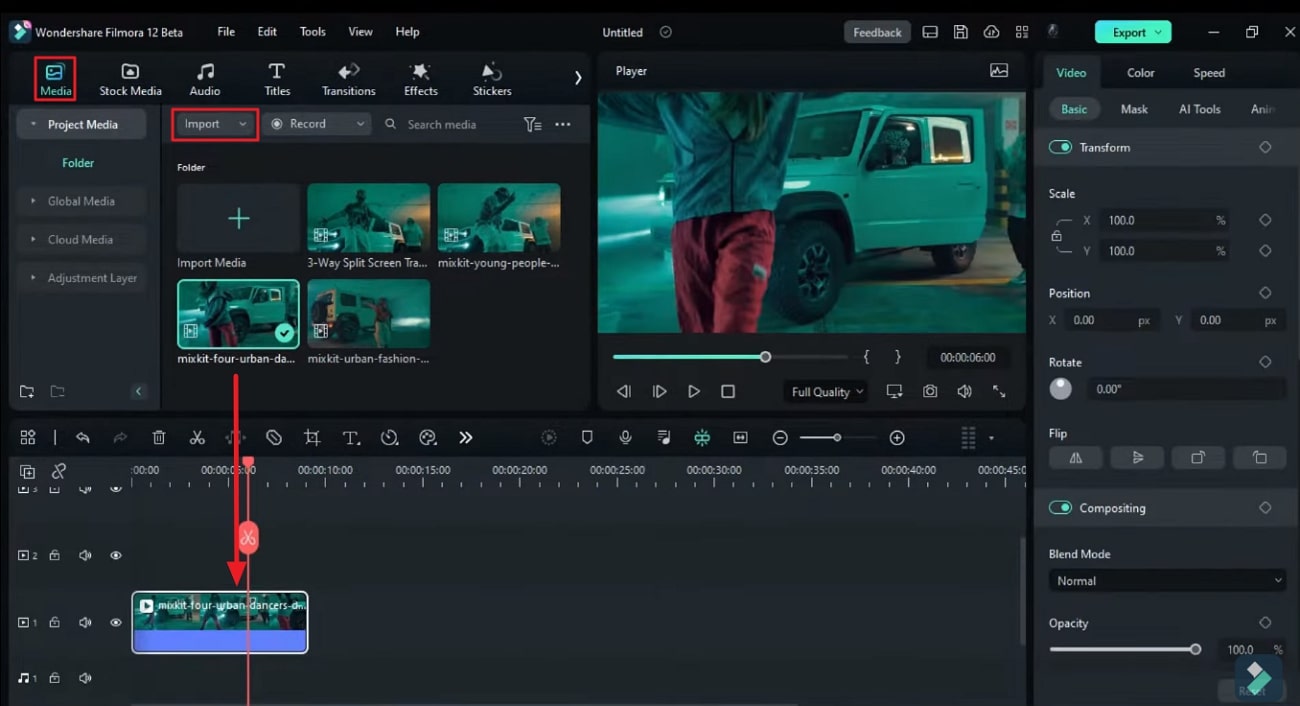
Open Filmora and access the editing window by clicking the "New Project" button. Go to the "Titles" tab in the toolbar and drag "Default Title" on the timeline track.
Modifier les éléments de texte
Cliquez sur le titre que vous avez ajouté à la timeline, et un panneau apparaîtra sur le côté droit de l'écran. Allez dans l'onglet "Titres" là-bas, et sous l'onglet "Basique", changez le style de police en "Star Jedi Hollow". Cliquez sur le bouton "Avancé" disponible en bas à droite.
Une nouvelle fenêtre va apparaître, où vous devrez taper le premier mot de votre introduction dans la zone de texte de la fenêtre d'aperçu. Ensuite, changez la taille de la police selon vos préférences. Allez dans le panneau droit de cette fenêtre, et sous l'onglet "Prédéfini", sélectionnez la couleur du texte de votre choix.
Dans la barre d'outils supérieure, allez sur l'icône "Texte" et choisissez l'option "Texte rapide" dans le menu déroulant. Là, ajoutez le deuxième mot de l'introduction dans la zone de texte. Après avoir ajusté la taille de la police et la position du deuxième mot, appuyez sur le bouton "Appliquer" en dessous.
Ajouter des pistes dans la timeline
Après avoir cliqué sur "Appliquer", vous retournerez à la fenêtre principale d'édition. Prenez une capture d'écran de ce texte en cliquant sur l'icône de l'appareil photo sous l'écran d'aperçu. Maintenant, allez dans la timeline et supprimez le "Titre par défaut". Insérez 3 pistes supplémentaires et ajoutez la capture d'écran sur la piste supérieure.
Cliquez avec le bouton droit de la souris sur la capture d'écran dans la 4ème piste et sélectionnez "Durée". Ensuite, une petite nouvelle fenêtre apparaîtra, augmentant la durée de votre capture d'écran à partir de cette fenêtre contextuelle.
Click on the snapshot in the timeline and hover towards the right side panel. By clicking the "Image" tab, you'll see many options under the "Basic" tab. Turn on the "Transform" and "Opacity" keyframes from there. -
Decrease the "Opacity" of text in the starting keyframes and increase it gradually while moving forward. Change the "Scale," "X," and "Y" values, similarly creating a zoom-out animation. You can also adjust the "Position" for a smooth animation. -
Step 5 -

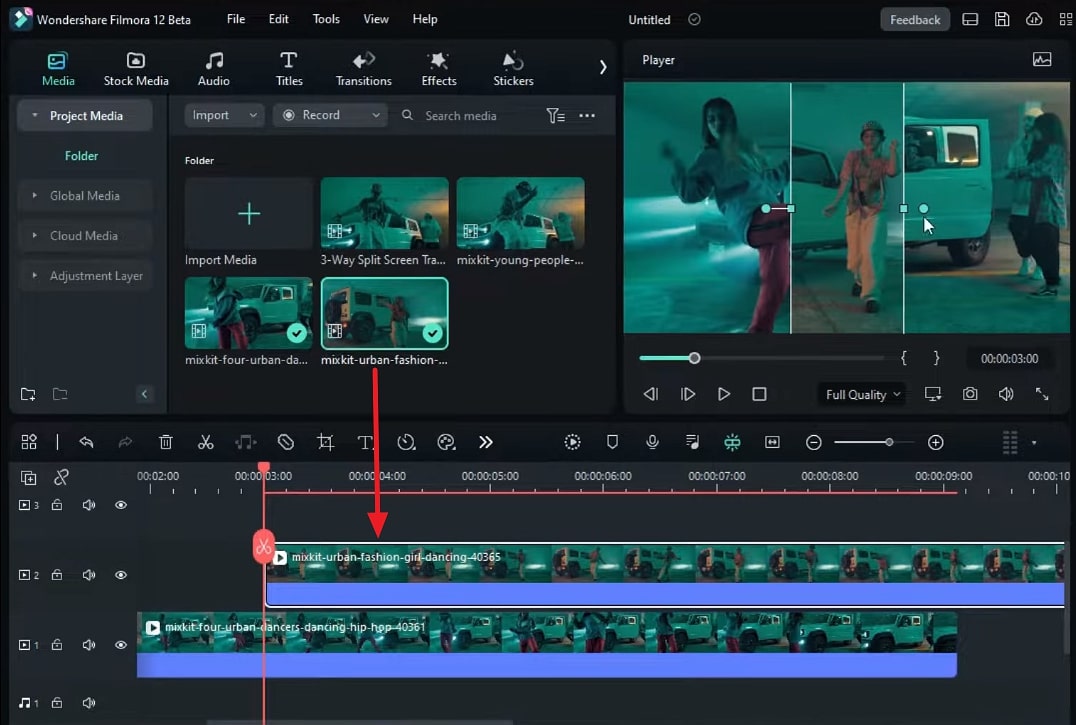
Now, it's time to add stars in the background. For this, add the star background clip in the lower timeline track. Then, under the "Video" tab, go to the "Basic" and change the "Blend Mode" to "Screen." -
Step 6 -
Moving forward, place the playhead on 5 seconds and 9th frame and add a "Default Title" on track 1. Extend the time duration of the default title to 20 seconds. Then, copy-paste the text you want to add in the intro. -
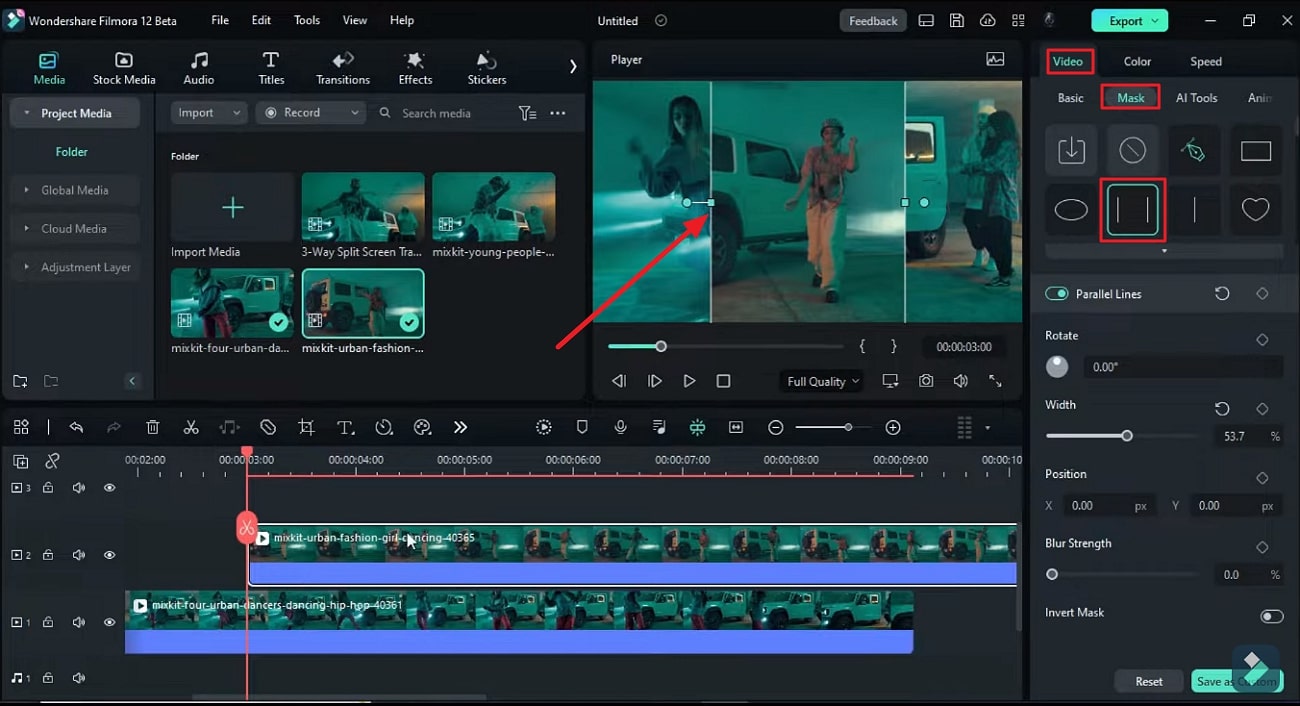
Make changes in the font style and size of this text and its color. To highlight the main text, you can increase its font slightly more than others. From the "Basic" tab, make adjustments in the "Position" and “Scale” of this text at different keyframes. This way, the text will go from downward to upward. -
Cambia lo stile del carattere, le dimensioni e il colore di questo testo. Per evidenziare il testo principale, puoi aumentare leggermente il suo carattere rispetto ad altri testi. Nella scheda Base, regola la posizione e la scala del testo in diversi fotogrammi chiave. In questo modo, il testo andrà dal basso verso l'alto.
Adapter la perspective du texte à Star Wars
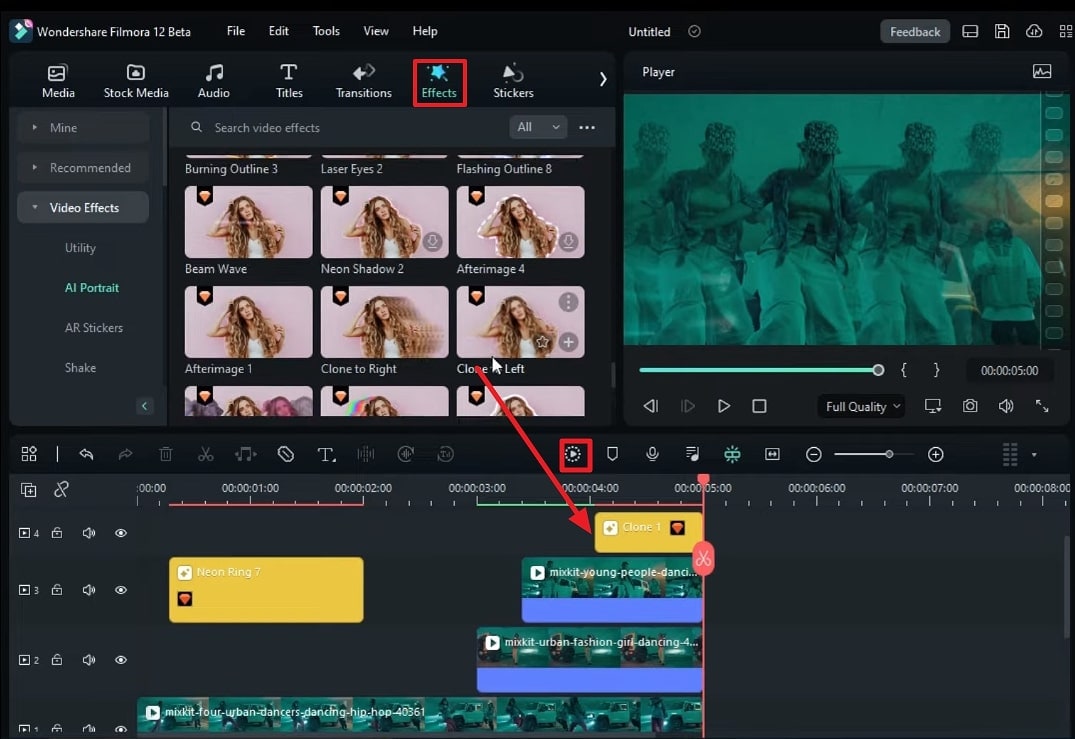
Allez dans l'onglet "Média" de la barre d'outils de Filmora et glissez "Calque d'ajustement" dans la deuxième piste. Augmentez la durée de ce calque à 20 secondes en le faisant glisser vers la droite.
Ensuite, allez dans l'onglet "Effets" et ajoutez l'effet "BCC Lens Correction" sur la piste. Maintenant, allez dans les "Effets" du panneau de droite et effectuez différents ajustements. Changer la "Perspective verticale" donnera à votre texte une vue verticale, exactement comme Star Wars. Lancez la lecture pour voir les résultats finaux et si vous êtes satisfait du résultat, vous pouvez l'exporter.
Il existe une technique de marketing qui consiste à faire de la publicité pour votre produit d'une manière qui rappelle quelque chose au public. Vous pouvez ajouter l'intro Star Wars dans vos vidéos comme mesure créative et moyen d'augmenter la portée de l'audience. Avec Wondershare Filmora, ce type de montage ne prend que quelques minutes.


Speak Your Mind