- Home
- DIY Special Effects
- Tutorial di animazione testuale ripetuta in Filmora
Tr
Fi, lets edit the titles. Double-click on the default title on the timeline and change the font to any bold font.
Ne, double-click to bring out the advanced panel, turn off Text Fill, turn on the Outline option, change the outline color to white color, and change thickness to one.
Ne, click on the crop tool, shift the crop section downward, and press OK.
No import the background image. Drag it to the timeline, click on it to change the scale, and make it cover the whole screen.
No drop the upward outline snapshot at the 15th frame. Double-click on it and go to the animation.
Ad a keyframe at a minute and five-second position. The go five frames forward and change the zoom level preview screen to 25%.
Dro the downward snapshot clip on Track 4 and repeat the same process. Until now, we have finished the first outline animation.
The next step is to create one more layer on the outline. Dro the topside snapshot clip on Track Three at the 17th frame.
Aggiungi un fotogramma chiave in un minuto e cinque secondi. Quindi, vai ai primi cinque fotogrammi, fai doppio clic sulla clip e allungala nell'anteprima.
Sblocca il clip di sfondo, sblocca il pin centrale, lo dividi al fotogramma 15 e aggiungi un fotogramma chiave all'inizio.
Vai all'effetto, seleziona la sbavatura, applica la dispersione della sbavatura e la striscia di sbavatura 2 sul clip diviso e fai lo stesso per la parte finale.
Tutorial di animazione testuale ripetuta
Devi prepararti:
- Computer (Windows o macOS)
- Tuo materiale video.
- Editor video di Filmora
Scarica Filmora. Fatelo installare e aspettate che funzioni. Quindi, fai clic“Nuevo proyecto”. Ahora estás listo para editar!
Primero, ve a Títulos y arrastra el Título Predeterminado hacia la Línea de Tiempo.

Ahora, haz doble clic en el clip del Título Predeterminado. Aquí, cambia su fuente a cualquier fuente en negrita. Aumenta el tamaño del texto a 120. Escribe tu texto en el cuadro. Desplázate un poco hacia abajo y cambia el Espaciado del Texto to 8. Haz clic en D'accordo.

Scatta un'istantanea di questo titolo predefinito.

Fare nuovamente doppio clic sulla clip del titolo predefinita. Questa volta, fai clic su di essoAdvanced & AdvancedImpostazione. Ecco, spegni.Riempimento testo →ApertoSchema →change the Outline color to White → reduce Thickness to 1. Haz clic en D'accordo.Now, take another Snapshot.

Delete the Default Title clip from the Timeline. Now, drag the Outline snapshot that we just created to the Timeline. Open the Crop tool → change the Ratio to Custom → Replace " with ". Lastly, move the highlighted crop section to the top. Click /p>1080"Con"540". Infine, spostare la parte di ritaglio evidenziata in alto. Fare clic suOK.

Double-click on the Snapshot to open its settings panel. Go to the /p>Animation /p>tab. Here, change the value of the /p>Y-axisA "275”. Haz clic en D'accordo.Ora, fai una foto.

Quindi, fai clicLe coltureUsa di nuovo lo strumento e sposta semplicemente la parte di ritaglio evidenziata nella parte inferiore dello schermo. Clicca suD'accordo.Quindi, fare doppio clic sulla clip dell'istantanea nella sequenza temporale e modificarlaY-axisDa "275" a "-275”. Haz clic en D'accordo.Fai un'altra foto.
Importa immagine di sfondo inLa mia stampa.Trascina l'immagine di sfondo sulla sequenza temporale. Fare doppio clic su di esso e trascinareLa scalaFino a quando l'immagine di sfondo non copre l'intero schermo. Clicca suD'accordo.Dovresti tagliare la clip di sfondo in 3 secondi.

Premi il pulsante evidenziato a sinistra per bloccare questa traccia nella sequenza temporale. Poi, vai"Responsabile del circuito"E aggiungi 6 nuove tracce alla sequenza temporale. Clicca suOK.

Trascina la prima istantanea che abbiamo fatto prima sulla traccia 6. Taglialo a 3 secondi. E poi,La serraturaLa pista.

Imposta la testina di riproduzione sul quindicesimo fotogramma della sequenza temporale. Quindi, trascinaProfilo in altoScatta un'istantanea a questo punto. Fare doppio clic su di esso e cambiareY-axisValore è «-4%". Quindi, ridurreOpacidad to 0%. Ahora, mueve el control deslizante 5 cuadros más adelante. A continuación, aumenta la opacidad to 100% y aumenta el Y-axisvalor a aproximadamente "105". No hagas clic OK todavía.
Mueve el control deslizante a 1 minuto y 5 segundos en la línea de tiempo. Agrega un fotograma clave haciendo clic en el “+Add” button. Then, move the Playhead 5 frames forward. Here, change the Zoom Level to 25%.

Double-click on the clip in Track 5. Drag the text like in the image below. Then, delete the part of the clip on the right side after 1 minute and 15 seconds.

Hide the clips on Track 6 and Track 1 by clicking the “eye” icons next to them. Then, take a Snapshot. Now, drag this Snapshot right next to the clip on Track 5.
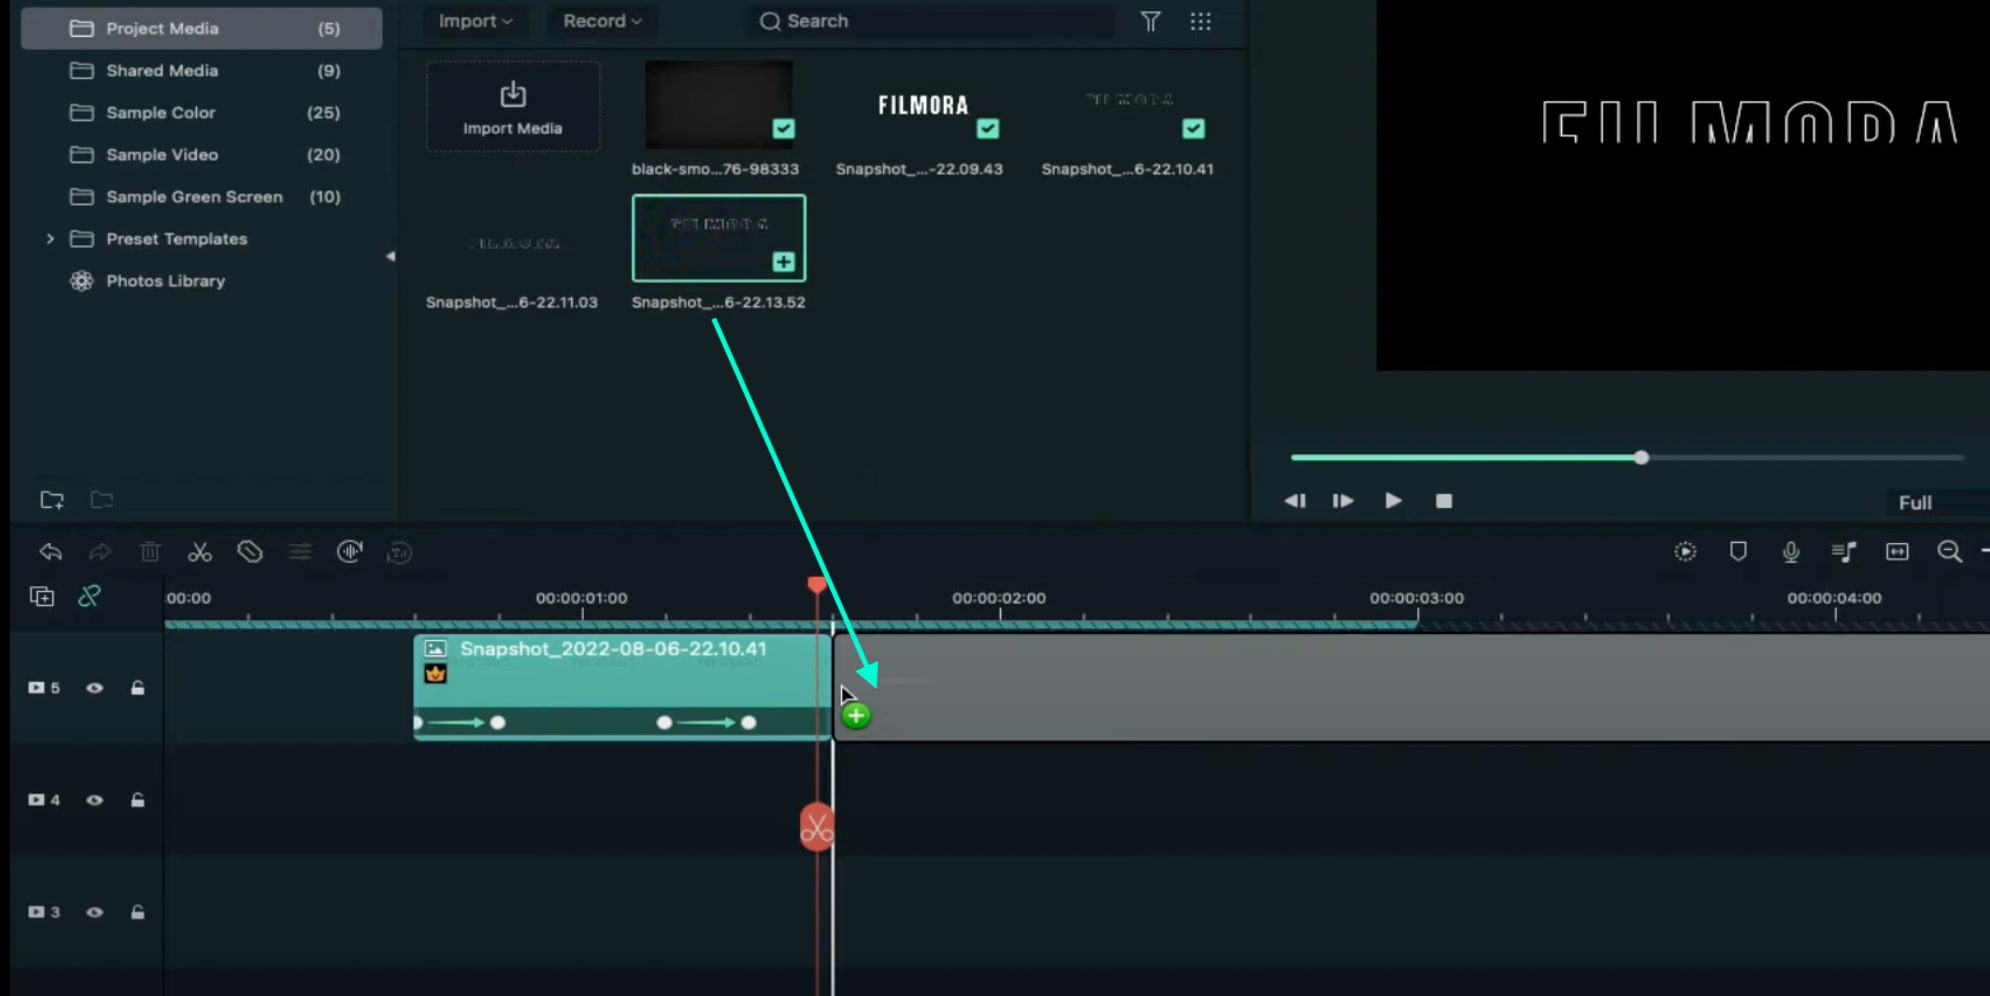
Move the Playhead 3 frames forward from the starting point of the clip you just added. Unhide Track 6. Double-click on the clip on the right side of Track 5 and click on “+Add”. Move the Playhead 5 seconds forward and adjust the Upward Outline to fit the text.

Move the Playhead 5 frames forward again. Drag the Y-axis value to the left until the outline clip overlaps the main text. Then, reduce the Opacidad to 0%. Move the Playhead to 2 minutes and 10 seconds. Cut the Track and delete the clip on the right side. Lastly, Lock Track 5.
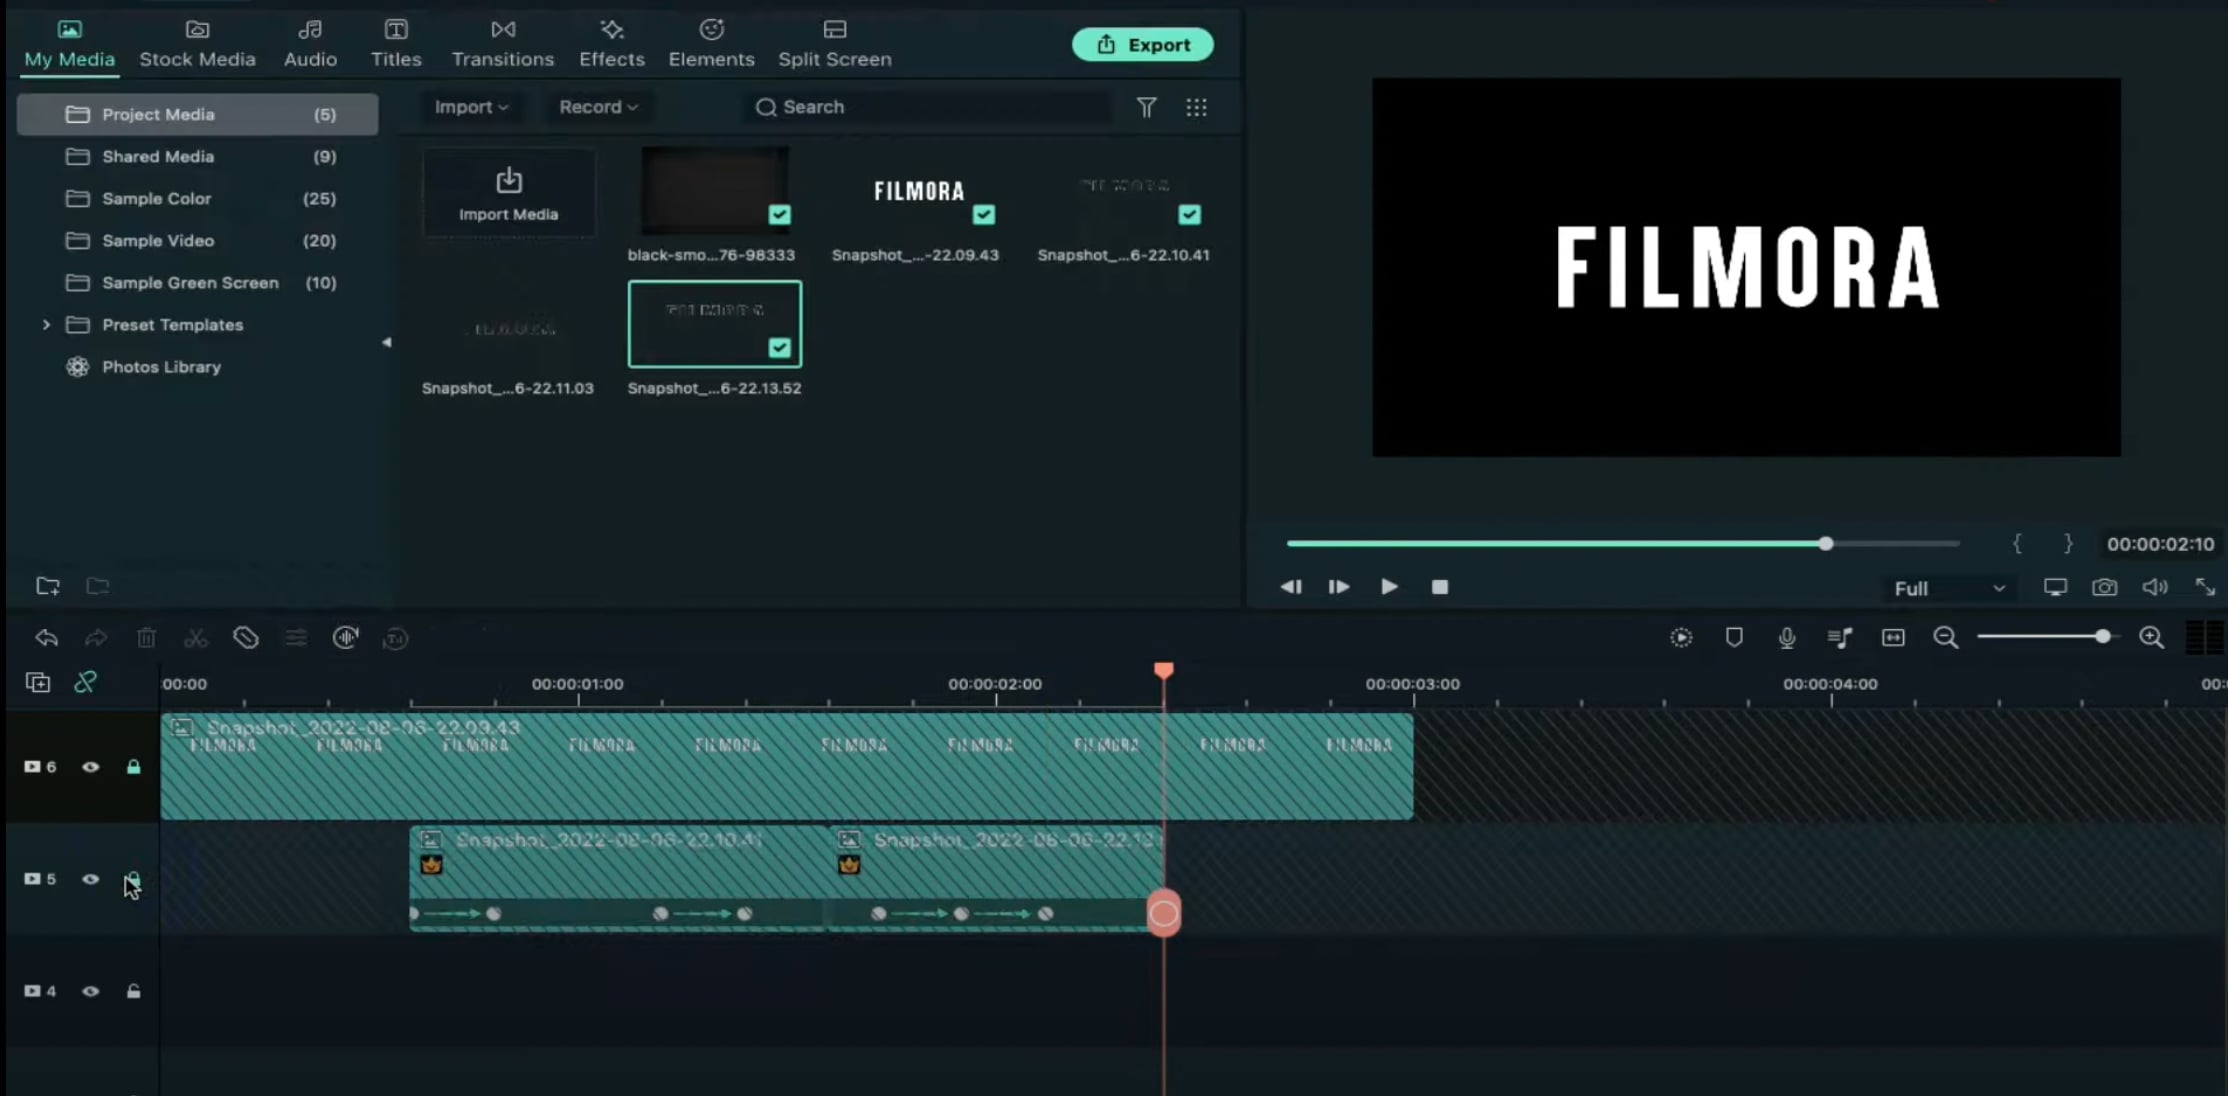
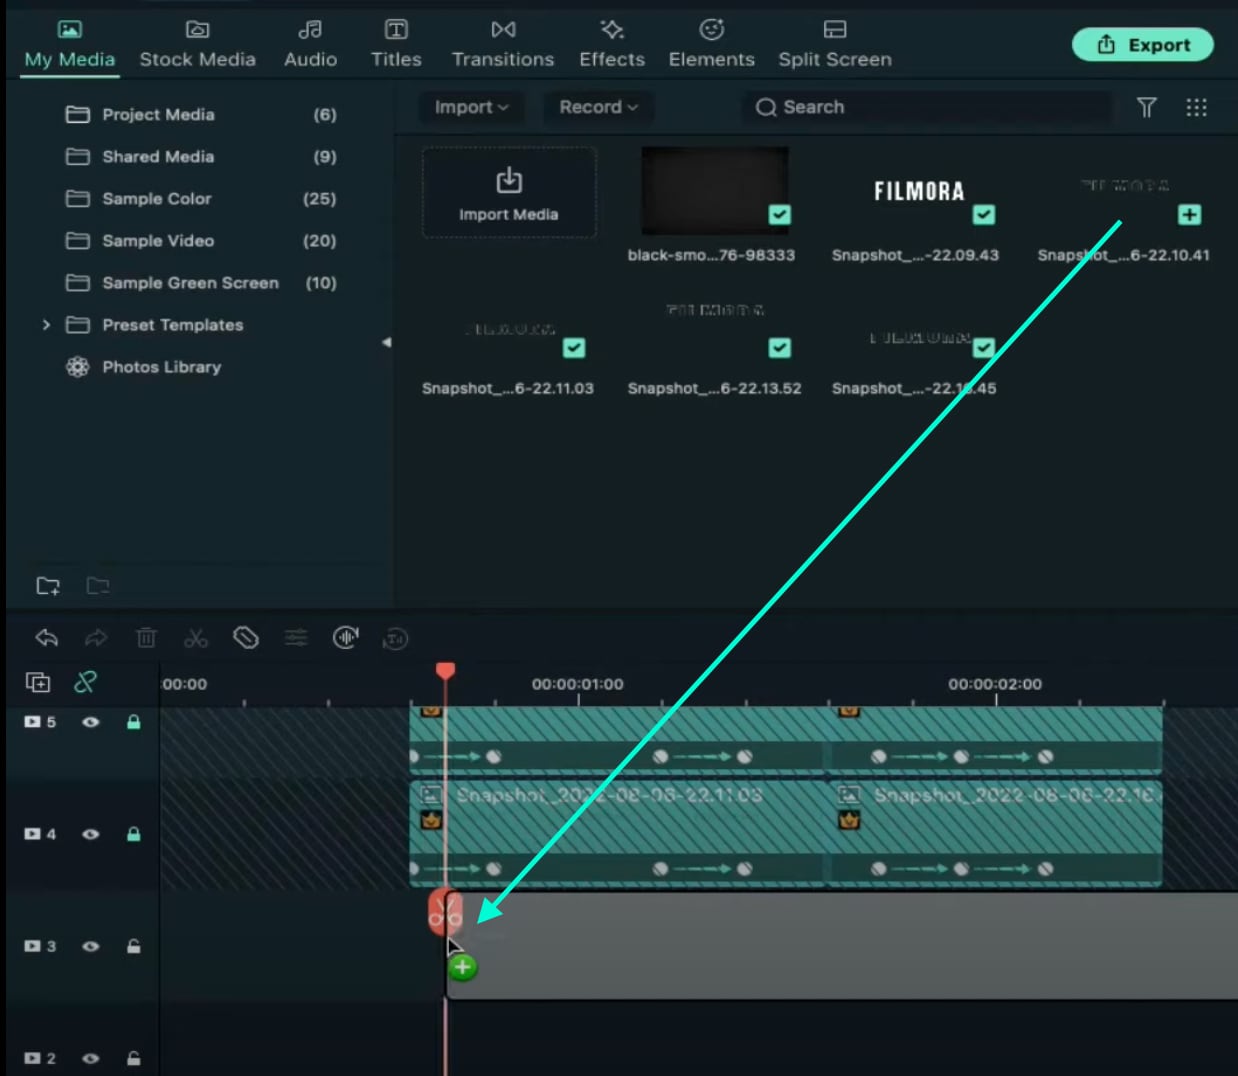
Drag the Downward OutlineSnapshot alla traccia 4. Quindi, ripetere lo stesso processo diPasso 16EPunto diciassette.
Trascina l'istantanea del contorno verso l'alto sulla traccia 3 del fotogramma 17. Fare doppio clic su di esso e cambiareopacidad to 0%.
Ora, muoviti di 5 fotogrammi in avanti e aumentaOpacidad Torna a:100%. Quindi, trascinaY-axis val to the right until the screen looks like this.

Move the Playhead to 1 min and 5 sec. Click on “+Add” to add a keyframe. Then, move the Playhead 5 frames forward. Double-click on the clip and stretch it from side to side to match sth like this.

Move the Playhead to 1 min and 16 sec. Split the clip and delete the part on the right side. Hide Track 4, 5, and 6. Then, take a Snapshot. Drag this Snapshot next to the clip on Track 3. Place the Playhead on 1 min and 18 sec. Then, unhide Track 4, 5, and 6.
Double-click on the clip on the right side of Track 3. Add a keyframe by pressing “+Add”. Move the Playhead to 1 min and 23 sec. Now, resize the clip back to its original size by moving the rectangle left and right. Right now, it should look like this.

Move the Playhead 5 frames forward. Drag the Y-axis value to the left until the screen looks like this.

Move the Playhead 5 frames forward again. Drag the value of the Y-axis to the left until the screen looks like this. Then, change the opacidad to 0%. Finally, split the clip at 2 minutes and 10 seconds. Delete the part on the right side. Lock Track 3.
Next, drag the Downward Snapshot on Track 2 and follow the same process as in Steps 19 through 25.
Unhide the Background clip at the bottom of the Timeline. Then, Unlock Track 6. Split the clip on Track 6 at the 15th frame.

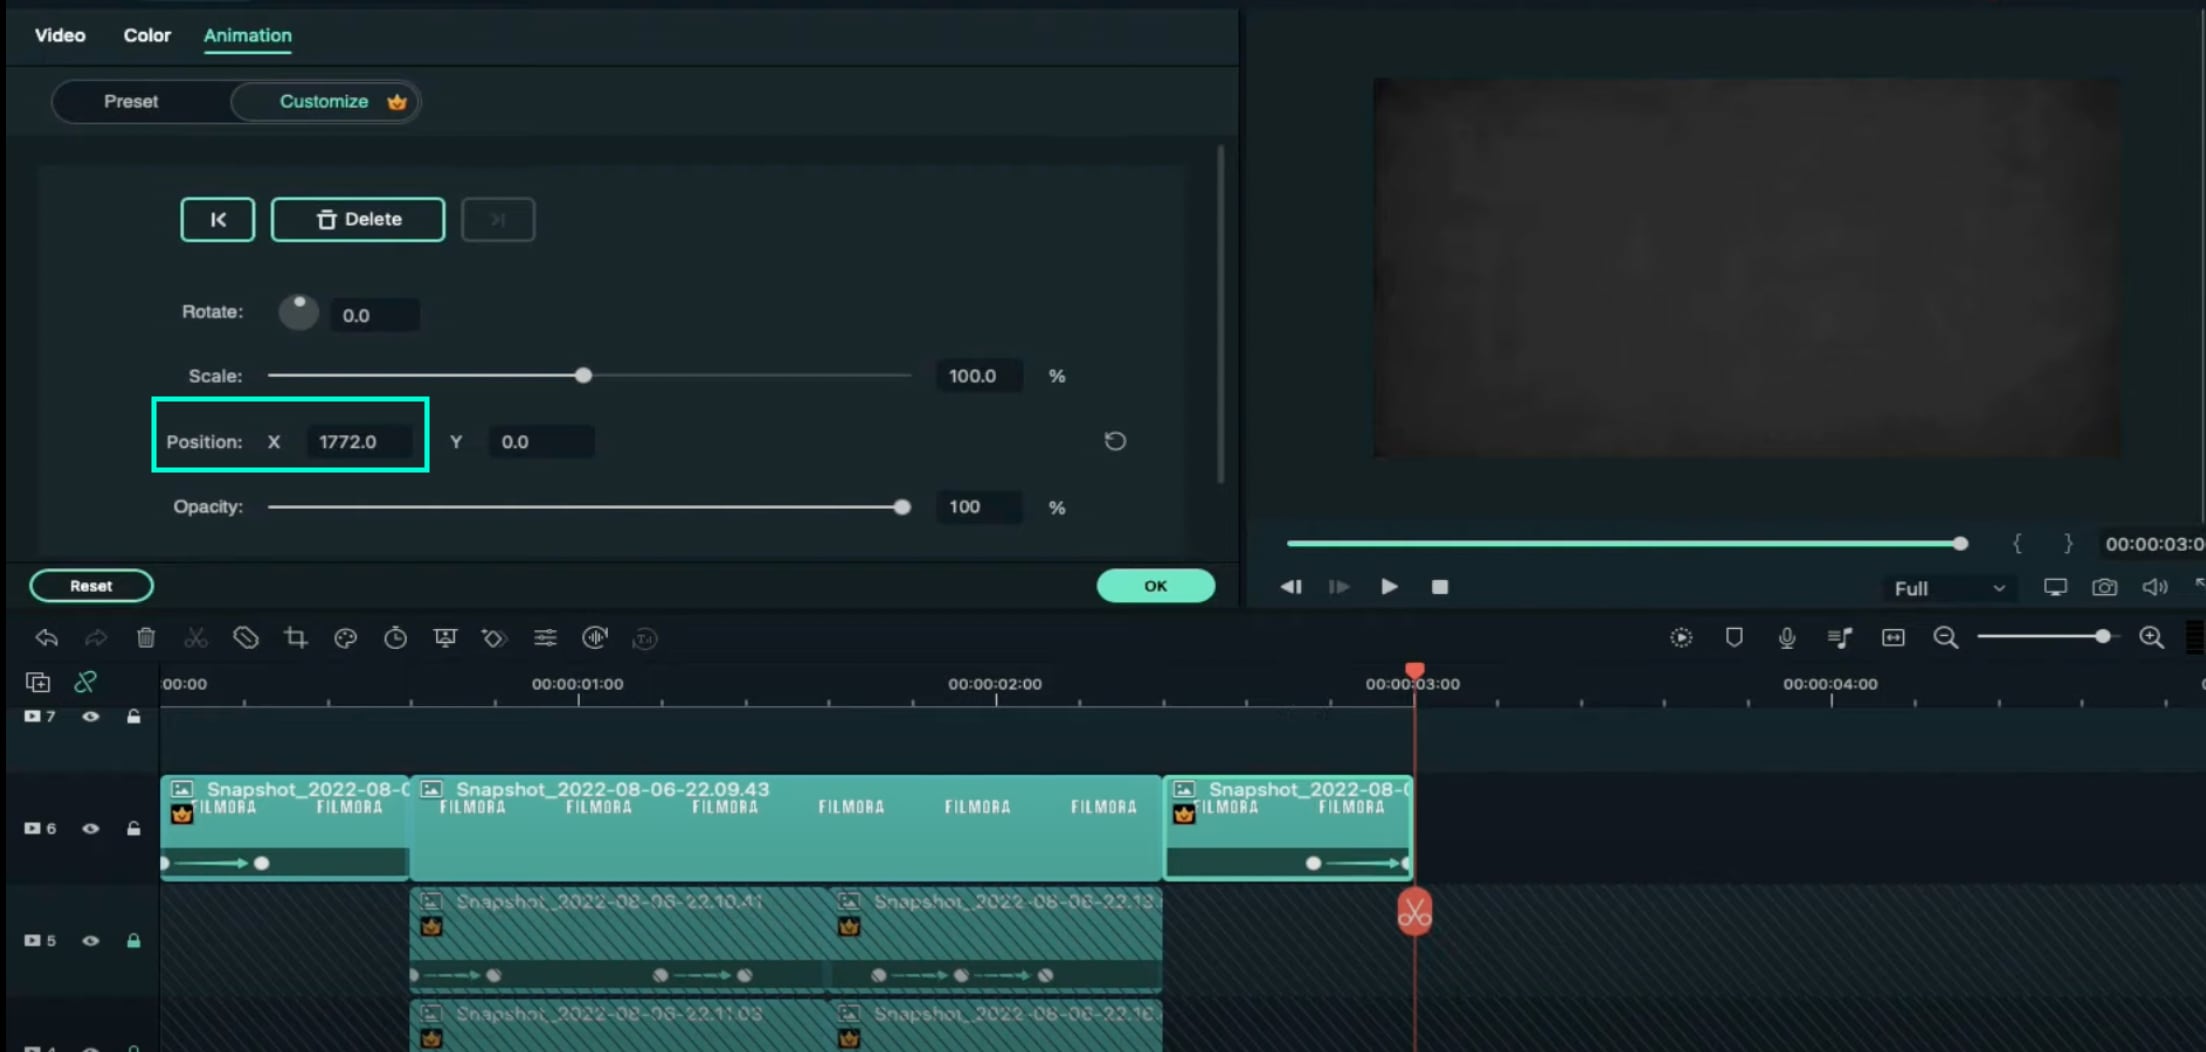
Move the Playhead at the beginning of the Timeline. Click on the first part of the clip on Track 6. Add a keyframe. Drag the X-axis value to the right until the word disappears out of the screen. Like this. 👇Then, move the Playhead to the 6th frame and Reset the X-axis value to 0.0.

Regola la testa di riproduzione su 2 minuti e 10 secondi. Separatelo. Ora sposta la testa di riproduzione su 2 minuti e 19 secondi e aggiungi un fotogramma chiave. Infine, posiziona l'intestazione di riproduzione alla fine della clip e trascina il testo a destra fino a quando non lascia di nuovo lo schermo.
Vai aGli effettiLe etichette. La sceltaI malfunzionamentiDal pannello a sinistra. Quindi, applicare[BLACK DISPONIBILE]E"Bave Stripes 2"Clip all'inizio e alla fine.

L'ultimo video renderizzato guarda l'anteprima finale. E poi, hai finito! Congratulazioni per aver creato un'animazione testuale ripetitiva in Filmora.

Cosa hai imparato:
- Come creare un'animazione testuale in Filmora
- Applica effetti di animazione
- Modifica avanzata dei titoli in Filmora
- Nascondi e blocca tracce e clip in Filmora

Speak Your Mind