Guide pour créer un effet de tête qui tourne dans Filmora
Obtenez un aperçu de toutes les fonctionnalités importantes impliquées dans la création d'un effet de tête qui tourne dans Wondershare Filmora. La vidéo ci-dessous fournit un guide clair sur toutes les fonctionnalités et leur fonctionnalité.
Key Steps of This Video Tutorial To Follow
Inizia il processo girando tre diversi video. Importa il video di sfondo in Filmora e portalo nella sequenza temporale per aggiungere un fermo immagine. Seleziona il video sulla sequenza temporale e vai alla barra degli strumenti principale di Filmora. Seleziona Strumenti e cerca l'opzione Aggiungi fermo immagine nel menu a discesa.
By selecting the "Add Freeze Frame" option, a freeze frame will be added to the video on the timeline. You can adjust the length of the freeze frame on the video by simply dragging it over the video. Remove the other parts of the video which are no longer required.

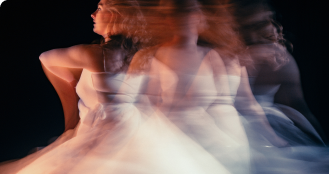
Proceed forward to bring the reaction shot to the timeline. Place this video right above the first video on the timeline on a different track. Similarly, bring the third video, including the green screen, and place it on another track on the timeline.

Cut the parts of the videos that are not required for the editing process. Likewise, you need to crop all the unwanted areas of the video that are not required. For this, choose the "Crop" icon from the toolbar of the timeline after selecting the video. Crop the green screen video and keep the required part.

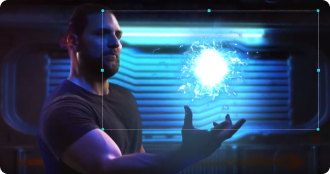
Now, double-click this video, and the settings window will appear. Go to the "AI Tools" section under the "Video" tab. Enable the "Chroma Key" button and continue to add a circular mask from the "Mask" tab, and adjust the size according to the size of your head in the reaction video. You can change the "Blur Strength" to soften the edges of the mask.

Adjust the "Position" of the mask by adding keyframes from the "Video" tab. From the "Position" option, add keyframes at the points of the video where your head drifted apart. Cut the video right after your head completes one round.

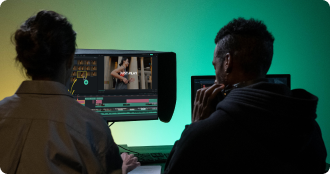
Pour augmenter la vitesse de votre masque, double-cliquez dessus sur la timeline. Naviguez vers l'onglet "Vitesse" dans la fenêtre des paramètres et augmentez la vitesse en déplaçant le curseur.

CTRVRFTPOTFRARV.MATPOTRVRTATVAAFRAVCIAAIFICIA.

STOPOTV,ITHRA,APITAEOFTRV.MMOVATSV.TRTHEFRAADAMOTHEHARVYCAMAIFROMTHEAVRTOCANHATRVAOAH.
DCTVHTTMTUTVATSMT.VTCTABVTTS.VTTCM,PIOTHAVAEIMBSTDWWYHWBCRFMBSSYHWBCRFTB.

To CTHSPNEFF,YNTARTVTDS.ASTCMVTPTMTSATOTTATT.ATCAMMABTTFR.

AMMETCACTTTVETI.PTESSPTCTHSPNEFFNel video. Prima di allora, probabilmente l'avete visto solo nel film e vi siete chiesti come sia stato prodotto questo effetto. Ora puoi anche seguire questa guida per creare questo effetto.
Altri corsi di Josh Master Filmora