Transcript [TR]
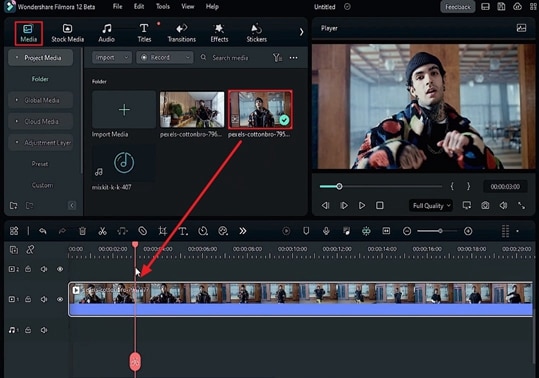
In this video, we will teach you how to create the shake blur transition in Wondershare Filmora. First, drop your footage on track 1. Now, identify where to apply the shake blur transition. [TR]
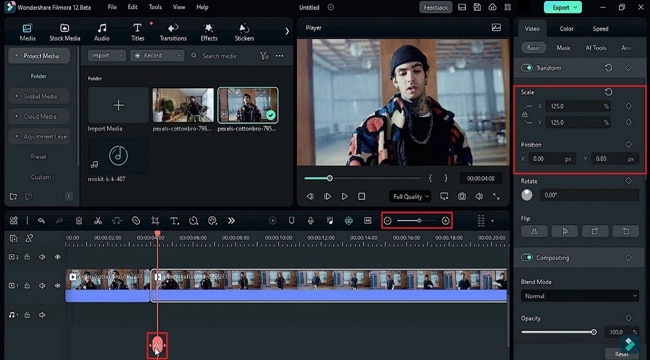
Under the setting panel, we lock the “Scale” rate and change “Scale” to 125. You can also increase the scale to produce more shakes; the best is 120 or 125. [TR]
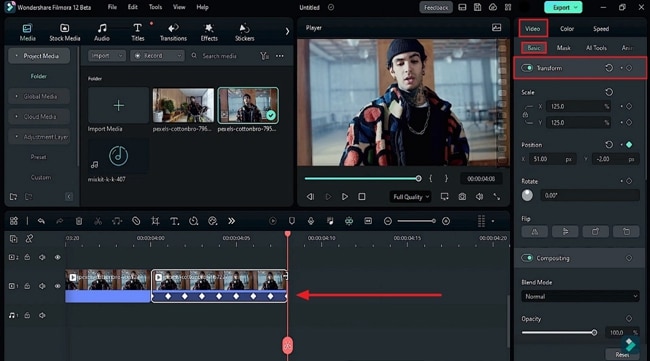
Then split the clip, go 8 frames further, and delete the rest of the footage. Now, zoom in on the timeline so we can see all the frames of the footage. Add a keyframe at the beginning of the second clip, and turn on keyframes for “Transform.” Slide your footage towards the right side, then slide it towards the downside, and go 1 frame forward. [TR]
If you don't want more shake on your footage, you can use the second keyframe on the second frame, but we want our footage to be shakier. For that, we go frame by frame. [TR]
Now, slide the footage toward the left upward. Go to the next keyframe and move the footage anywhere on each frame to make a customized shake transition. In the same way, place the keyframe of the next frame and move your footage. Now, for the last keyframe, extend the clip by one frame, place your keyframe ad, move the footage, and adjust its position. Delete this frame once you're done. [TR]
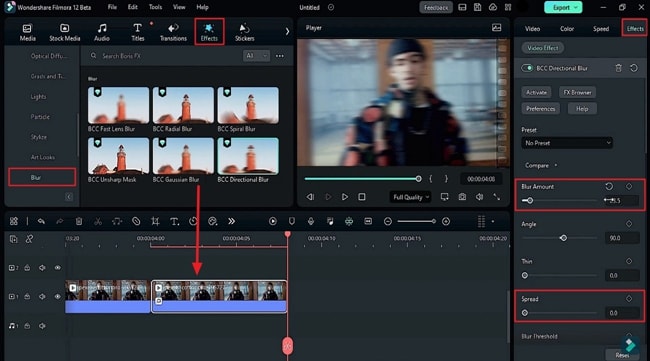
Now, to make it more dynamic, we can apply the blur effect. Go to “Effects,” and in “Boris FX,” you will find out blur. Here, you'll get lots of blur options. You can use “Gaussian Blur,” “Fast Lens Blur,” or “Directional Blur.” Here, we drop “Directional Blur” on the split part. Go to the “Effects” and set the “Blur” amount to 23.5; it may vary according to the footage quality. Then, go down and change the “Spread” to 8.6. [TR]
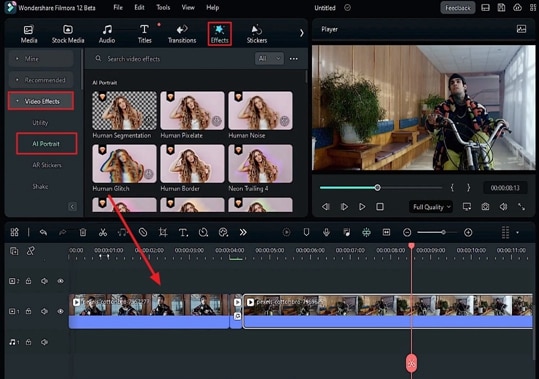
Ora, rendiamolo; Riduci la cronologia. Quindi, ora la nostra transizione di sfocatura del jitter è pronta. Basta posizionare la seconda lente subito dopo la transizione. Inoltre, puoi aggiungere un po'di intelligenza artificiale utilizzando ritratti di intelligenza artificiale sotto effetti video per rendere il tuo video più attraente. Dai un'occhiata a questi effetti magici da solo.
Come utilizzare Filmora per creare una guida per le transizioni sfocate con il jitter
What you need to prepare:
- A computer (Windows or macOS)
- Your video materials.
- Filmora video editor
Import Your Clips and Start Editing
After launching Filmora on your device, select the "Media" tab from the custom toolbar and import your clips. For this transition, you'll need two video files, which include clips of before and after the transition. After importing, drop the first clip in the timeline. Place the playhead where you want to apply the transition, and then make some edits.
Per la modifica, seleziona la scheda Video dal pannello di destra e nella categoria Base, blocca la scala e cambia i suoi valori X e Y. Dividi questo frammento, dopo di che ci saranno due segmenti nella traccia della sequenza temporale. Vai alla seconda clip e tagliala ulteriormente. Elimina le clip ridondanti e aumenta il livello di zoom delle tracce corte dalla barra degli strumenti della Linea temporale per una migliore modifica.
Crea un effetto jitter aggiungendo fotogrammi chiave
Ora, aggiungi un fotogramma chiave all'inizio della seconda clip abilitando il fotogramma chiave "Trasforma" nella sotto-scheda "Basice". Per creare un effetto sfocato, modificare i valori X e Y di Posizione, quindi posizionare l'intestazione di riproduzione su un frame diverso e ripetere le impostazioni.
Aggiungi effetto sfocatura
Per rendere la transizione più fluida e attraente, aggiungi un effetto sfocato. Dalla scheda Effetti sulla barra degli strumenti personalizzata, vai alla categoria Boris Forex e sotto la sottocategoria Sfocatura, seleziona l'effetto sfocatura che preferisci. Dopo aver selezionato questo effetto, trascinalo sulla sequenza temporale. Dalla sotto-scheda Effetti del pannello laterale, aggiungi il livello di sfocatura e la sfocatura di diffusione.
Aggiungi effetti AI e completa la transizione
Ora che la transizione è completa, metti il secondo segmento nell'orbita della linea temporale. Per rendere la tua transizione più creativa, aggiungi alcuni effetti di intelligenza artificiale. Dalla scheda "Effetti", vai alla categoria" Effetti video "e fai clic su" Ritratto di intelligenza artificiale "per aggiungere effetti diversi in diversi punti del video. Ora, guarda l'anteprima finale del tuo video e se sei soddisfatto del video di transizione generale, "esporta".
Es ist immer jemand online, und die Leute bewundern Inhalte, die sie als einzigartig und kreativ empfinden. Sie können verschiedene Arten von Übergängen für verschiedene Inhalte wie Mode, Werbung, Kochen und mehr verwenden. Mit Filmora können Sie nicht nur solche Übergänge erstellen, sondern auch KI-Effekte hinzufügen, um spezielle Videos mit zitternden Unschärfe-Übergängen zu generieren.


Speak Your Mind