Transcript
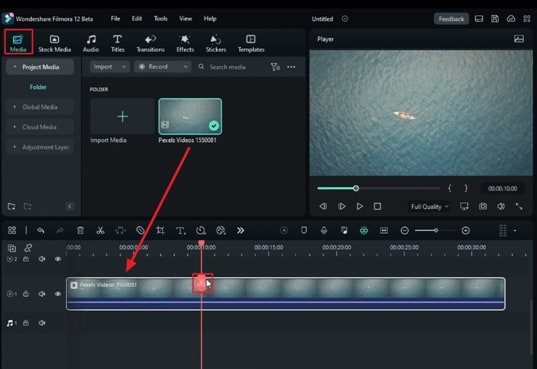
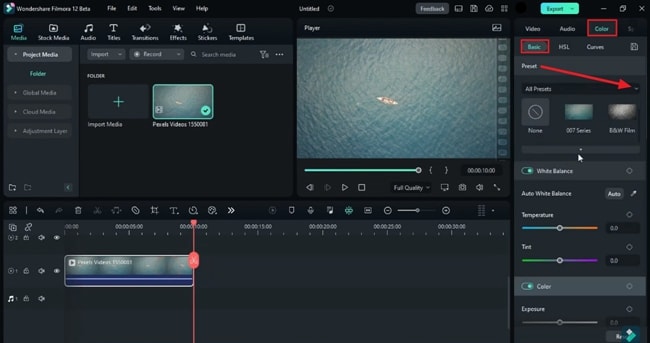
Dans cette vidéo, nous vous apprendrons comment créer ce titre sous-marin dans Wondershare Filmora. D'abord, déposez vos séquences de vidéo sous-marine sur la timeline et gardez-les d'une durée de 10 secondes. Sélectionnez le préréglage "Cool Film" sous l'onglet "Color". Maintenant, nous avons de l'eau bleue agréable.
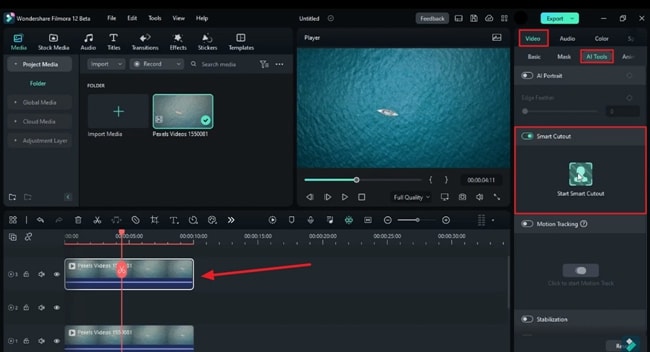
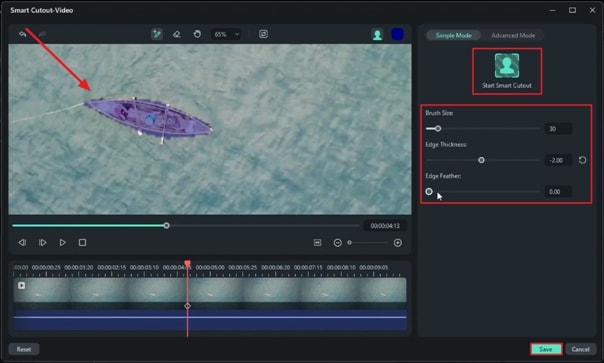
Ensuite, copiez-collez la séquence, déplacez le clip dupliqué sur la piste 3 et sélectionnez-le. Allez dans la vidéo et sélectionnez "Smart Cut" sous "AI Tools", puis démarrez-le. Maintenant, zoomez sur votre clip et faites une sélection autour du bateau. Réduisez l'épaisseur des bords à -2 et "Edge Feather" à 3. Maintenant, cliquez sur "Start Smart Cutout". Cette fonctionnalité d'IA masquera automatiquement et enregistrera l'objet sélectionné dans votre clip. Maintenant, vous pouvez voir que nous avons notre bateau sans arrière-plan.
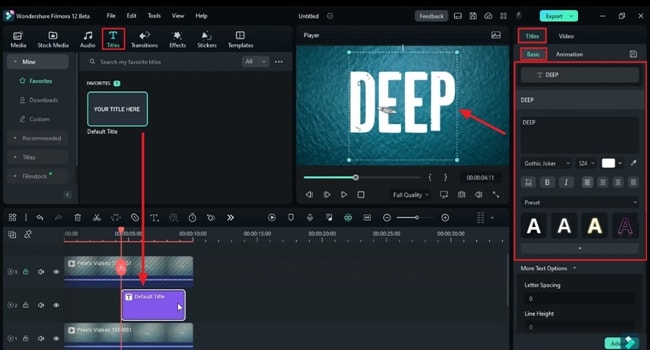
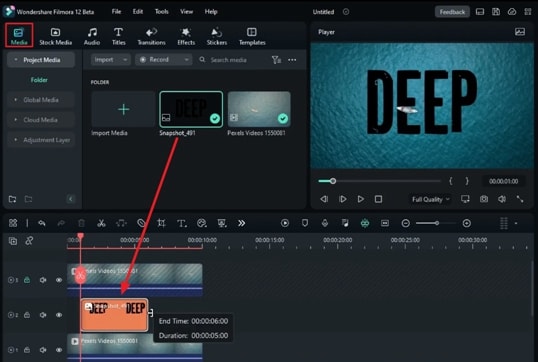
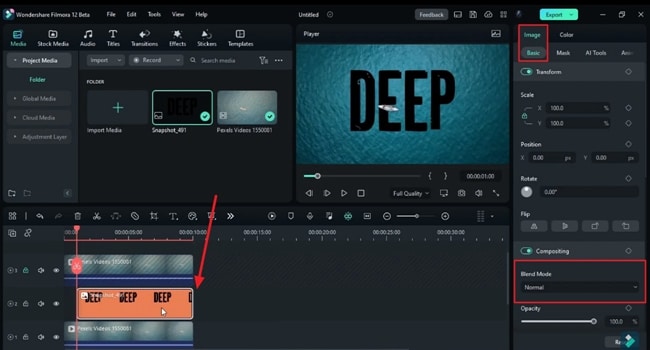
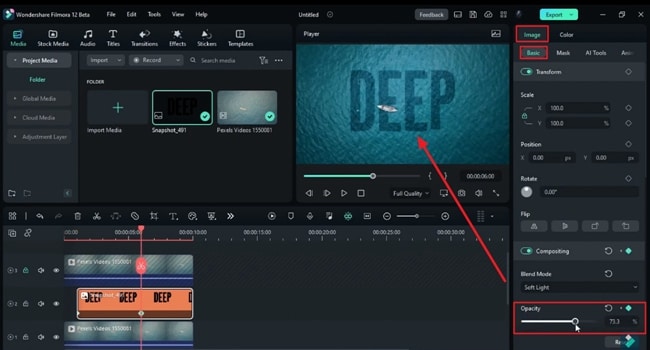
Ensuite, déposez le "Default Title" sur la timeline, tapez votre mot et changez la police en une police audacieuse cinématographique. Augmentez la taille du mot, verrouillez la piste 3 et ajustez sa position. Faites glisser le titre par défaut à l'extérieur. Changez la couleur de la police en noir et prenez une capture d'écran. Maintenant, supprimez le titre par défaut et déposez la capture d'écran sur la piste 2. Identifiez le point de départ et placez cette capture d'écran à ce point. Prolongez sa durée et changez le "Blending Mode" en "Soft Light". Ajoutez un keyframe d'opacité et réglez l'opacité à 0% au point de départ. Ensuite, avancez de cinq secondes et réglez l'opacité à 70,5%.
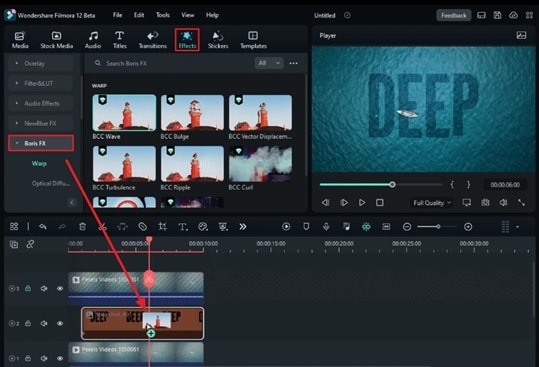
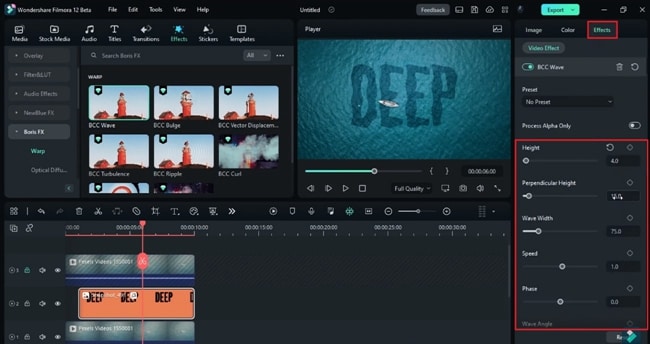
Maintenant, nous allons faire en sorte que le texte se mélange parfaitement avec l'eau. Pour cela, nous ajoutons l'effet "BBC Wave" de "Boris FX" à la capture d'écran. Ensuite, allez dans les "Effets" et réglez la hauteur sur 4, la "Perpendicular Height" sur 0,1, la "Wave Width" sur 400, la "Spe
Se ritieni di aver agitato troppo, cambia "altezza dell'onda" in -4 per ottenere un'onda più liscia. Ora, lasciamo perdere il bar del film e rendiamolo più cinematografico. Ora diamo un'occhiata all'anteprima finale. /p >
Come creare una guida introduttiva al display subacqueo in Filmora
What you need to prepare:
- A computer (Windows or macOS)
- Your video materials.
- Filmora video editor
Import Your Clip and Adjust Its Duration
To incorporate an Underwater Reveal Intro, initiate Filmora on your device and tap on the “New Project” button. Import your clip through the “Project Media” category in the editing window. Afterward, drag and drop your imported clip in the timeline track and adjust its duration according to your ideal intro duration.
Enhance the Ocean Color from Preset
From the timeline toolbar, tap the “Zoom to Fit Timeline” icon, trim your clip from 10 seconds onward, and delete it. To add more blue to ocean water, go to the right tool panel and click the “Color” tab. In the “Basic” sub-tab, go to the “All Presets” option and choose the preset that suits your clip the best.
Duplicate the Clip and Initiate Smart Cutout
Now, move towards the timeline clip and duplicate it by clicking right on it with your cursor. Select the "Copy" option from the options menu and paste it. Once you're done, drag the duplicated clip to another timeline track, click on it, and go to the "Video" tab on the right tool panel. Click on the "AI Tools" sub-tab and click on the "Start Smart Cutout" icon.
Next, zoom in on the clip and mark the circumstance of your object with the help of a cursor. Once you've done it, manually adjust the “Edge Thickness” and “Edge Feather” of the object and tap the “Start Smart Cutout” button once again. Select the “Save” button after AI tracking is done. You'll notice that the ocean background will be removed.
Add Intro Theme/Title
It is time to add your brand or page's name to the video. Go to the “Titles” tab in the upper toolbar and drop your desired title into the timeline track. Experiment with title settings from the “Titles” tab on the right-side panel, which covers editing the text, font style, and size. Adjust the position of your text on the video and change the position of the title in the track as well.
Next, change the color of the text to black and take a snapshot of it. You'll find the snapshot icon below the video preview screen. Afterward, delete the title from the timeline track and replace it with the snapshot you just took. Decide the starting point of your video where you desire to show your Intro Theme and adjust the snapshot's position there.
Blend In the Intro Theme/Title
Once the position of the snapshot is set, equalize its duration according to the rest of the files in the tracks. Click on the snapshot in the timeline and select the “Image” tab at the right-side panel. In the “Basics” sub-tab, find the “Blend Mode” option and set it as per your preference.
Add the opacity keyframe from the same window and set “Opacity” to zero at the start of the video. Next, place the playhead forward in the timeline, add opacity keyframes, and increase the “Opacity” value. This will smoothly show the text.
Add Effects to Enhance the Blending
You'll need to add some effects to blend in the text/title more with the ocean. For this, go to the “Effects” tab on the toolbar and select the “Boris FX” category. You'll find the “BCC” effects there; select the effect you prefer and drop it into the timeline track with your snapshot.
You’ll see that because of the wavy effect, the height and position of the text have been disturbed. To adjust this, go to the right tool panel and, under the “Effects” tab, make adjustments to metrics like “Height,” “Perpendicular Height,” and “Wave Width.” You can also adjust these waves' “Speed” and “Wave Angle”. If you want to change the form of a wave, adjust the value under “Chaos.”
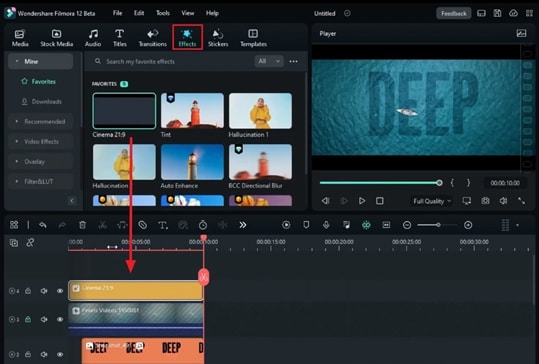
Caduta Bar Cinematografica e Finalizzazione
Puoi apportare ulteriori regolazioni se non sei soddisfatto dei risultati. Per un tocco finale, cerca e inserisci un effetto cinematografico su una nuova traccia nella timeline una volta per tutte. Se sei contento dei risultati, vai al pulsante "Esporta" e scarica il video finale.
Tutti sanno che il video introduttivo è il fondamento dell'identità del tuo marchio. Gli intro video attraenti sono particolarmente importanti perché i video sono diventati un mezzo popolare per tutte le imprese digitali, creatori e marketer. Aggiungendo intro sommersi con Filmora, puoi fare un'eccezionale prima impressione sul tuo pubblico.


Speak Your Mind