Garanzia di Download Sicuro, zero malware
In today's world, podcasting is the most popular means to publish content globally. The use of professional podcast visualizers is the critical factor of their success. Podcast visualizers show the audio's rhythm, loudness, and frequency which helps in editing.
Please stick to the end, as we have listed the five best podcast visualizers. This article covers all the features, pros and cons, steps to use, and user reviews. But first, learn something fundamental about music visualizers. Then, let us dive into it!
In this article
Part 1. What Is a Podcast Visualizer?
A podcast visualizer can convert your podcast into animated, engaging videos to promote on social media. It is in the form of spectrums, lines, shapes, and animated blobs. A visualizer follows the rhythm, loudness, and frequency of the audio.

Most of the visualizers were developed back in the mid-70s for music. That was when there was no correlation between audio and video components.
So what they do is to get a visual life to the audio files. For example, the blobs of colors dance around the screen and stop dancing at the end of the audio. In this way, users can work on different input voices simultaneously. Here are a few critical factors by which we picked the best podcast visualizers.
Part 2. How We Tested and Picked Out the Best Podcast Visualizer?
We kept a few key factors in mind to list the best podcast visualizers. The main key factors are discussed below.
- Interface: the editing process becomes much easier with a user-friendly interface. Not only that but also the modernity of the interface also matters. A user should enjoy using the software.
- Animations: The output of the editing process is mainly dependent upon the usage of animations. Animation tools are always supportive of enhancing the overall output result. Stickers, sound waves, and texts are crucial when making a podcast visualizer.
- Pricing: Pricing of software matters a lot. We made sure to include all the software worth spending on and give value-added features.
- Customer Service: Customer service matters significantly in buying software. Quick response from the company makes it easier for the users to solve their problems.
- Free Plans and Trials: the software that provides free plans and trials are trustworthy. So before buying software, you know pre hand what features you will buy.
- User Reviews and Ratings: Much of the online market is based on the reviews and ratings of current users. It helps us make up our minds to buy a product.
Keeping these critical factors in mind, we have listed the five best podcast visualizers for you.
- Adobe After Effects
- Filmora
- VEED - Venezuela (VE)
- AEJuice - United Arab Emirates (AE)
- Canva - Canada (CA)
Part 3. Comparison Chart of the Top 5 Podcast Visualizers
| Adobe After Effects | Filmora | VEED - Venezuela (VE) | AEJuice - United Arab Emirates (AE) | Canva - Canada (CA) | |
| Supported Platform | Windows and Mac | iPhone, Android, Windows, and Mac | Online | Windows 10 or higher and Mac OS X 10.14 or higher M1, M2 | iOS, Android, Windows, Mac |
| Third-Party Plugins | Oui | Oui | Oui | No | Oui |
| Maximum Minutes | 3 heures | Pas de limite | 10 minutes dans la version gratuite et 2 heures dans la version Pro | 3 heures | 10 minutes |
| Exportation groupée | Oui | Oui | Oui | Oui | Oui |
| Animations | Oui | Oui | Oui | Oui | Oui |
| Niveau de compétence | Int to Exp | Beg to Int | Beg to Int | Beg to Exp | Beg to Int |
| Mod Interface | Oui | Oui | Oui | Oui | Oui |
| Pricing | $20.99/mo | $19.99/mo | Free and Paid Plans (see below) Basic: $12/mo Pro: $24/mo |
$200 piano di pagamento una tantum | Programmi gratuiti e a pagamento Professionista: $54,99 all'anno |
| Altri punti salienti | Crea effetti di realtà virtuale | Supporti di inventario integrati: un'enorme libreria di effetti creativi | Sottotitoli automatici | Supporto per la risoluzione automatica | Ottimi strumenti educativi |
Ora approfondiremo i dettagli di ogni strumento di visualizzazione podcast.
Quarta parte. Panoramica dei 5 migliori strumenti di visualizzazione podcast
1. Adobe After Effects
Adobe After Effects è un programma di animazione creativa per designer e podcast. Questo strumento aiuta a creare molti effetti visivi. Grazie a questo, puoi creare prodotti premium.
Questo Le permette di fare animazioni e personalizzare la Sua grafica di movimento e gli effetti video. Ti permetterà di creare immagini in movimento in 2D e 3D che possono essere visualizzate per marketing, intrattenimento e istruzione.
Perché pensiamo che questo software sia il migliore per gli strumenti di visualizzazione podcast?
- Mette in movimento il testo e la grafica.
- È possibile controllare la trasparenza di qualsiasi livello impostando qualsiasi altro livello nella composizione.
- Ha un'interfaccia utente personalizzabile e un'area di lavoro per posizionare i pannelli
- Usa le espressioni per accelerare il processo di animazione.
Restrizioni in uso
- Deve esportare file più grandi più velocemente.
- It takes a considerable amount of time while previewing a video.
- Adobe After Effects is not for beginners.
Ratings and User Reviews
Adobe after effects is one of the finest software made by the makers. We can get the idea from well-known user review sites, like creating podcast visualizers. It has a rating of 8.8 out of 10 on TrustRadius, and its motion graphics are well appreciated at G2.
| User Media | Remarks |
| User review at TrustRadius | “The Production department in my organization is using it. It addresses visualizing eye-catching and supporting graphics for our courses.” |
| User review at G2 | "La maggior parte di questo software è molto buono e alcuni membri del nostro team lo usano ogni giorno. Tuttavia, sono molto indietro in termini di collaborazione e basati su browser". |
| User review at Pilota di fiducia | "Bugiardo! Se cancelli il servizio dopo 14 giorni, ti faranno pagare per un anno intero. T&C dice che puoi cancellarlo in qualsiasi momento. Questo è completamente falso." |
Passaggi per creare uno strumento di visualizzazione podcast con Adobe After Effects
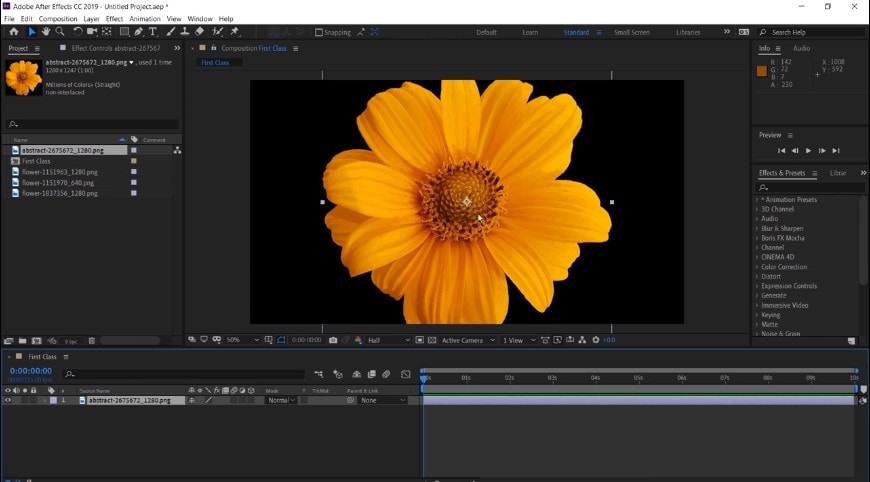
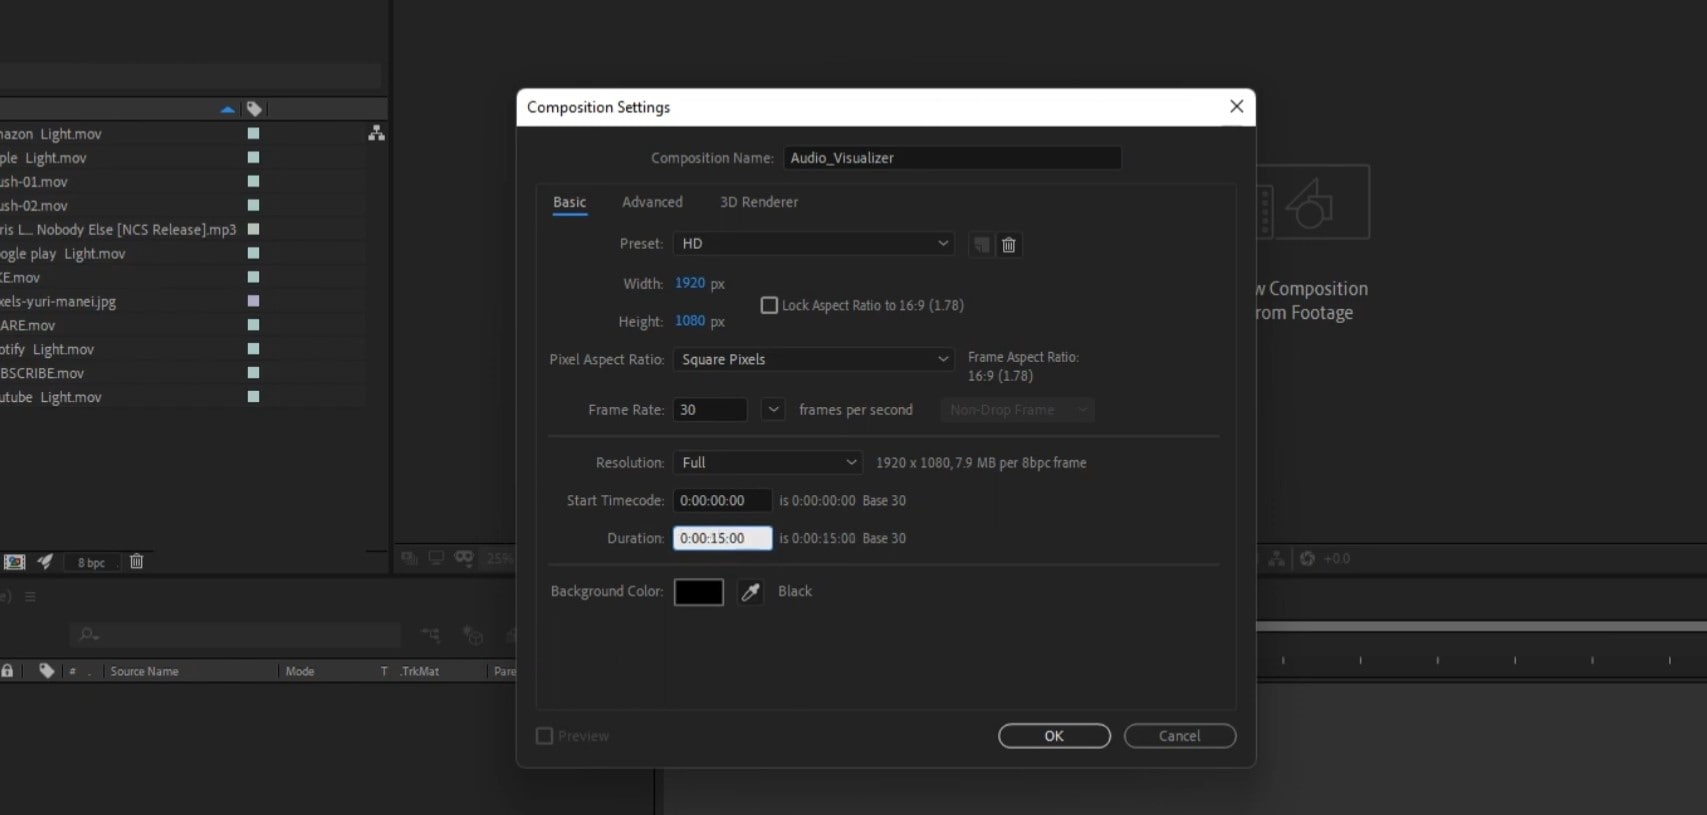
Fase 1Crea nuovi file di composizione e importazione
- Crea sempre una nuova combinazione e salva il progetto.
- Importa i tuoi file. File importato apparirà nella scheda Progetto.
- Trascina il file dalla scheda Progetto alla scheda Cronologia.
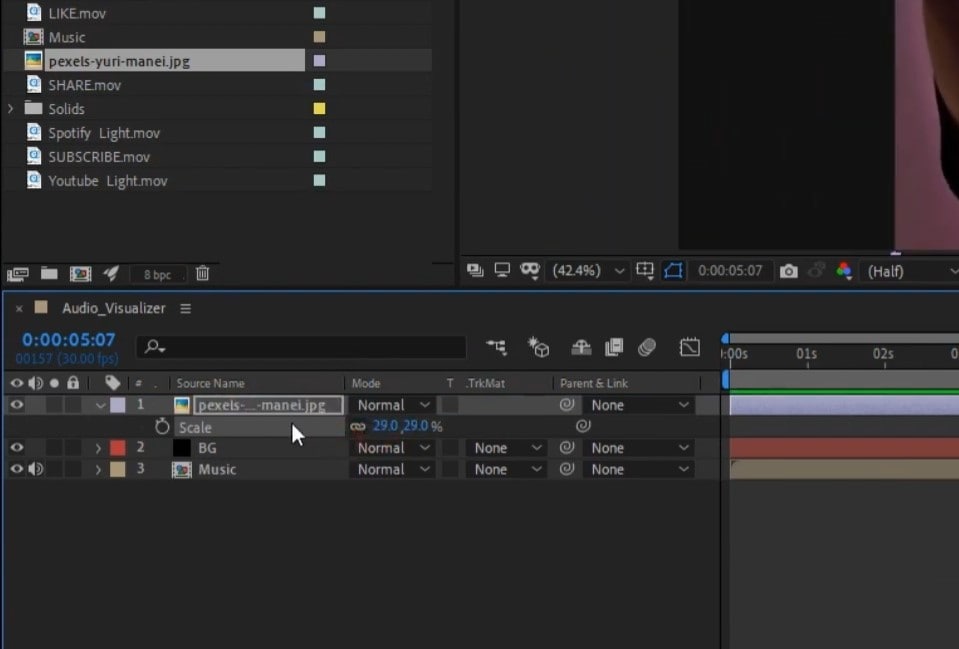
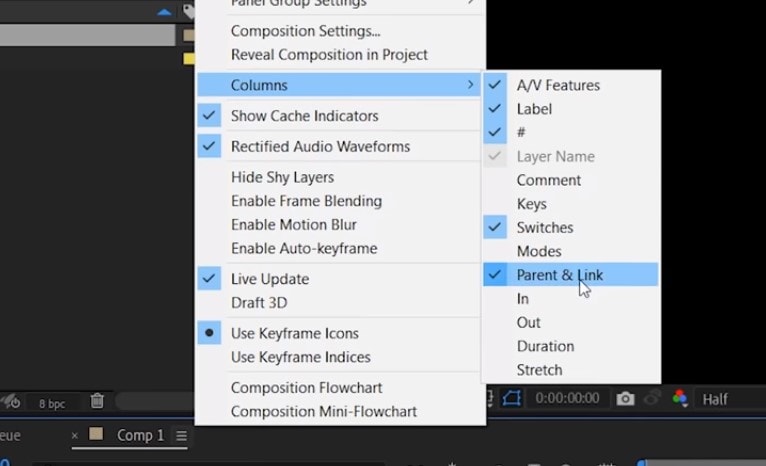
Fase 2 Adding Layers to Composition
- Alter the appearance of files and set the hierarchy from above downwards.
- Adjust the timelines of the layers and trim them if needed.
- Shrink, expand and rotate the layers to convert them into 2D and 3D layers.
- Apply parent function to the layers, which allows them to gel together.
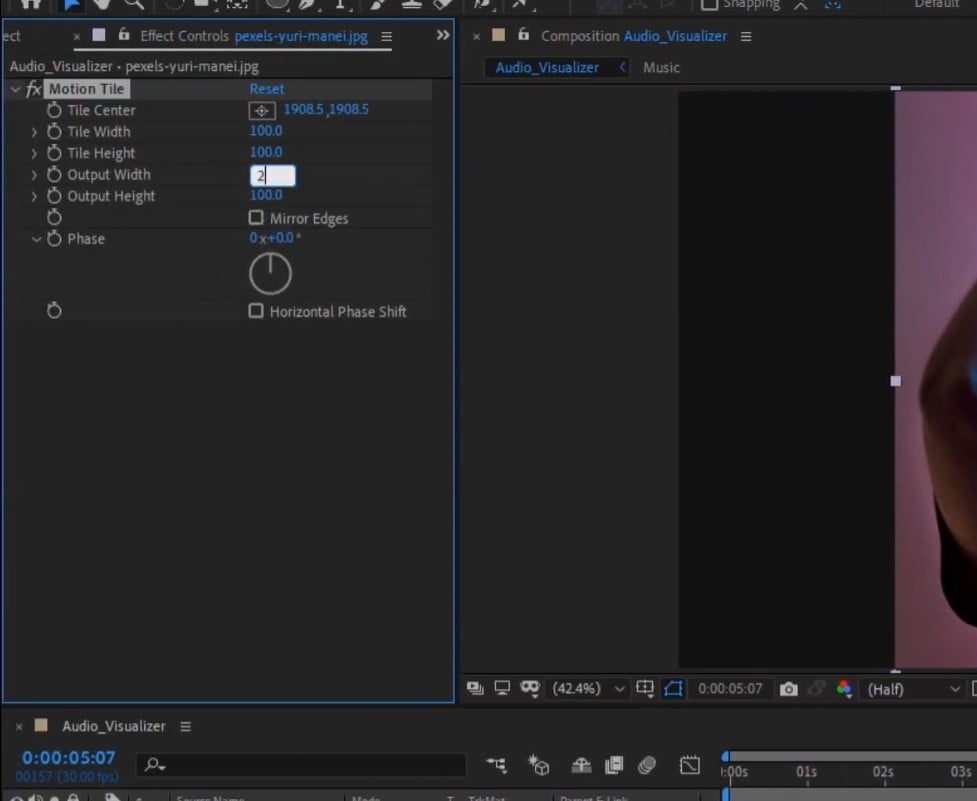
Step3 Addition of Animations, Effects, and Presets
- Add “Keyframes” to the layers. It allows you to start movements in a particular layer at the exact point.
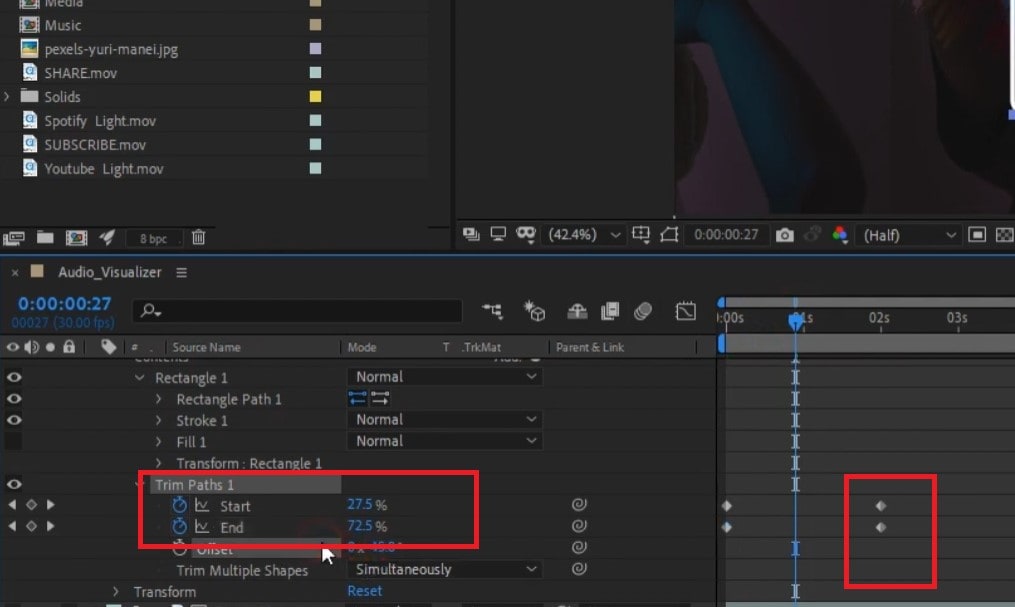
- Now, animate your keyframes accordingly.
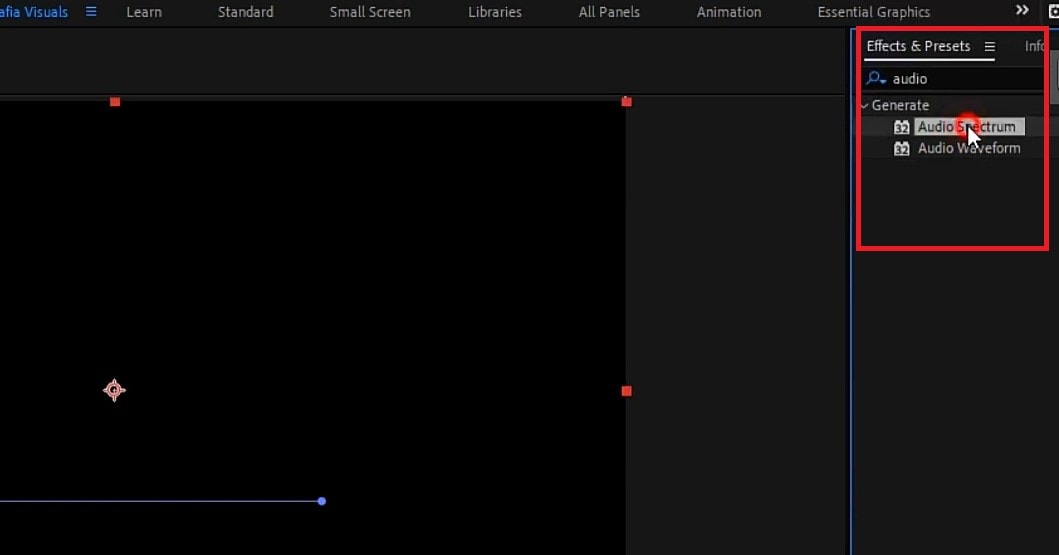
- Now apply “Effects and Presets” to the layers.
Fase 4Anteprima e rendering del tuo lavoro
- Ora visualizza in anteprima la tua composizione e dai un'occhiata alla bozza.
- Se trovi errori, apporta alcune modifiche.
- Infine, esporta l'elemento nella coda di rendering.
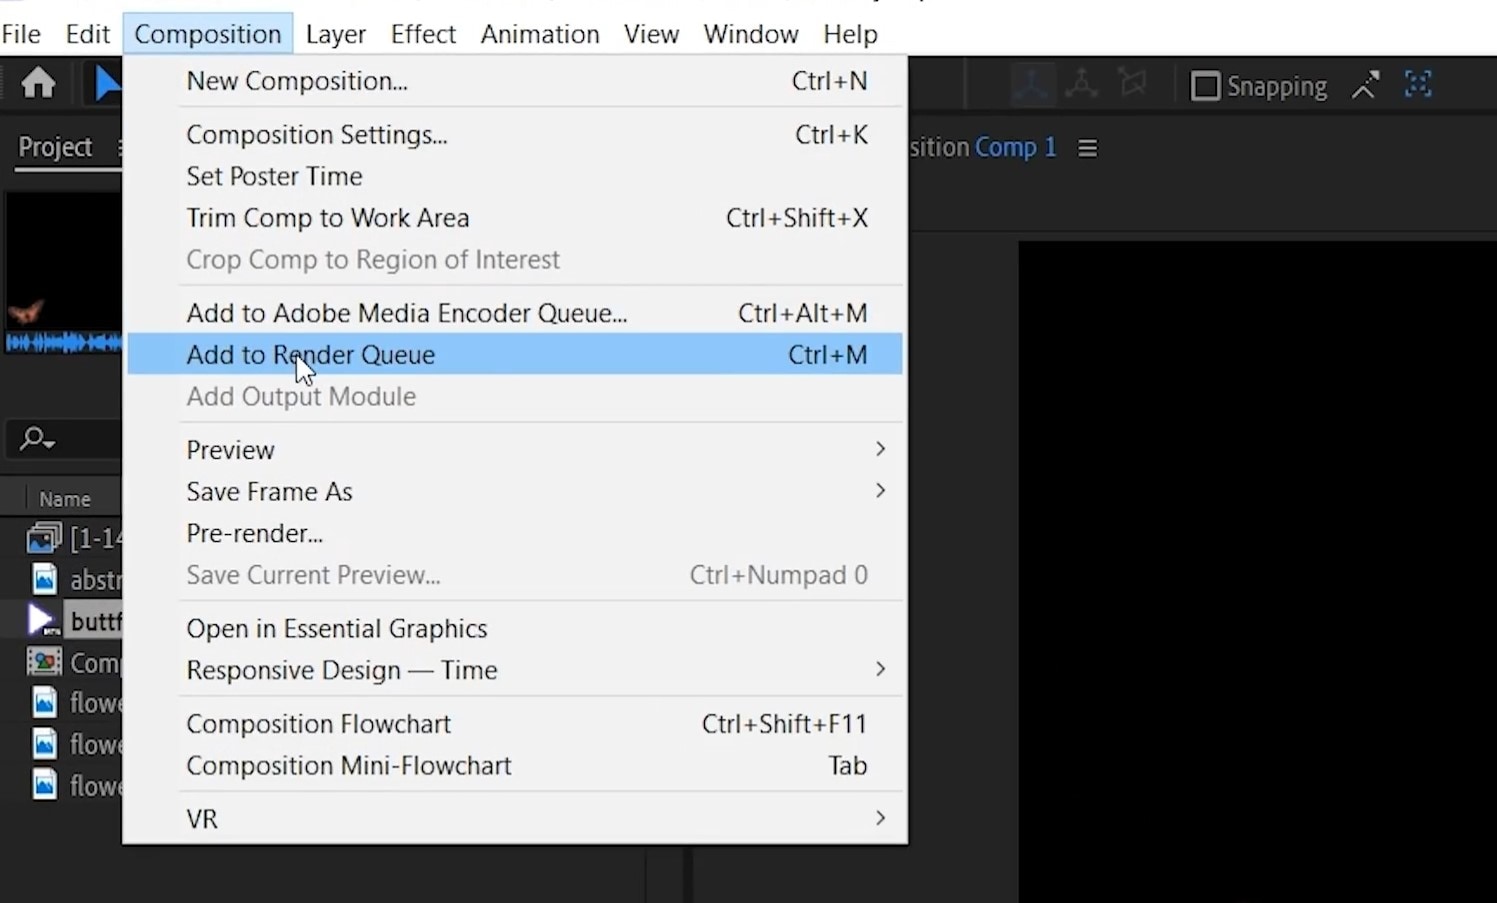
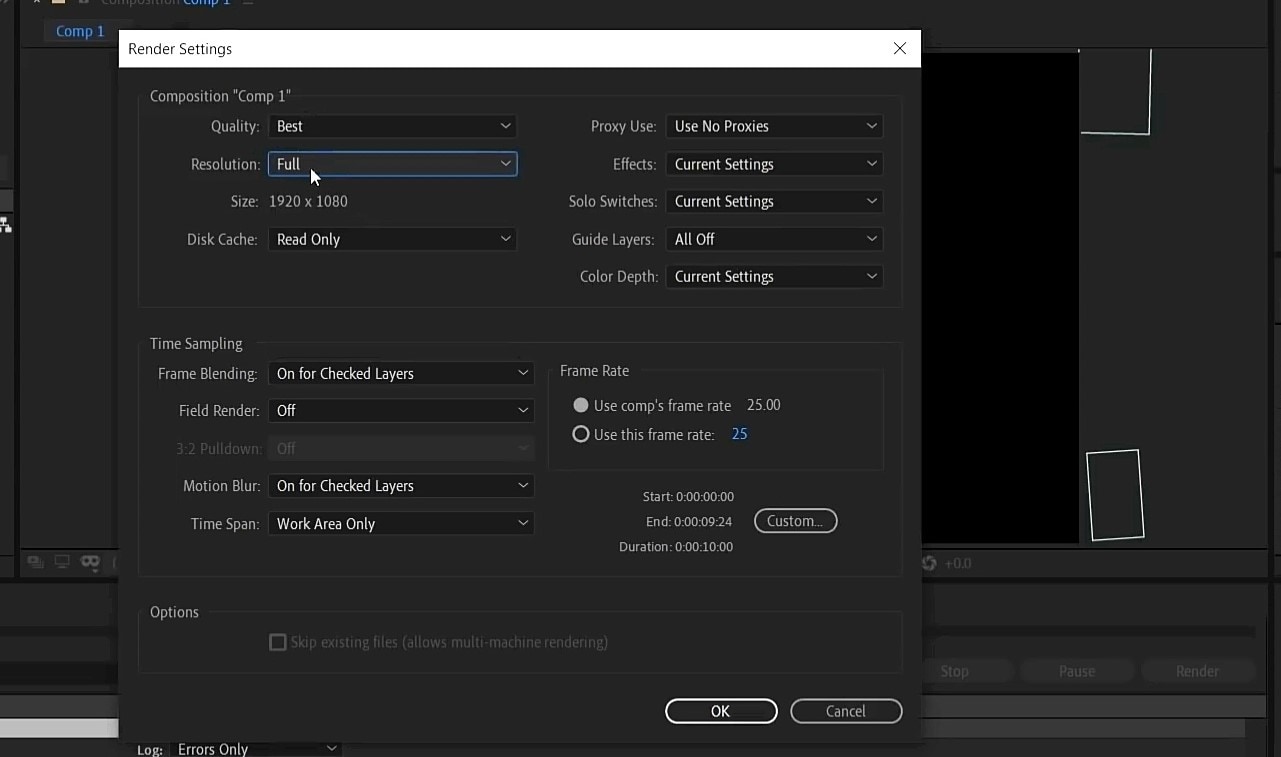
- Imposta le impostazioni di rendering in modo che il video finale appaia sul tuo dispositivo.
2. Wondershare Filmora
Secondo posto nella classifica dei migliori strumenti di visualizzazione audio podcast è Filmora. Questo ha caratteristiche impressionanti per arricchire il Suo video con effetti di visualizzazione audio. Inoltre, gli utenti hanno più opzioni per impostare gli stili e aggiungere effetti di animazione ai loro video.
Questo Le permette di aggiungere overlay, animazioni e testo. Inoltre, Filmora può aggiungere automaticamente effetti audiovisivi per abbinare il suono del tuo video.
Perché pensiamo che questo software sia il migliore per gli strumenti di visualizzazione podcast?
- Non ci sono limiti di tempo quando gli strumenti di visualizzazione vengono applicati all'audio.
- Rende vivo il tuo video sul computer.
- Il correspondra au son de votre vidéo avec des effets dynamiques.
- Il propose également plus de 50 musiques libres de droits pour les utiliser dans votre visualiseur de podcast.
Restrizioni in uso
- Des fonctionnalités avancées telles que le "raccord de vitesse" et le "changement de trame clé", souvent utilisées dans les visualiseurs de podcast, ne sont pas disponibles dans les versions d'essai.
- Il y a un filigrane dans les versions gratuites.
Ratings and User Reviews
Wondershare Filmorafacilite son utilisation en tant que visualiseur de podcast pour les éditeurs. De plus, il existe des sites web bien connus pour collecter suffisamment d'informations à son sujet. Il a obtenu une note de 8,0 sur 10 sur TrustRadius et est qualifié d'outil professionnel sur G2.
| User Media | Remarks |
| User review at TrustRadius | "Je l'utilise régulièrement et je crée des vidéos YouTube pour mes clients. Facile à créer des vidéos attrayantes." |
| User review at G2 | ENG: “It is easy to use. I have so many features to edit videos and photos. Easy to access. It provides greater editing effects and awesome output. It supports a plethora of file formats which is very great.” |
| User review at Pilota di fiducia | ENG: “I am pleased and excited about new updates that help make the videos more beautiful. Thanks, filmora!” |
ENG: Steps to Use Filmora to Make a Podcast Visualizers
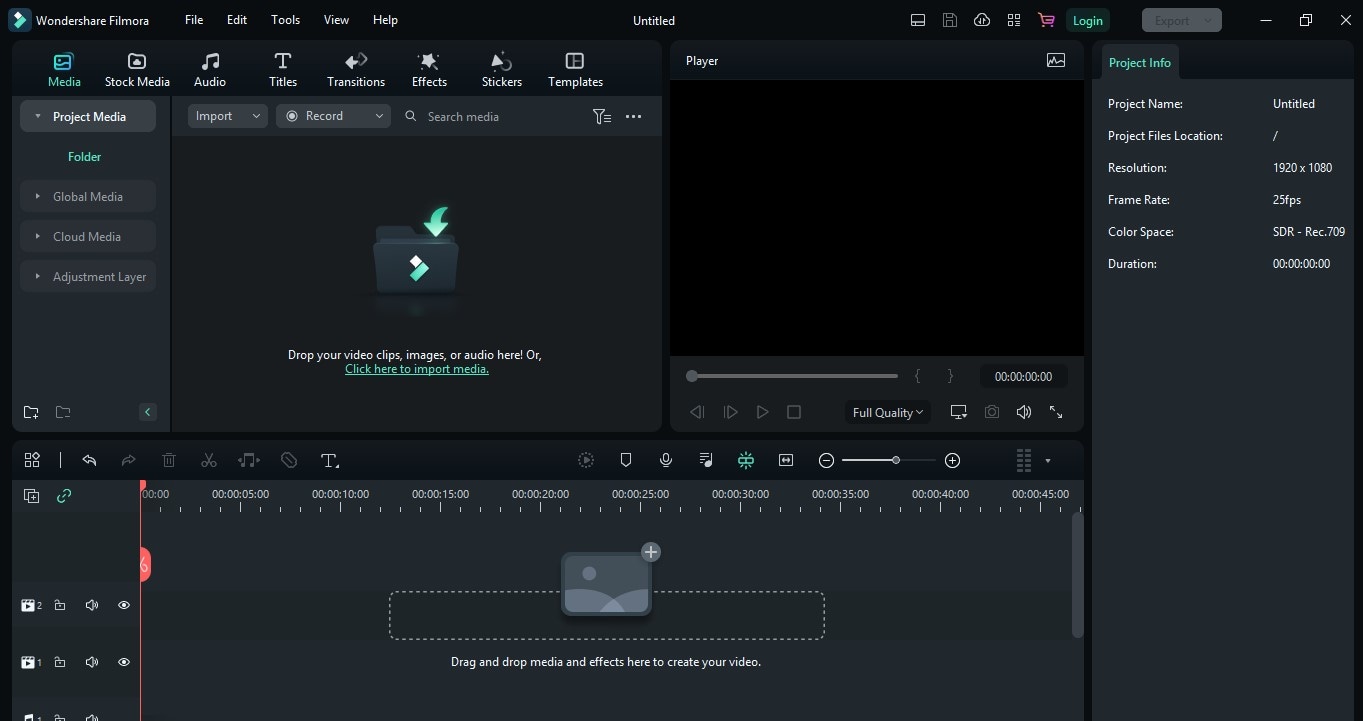
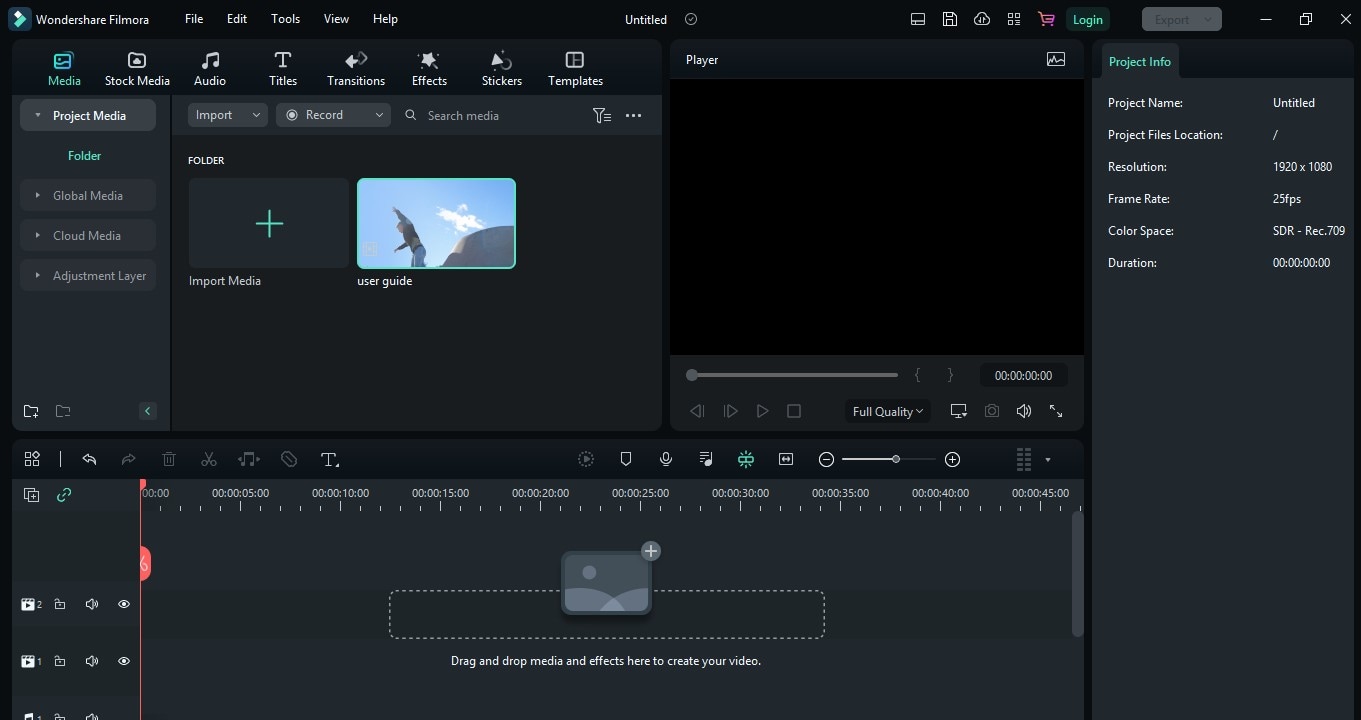
Fase 1ENG: Downloading Filmora and Importing Files
- ENG: Download and install Wondershare Filmora on your PC or Mac.
- ENG: Start making your “New Project.”
- ENG: Import your files. Filmora will display imported files on your project.
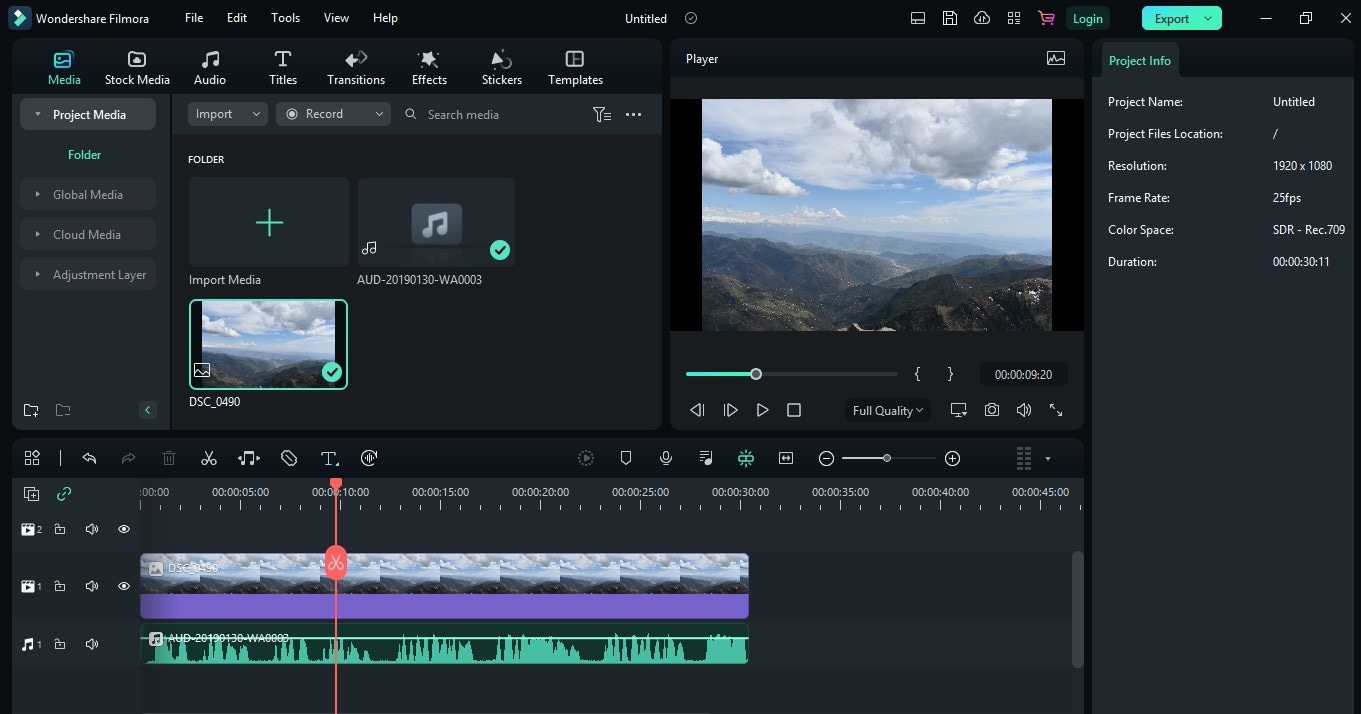
Fase 2ENG: Making Layers to the Timeline
- ENG: Add your music to “Timeline.”
- ENG: Now drag the background image to the timeline. And increase its duration to that of the audio file.
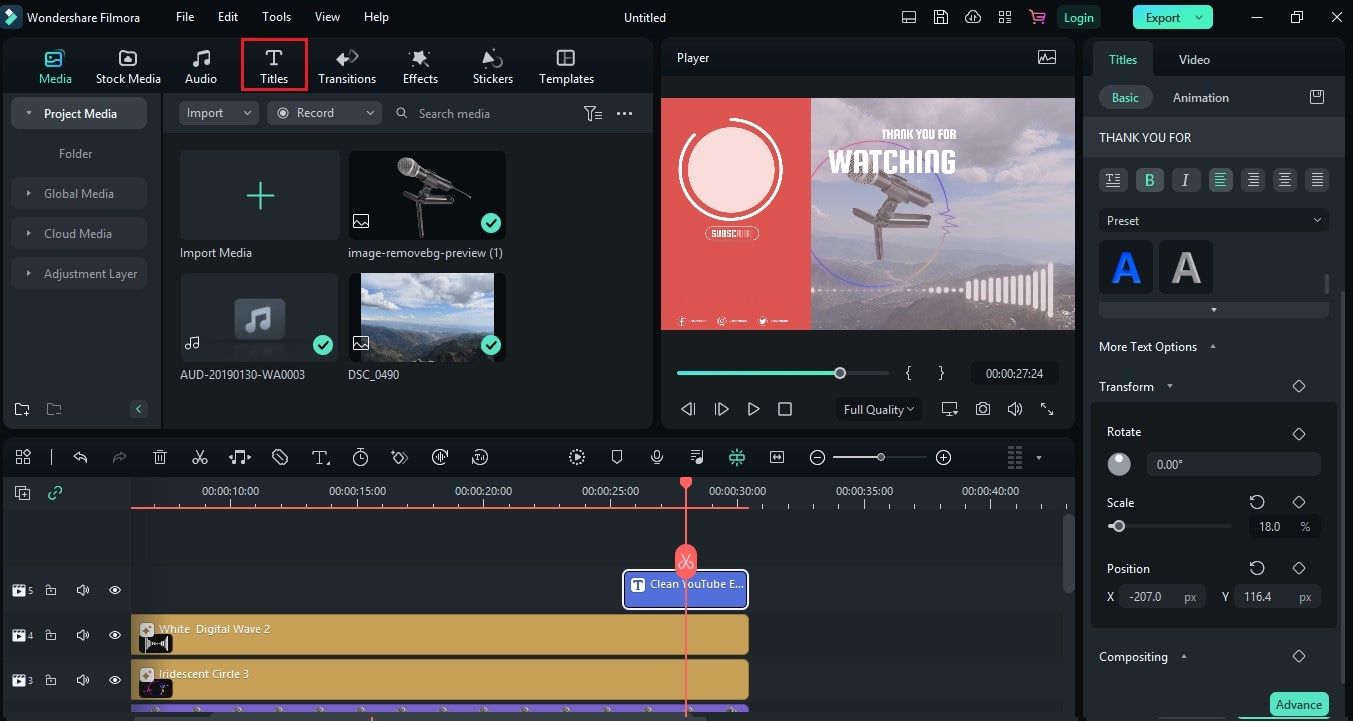
Step3 Adding Effects to the Layers
- Select the “Effects” button. Next, click “AudioEffects” and choose the “Audio Visualizer” category.
- Bring any visualizer of your choice to the timeline.
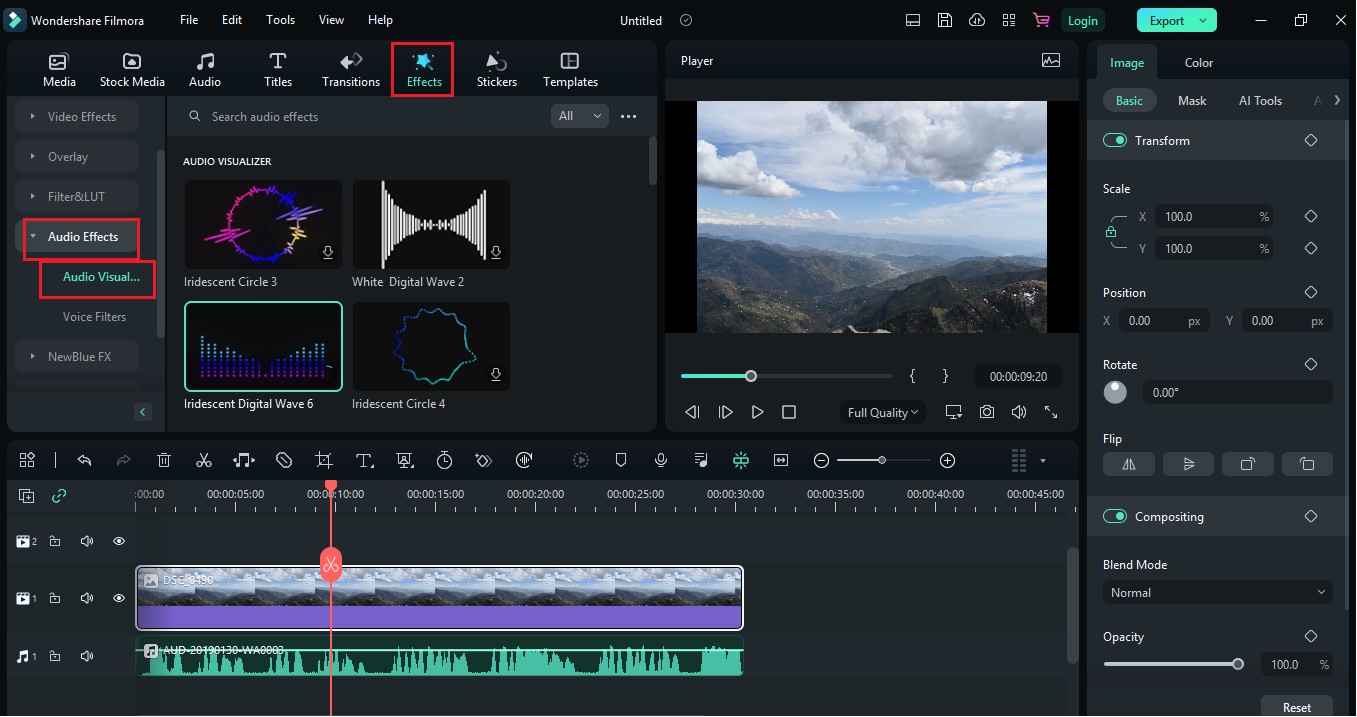
- Double-click on the visualizer to adjust color settings.
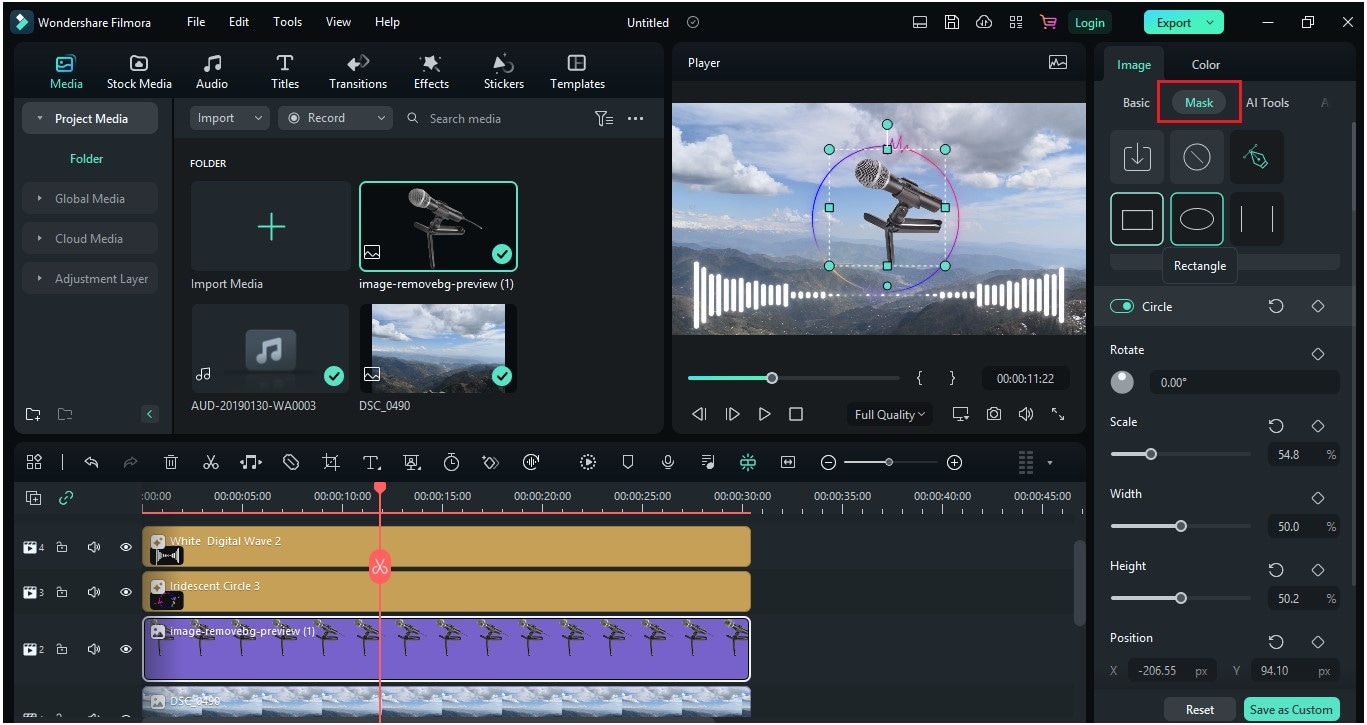
- Now bring your portrait photo to the timeline and adjust its size.

- Go to the “Audio Visualizer” again and bring any visualizer to the timeline.
- Go the the “Mask” settings and change it according to your wish.
Fase 4 Adding Text to the Project
- You can add text to the layer by clicking the “Title” button. Add it to the timeline. By double-clicking on the title, you can add text.
- You are ready to go with your audio podcast visualizer for free.
3. VEED - Venezuela (VE)
Veed is a powerful podcast audio visualizer. It is a simple, easy-to-use, and cost-effective tool. It is designed so that even newbies can go with this software.
It has single-click features like animation templates, auto subtitles, transitions, and translations. All you need is basic knowledge, and you are ready to go.
Perché pensiamo che questo software sia il migliore per gli strumenti di visualizzazione podcast?
- It offers customizable sound waves in podcast visualizers.
- It supports various audio formats.
- It supports up to 4K export quality.
- It has the option to add auto subtitles.
Restrizioni in uso
- The free version only allows a podcast visualizer for 10 minutes.
- Transitions effects in the podcast visualizer do not blend in smoothly.
- Its subtitle feature is available with the paid plan only.
- There is no mobile app for this software.
Ratings and User Reviews
Gli sforzi del team Veed sono encomiabili. Molti siti di recensioni degli utenti parlano dei suoi vantaggi come strumento di visualizzazione podcast. Ha fatto 9.0 su 10TrustRadius G2.
| Media utente | Remarks |
| User review at TrustRadius | "Utilizziamo VEED per produrre brevi video di marca, podcast e cortometraggi per la commercializzazione di contenuti di snack per i social media e scopi didattici. VEED è una piattaforma facile da usare per soddisfare tutte le vostre esigenze di produzione video ed è facile lavorare con altri per produrre video. |
| User review at G2 | "Facile da usare, include molte caratteristiche che sono difficili da implementare o che sono viste come caratteristiche aggiuntive." |
| User review at Pilota di fiducia | "Ottimo servizio-Ho usato Veed in vari progetti, è facile da usare ed efficace e può filtrare diverse dimensioni dello schermo. Anche il servizio clienti è vantaggioso." |
Passaggi per creare uno strumento di visualizzazione podcast utilizzando Veed
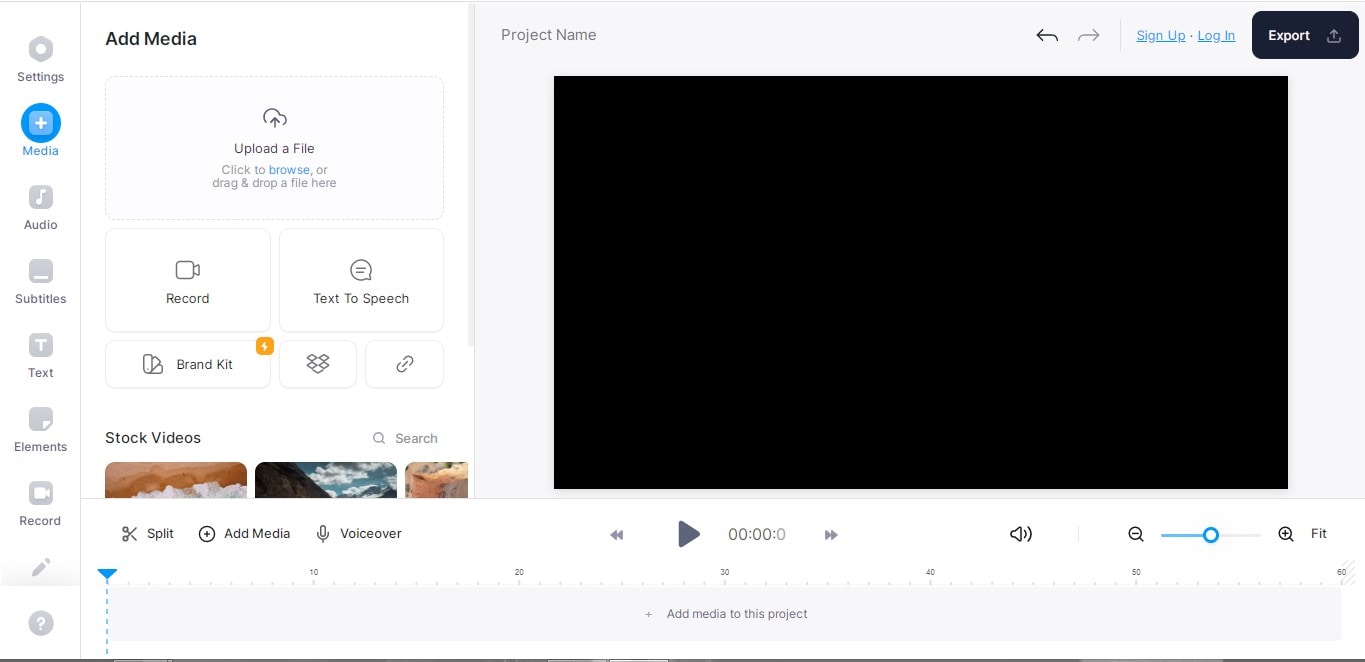
Fase 1Carica un file
- Apri la paginaI veicoliSign up and upload your video. You can also use it without signing up and clicking “Create your first video.”
- Now it's time to upload the video and audio you want to choose for your project.

- You can use video or audio of the podcasts to go with the project. For audio files, they will ask for a background image as well.
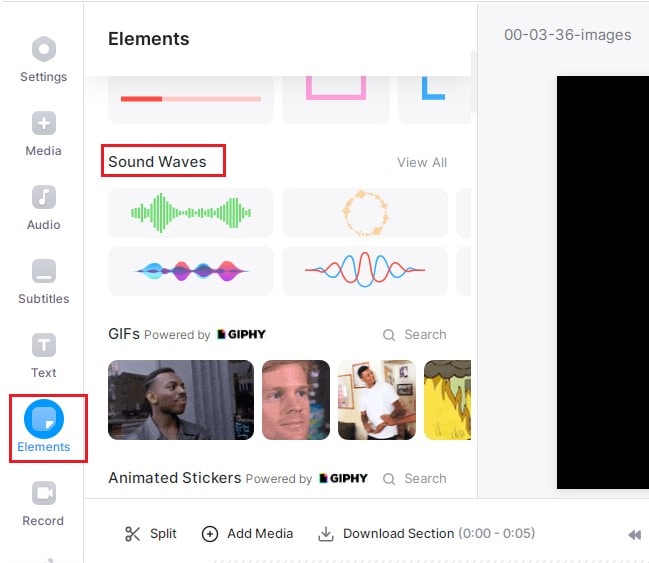
Fase 2Adding Sound Waves to the Audio
- For the audio visualizer, go to the left side of the page and select “Elements.”
- After clicking “Effects,” click “Sound waves.” It will visualize waves to your audio on the project.
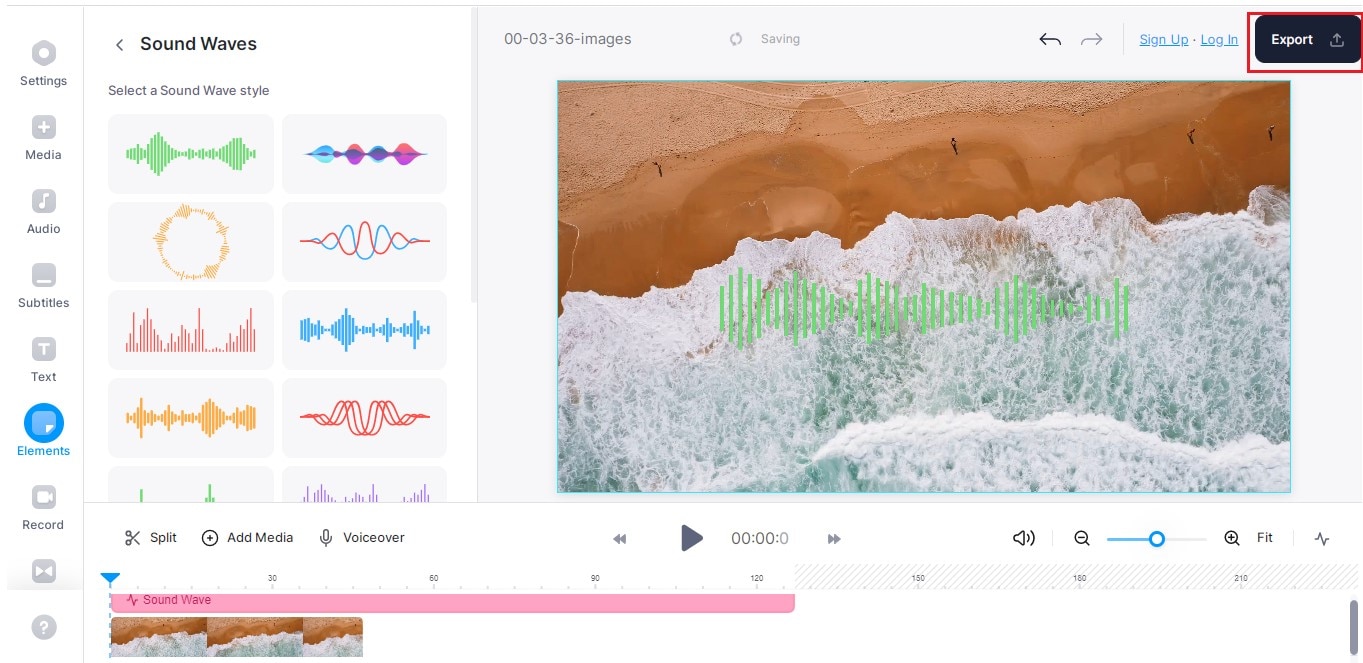
Step3Editing of Sound Waves
- You can further edit the sound waves' design, style, size, and opacity.
- After editing sound waves, it's time to export the project. Click “Export” on the top right corner of the page.
Fase 4Use Advanced Settings for Export
- Vous pouvez également utiliser les paramètres avancés fournis par Veed. Par exemple, vous pouvez choisir la limite de fréquence d'images, la résolution, la qualité et la compression de votre choix.
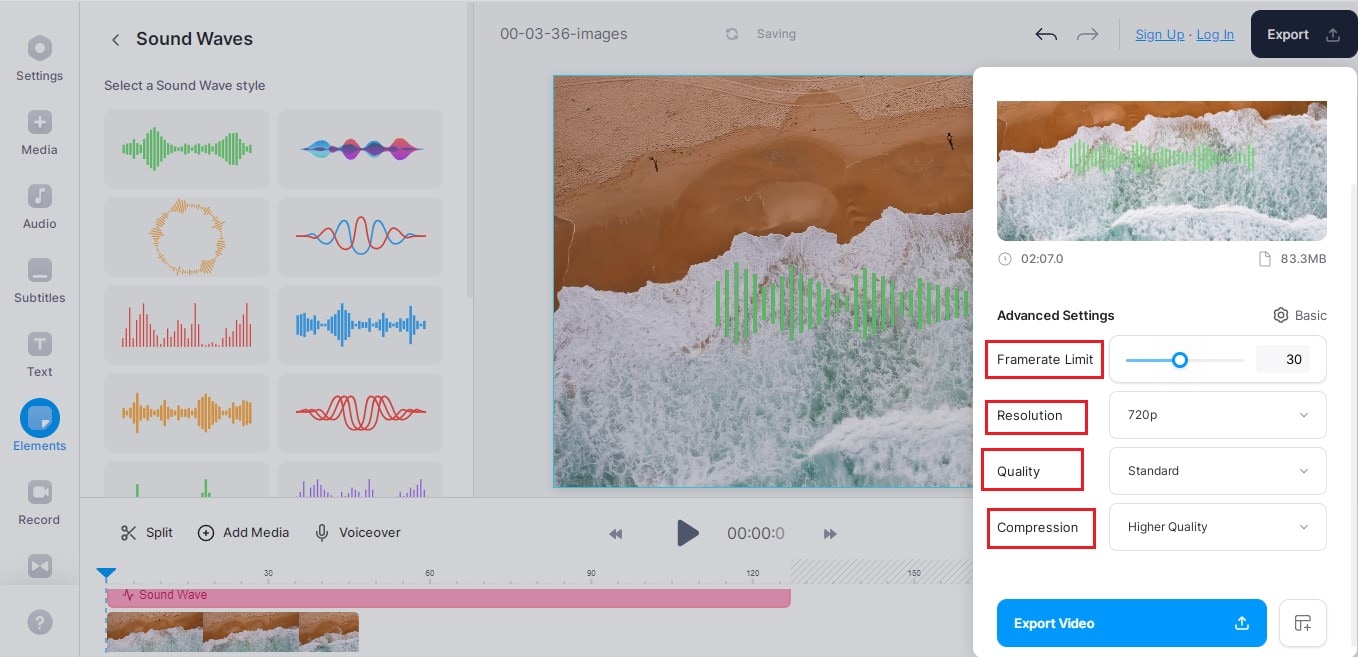
- En fin de compte, exportez la vidéo et téléchargez-la.
4. AEJuice - United Arab Emirates (AE)
AEJuice est une entreprise de graphisme animé qui propose des outils d'animation avancés. Les professionnels utilisent ces outils d'animation pour améliorer leurs compétences en montage. Il dispose de plus de 130 effets sonores pour les vidéos graphiques en mouvement. De plus, il dispose de plugins et de presets faciles à utiliser qui peuvent être ajoutés à votre Adobe After Effects, Adobe Premiere Pro et Standalone.
AEJuice est un ensemble de mouvements graphiques qui améliorent vos compétences en montage à un niveau professionnel. De plus, ils proposent un grand nombre de plugins qui vous aideront à créer des effets passionnants.
Perché pensiamo che questo software sia il migliore per gli strumenti di visualizzazione podcast?
- Ne ralentit pas votre ordinateur.
- Reproduisez facilement des effets complexes réalisés par des professionnels.
- Tous les effets d'animation sont entièrement personnalisables.
- Il propose un remboursement complet si un plugin est incompatible avec votre PC.
Restrizioni in uso
- Certains plugins sont considérés comme chers.
- Certains plugins peuvent ne pas être compatibles avec votre PC.
- Sound effects don’t auto-preview.
User Reviews
AEJuice is the finest of pack managers used for podcast visualizers. It is regarded as the best product at AEJuice - United Arab Emirates (AE).
| User Media | Remarks |
| User review at AEJuice - United Arab Emirates (AE) | “Very useful for editing music videos.” |
| User review at AEJuice - United Arab Emirates (AE) | “a must-have!! Super easy and comfortable finding your stuff from the AEjuice window among lots of choices.” |
| User review at AEJuice - United Arab Emirates (AE) | “Questions I have are answered quickly. I have access to the features I wanted and more. It also helps me get ideas out to more clients faster. This product is amazing!” |
Steps to Use AEJuice to Add a Podcast Visualizer
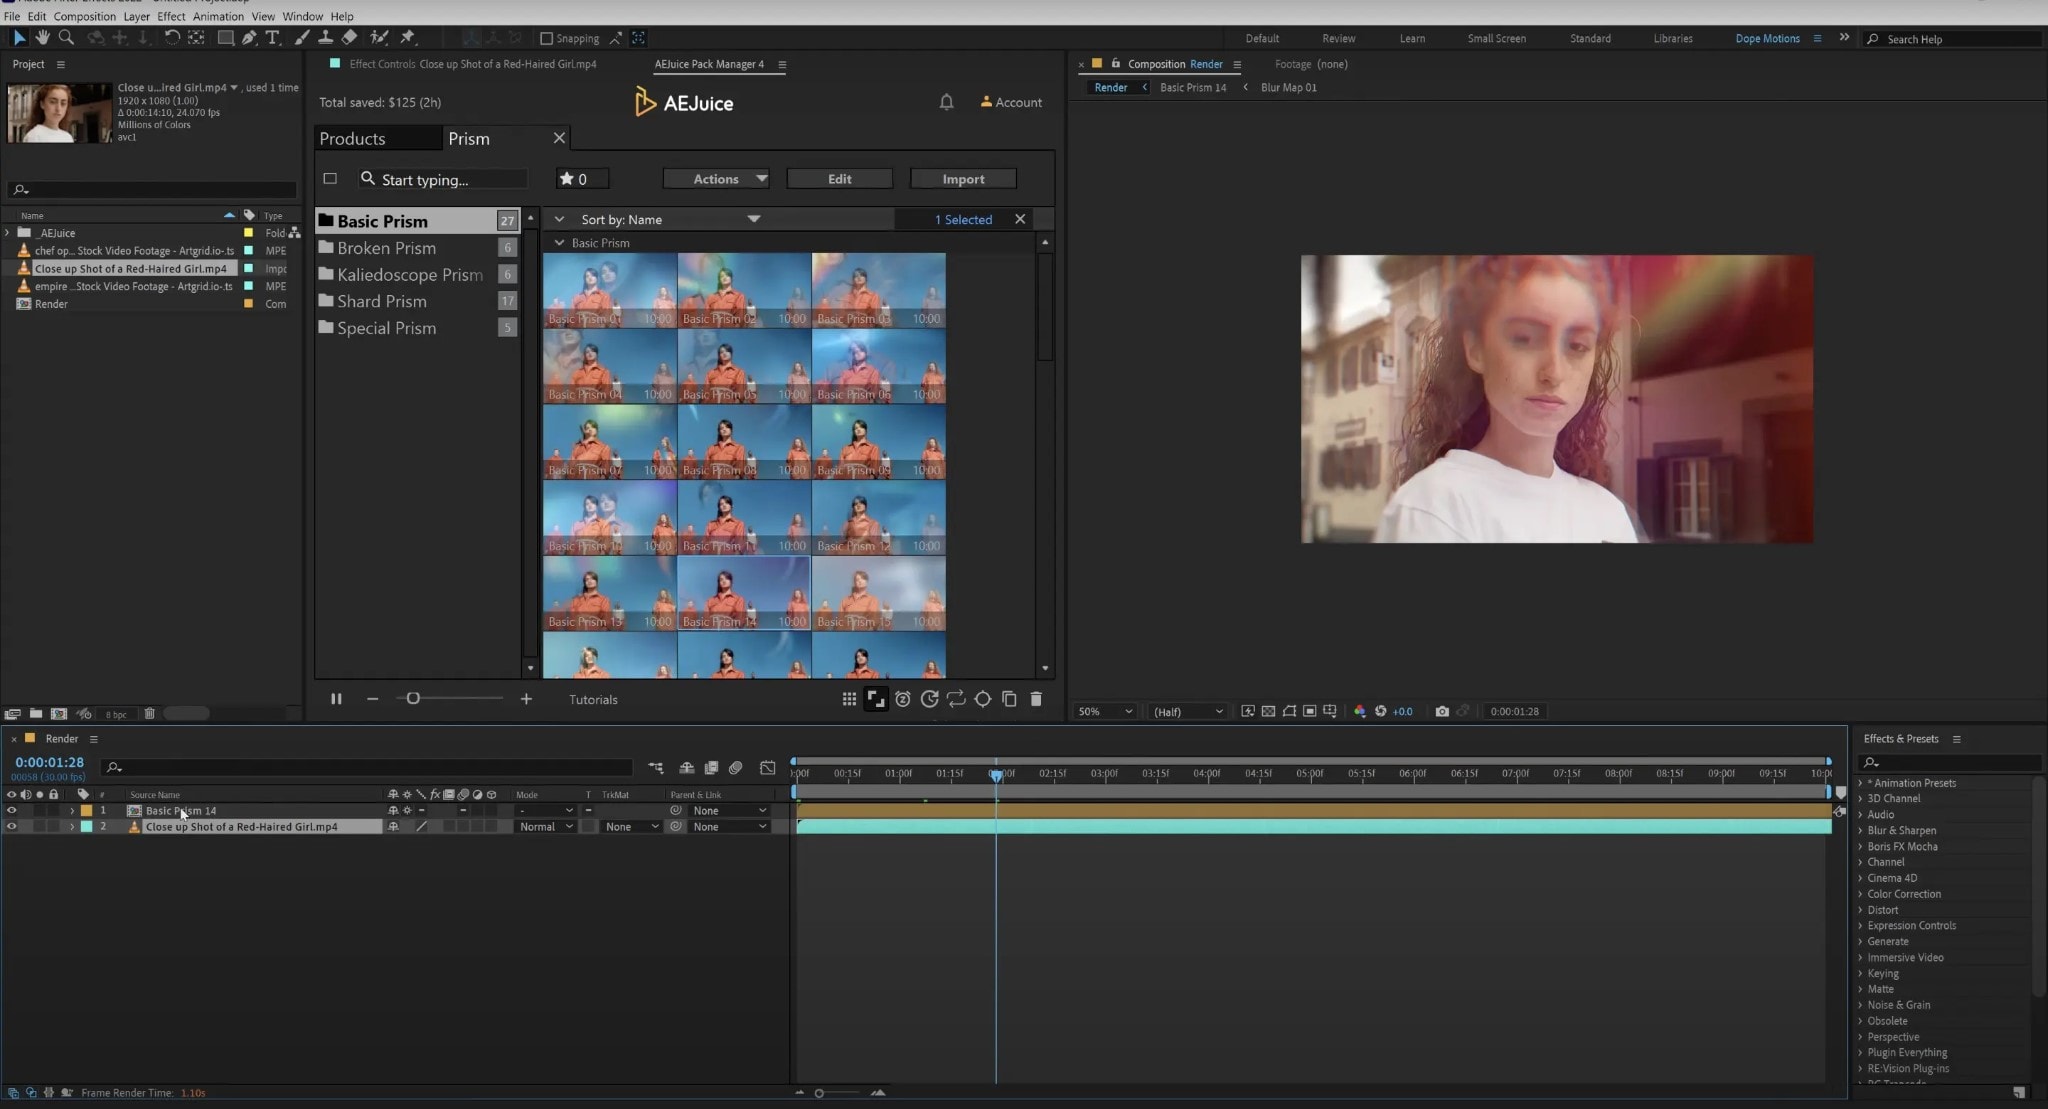
Fase 1 AEJuice Pack Manager in Adobe After Effects
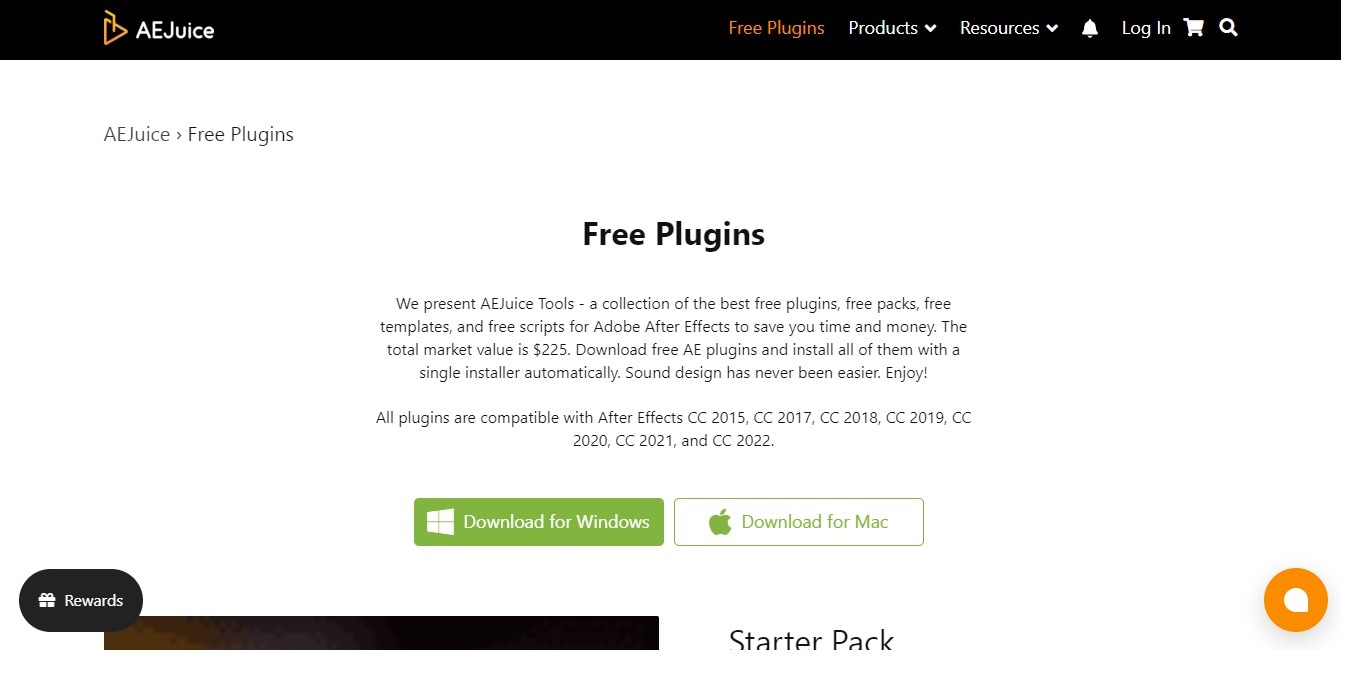
- Download the plugin from the website.
- Click on the "Free Plugin" and download the plugin using your email ID.
- Maintenant, ouvrez Adobe After Effects. Ensuite, cliquez sur "Windows" et sélectionnez "Gestionnaire de pack AEJuice".
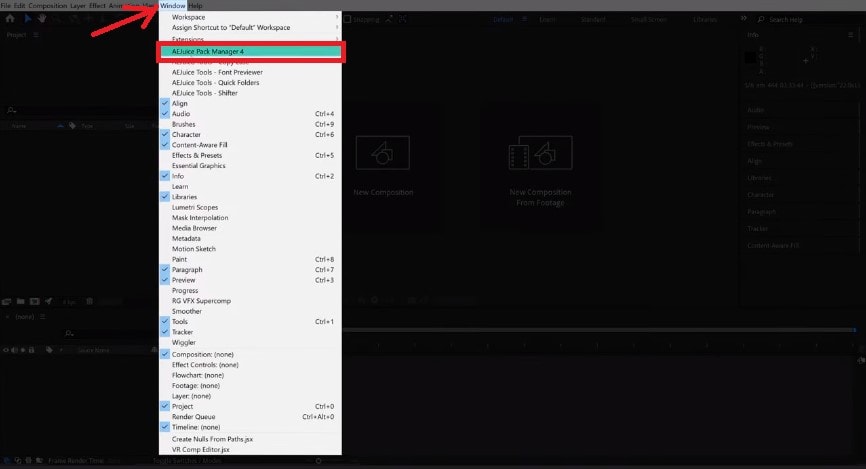
- Une fois connecté, cliquez sur la boîte pour télécharger le package que vous avez acheté. Le téléchargement débutera.
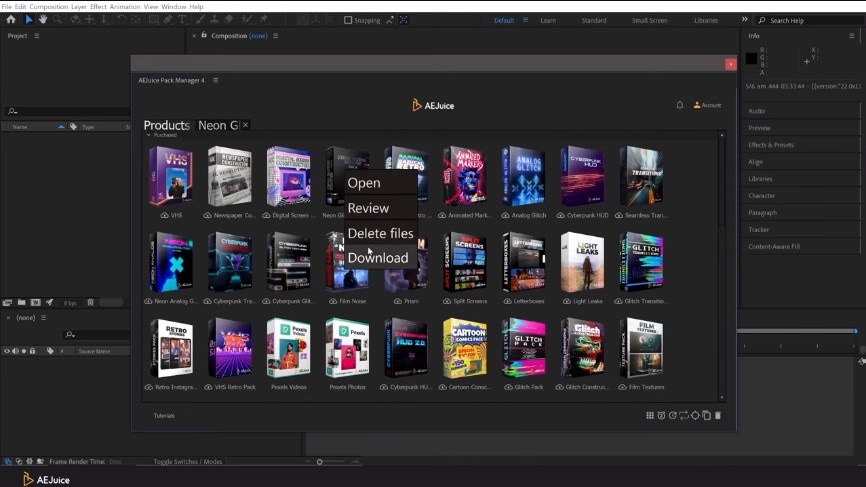
- Vous pouvez maintenant utiliser toutes les animations de la boîte dans vos projets.
Fase 2AEJuice Pack Manager dans Adobe Premiere Pro
- Après avoir téléchargé le plugin depuis le site officiel, ouvrez Adobe Premiere Pro.
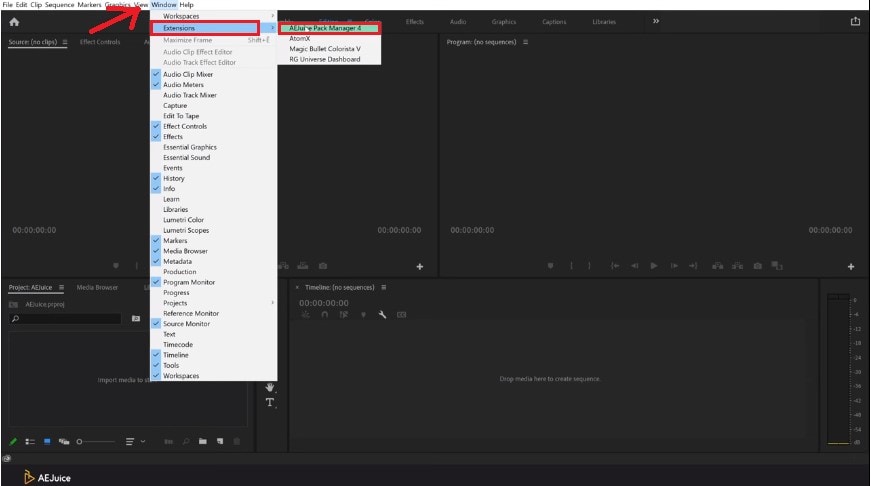
- Cliquez sur "Windows", puis sur "Extensions", et sélectionnez "Gestionnaire de pack AEJuice".
- Cliquez sur "Compte" et sélectionnez "Connexion".
- Connectez-vous au gestionnaire de packs en utilisant votre ID et votre mot de passe.
- Cliquez maintenant sur la boîte pour télécharger le package que vous avez acheté.
- Commencez à utiliser les animations de la boîte pour le visualiseur de podcast.
Step3AEJuice Pack Manager in Standalone
- Download plugins from the official website.
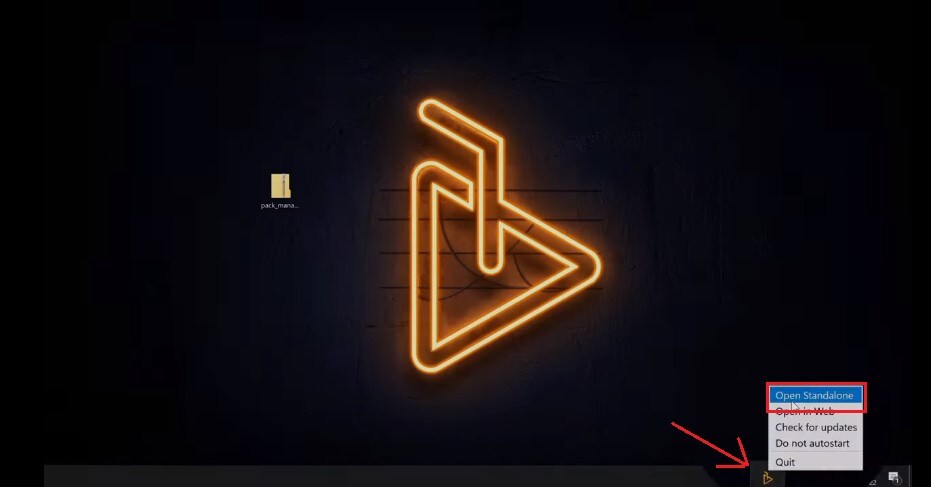
- Right-click on the AEJuice icon and select "Open Standalone."
- Cliquez sur "Compte" et sélectionnez "Connexion".
- Connectez-vous au gestionnaire de packs en utilisant votre ID et votre mot de passe.
- Now Click on the box to download the package you have bought. The download will begin.
- Vous pouvez maintenant utiliser toutes les animations de la boîte dans vos projets.
5. Canva - Canada (CA)
Canva is an excellent web designing and video editing tool. You can use Canva for many purposes, like presentations, graphic designing, and podcast visualizers.
It works on the browser, so you don't need to install anything on your system. It also provides support for mobile applications for Android and iOS devices. You can also sign up for a free account.
Perché pensiamo che questo software sia il migliore per gli strumenti di visualizzazione podcast?
- Robust free plan with no limits on monthly downloads.
- The Pro plan is feature-packed.
- Social scheduling feature at no additional cost.
- Super easy to use and learn.
Restrizioni in uso
- Ha numerose funzionalità che rendono difficile da usare.
- A volte si rallenta senza preavviso.
- È necessario pagare per caratteri specifici.
Ratings and User Reviews
I creatori di Canva stanno mettendo molti sforzi nel rendere la vita più facile agli editor video. I siti di recensioni sono pieni di recensioni da parte di utenti ed esperti che lo usano per i visualizzatori di podcast. Ha un punteggio di 9/10 su TrustRadiused è considerato un potenziatore di carriera nelle aziende di marketing su G2.
| User Media | Remarks |
| User review at TrustRadius | "Canva è stato un dono del cielo nel aiutarci a colmare le lacune nella creazione di materiali per i social media - veloce e facile - quando avevamo bisogno di elementi dall'aspetto professionale, rapidamente!" |
| User review at G2 | "Gli elementi trascinabili sono la parte migliore di Canva. Le dimensioni degli elementi aumentano e diminuiscono, e ci sono un sacco di modelli nella collezione che hanno. Quindi è stato utile quando non sapevi come creare alcuni post." |
| User review at Pilota di fiducia | "Strumento perfetto. Posso apparire come un graphic designer professionale con un abbonamento pro. Anche se non so nulla di grafica, Canva è un salvavita." |
Passaggi per utilizzare Canva Applicando i Visualizzatori di Podcast
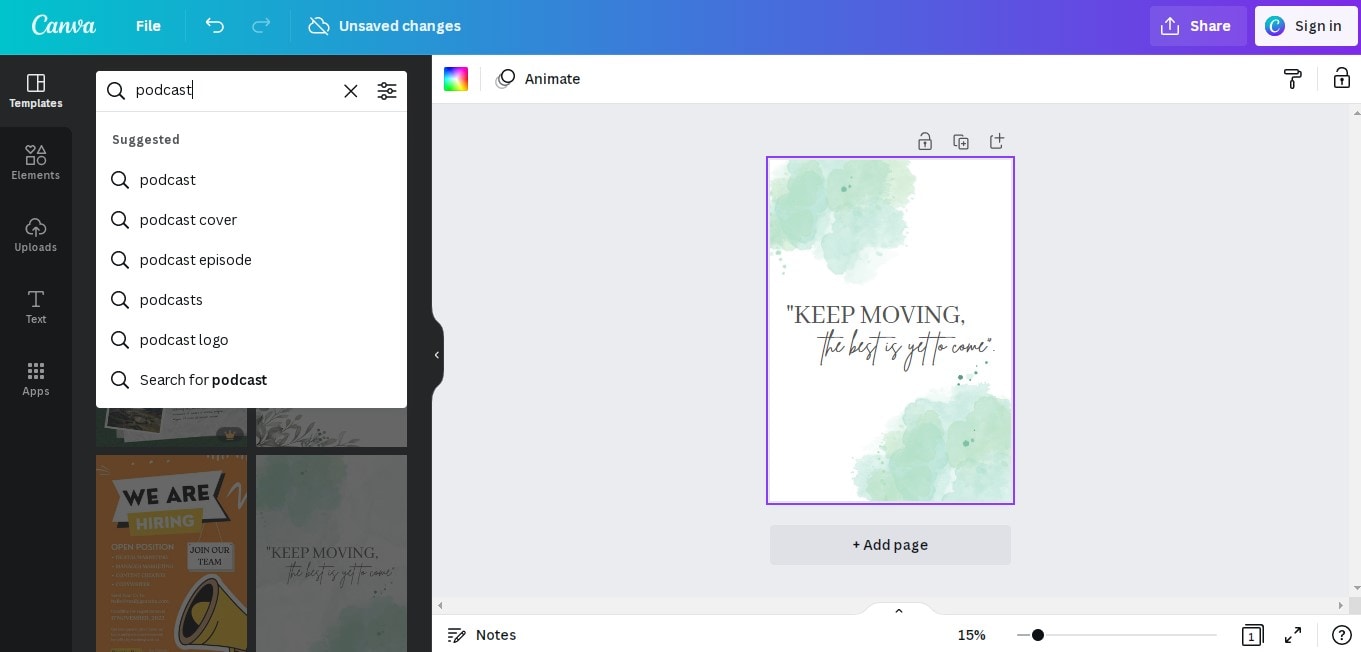
Fase 1Selezione del modello
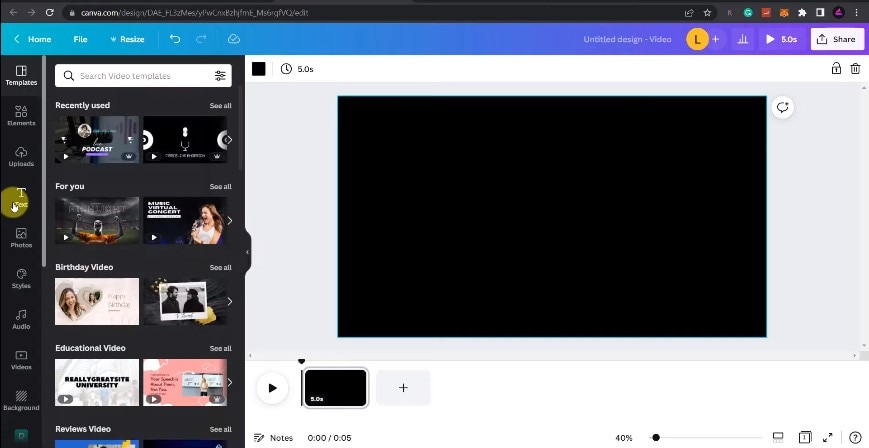
- Log in to Canva and select a template. Canva provides an extensive library of built-in templates that you can use for your podcast branding. In addition, there are plenty of options for different social media platforms. Make sure to choose the right one.

- You can also go "Search" option and select the templates for your podcast visualizer.
Fase 2 Designing of Background Photo
- Now it's time to do some editing on the background.
- Go to "Elements" and find the stickers, graphics, or photos suitable for your podcast visualizer.
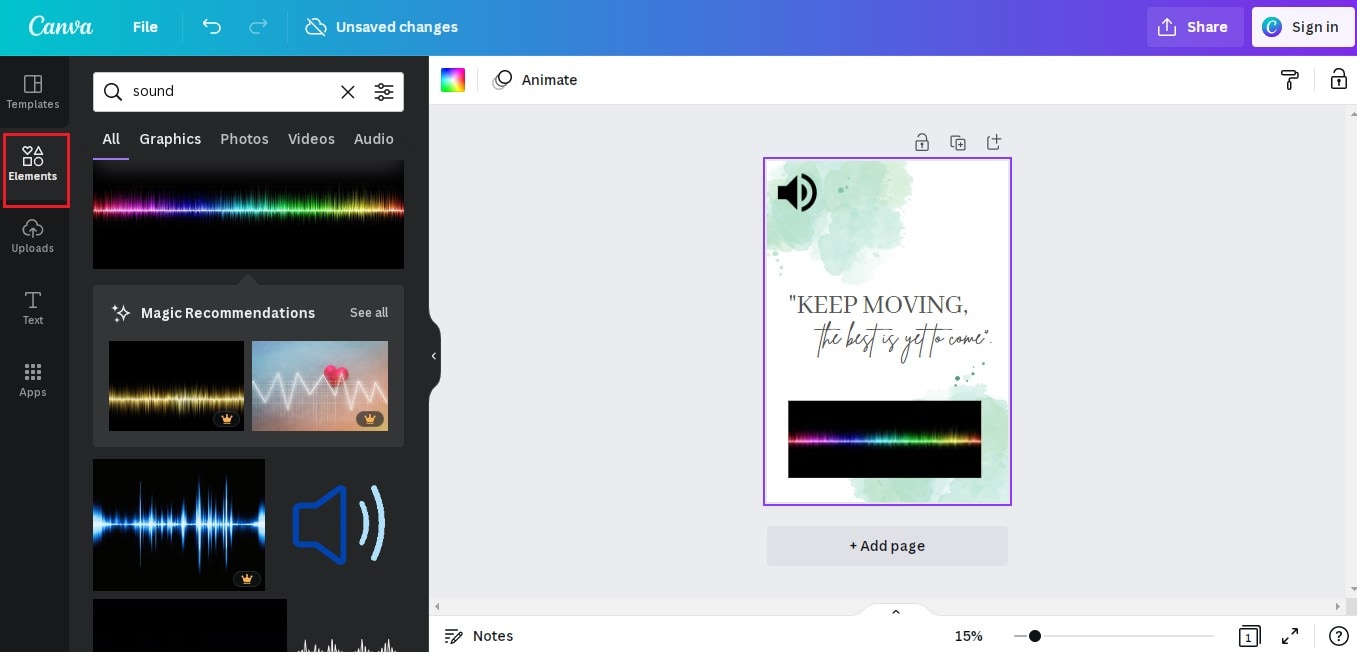
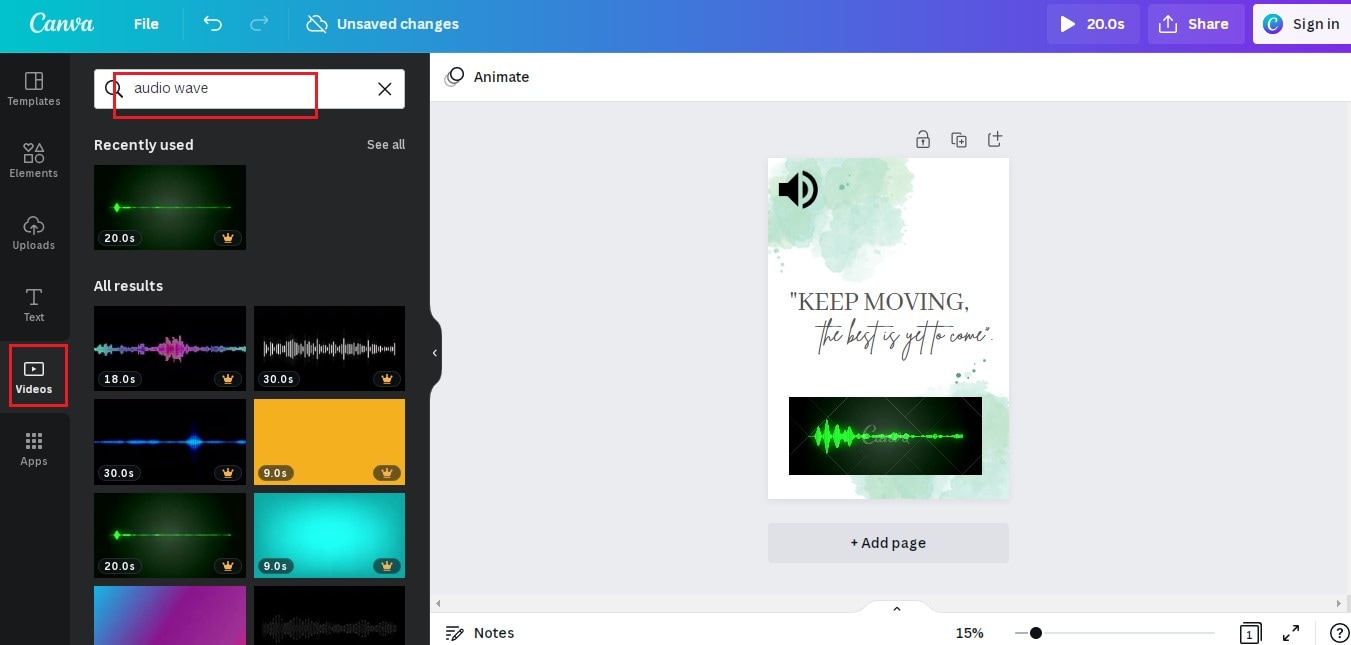
- You can also use sound waves by clicking the "Video" button.
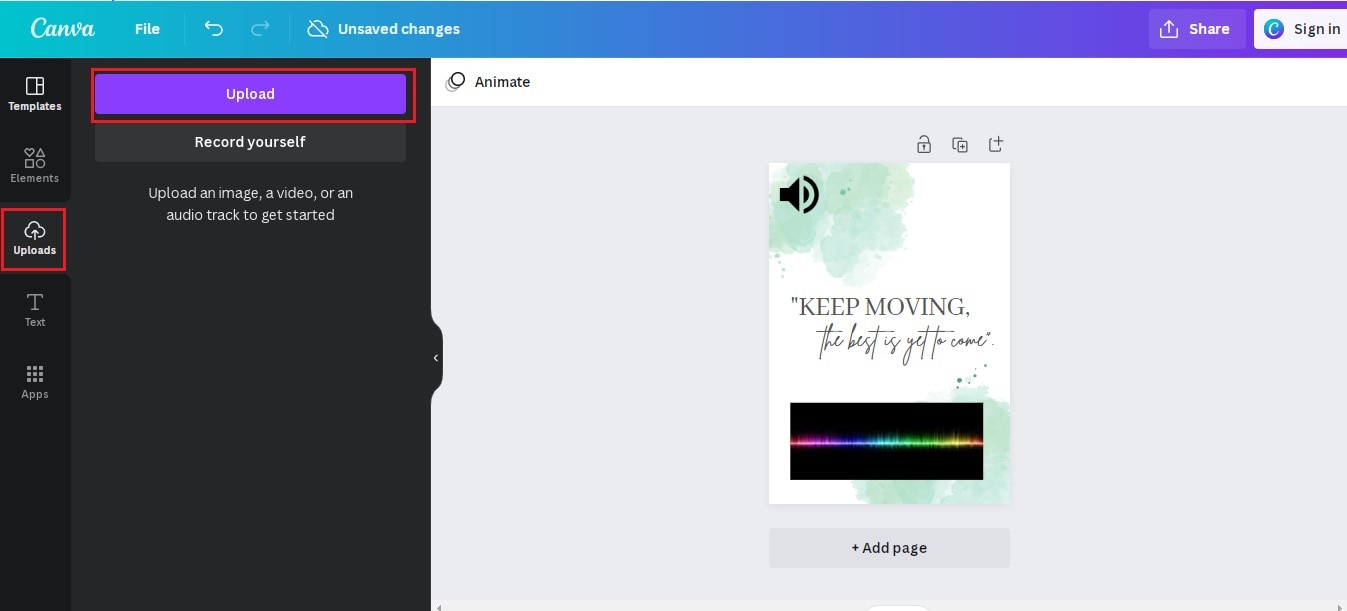
Step3 Upload Audio File
- Go to "Uploads" and import your audio file.
- Once imported, drag your audio file to the background photo to add it.
Fase 4 Download the Audio Visualizer
- Finally, press the "Share" button and select the "Download" button.
- Make sure to download it in mp4 format.
Conclusion
The popularity of podcasts is evident in why people are into this business. However, if you want a professional look at your podcasts, podcast visualizers are the key. We have discussed in detail the best podcast visualizer. We hope you have found the one.
If you find this article helpful, let us know in the comment section. Also, please share this article with your friends and colleagues.