Do you want to reduce echo in Premiere Pro? How often have you been in situations where you encountered conditions where there was annoying background noise on your video? There is no need to overthink, given that everyone has to deal with this problem. Your video may become intolerable if background noise, such as the sound of a fan or the wind blowing through a window, is present. Because of this, you need to take immediate action to remove echo in Premiere Pro to accomplish the task of uploading a video to YouTube or any other social media site.
Spending a lot of time on a recording, only to have the completed work have a terrible echo, is one of the most frustrating experiences. You will be relieved that there are methods by which you may take your audio clips and modify the audio on your clips to decrease the echo. The following explains how to remove echo from audio in Premiere Pro.

In this article
Partie 1 : Comment réduire l'écho avec Premiere Pro
Réduire l'écho dans Premiere Proest facile avec les outils intégrés de l'application. Aucun plugin supplémentaire n'est nécessaire.
Étape 1Deverb
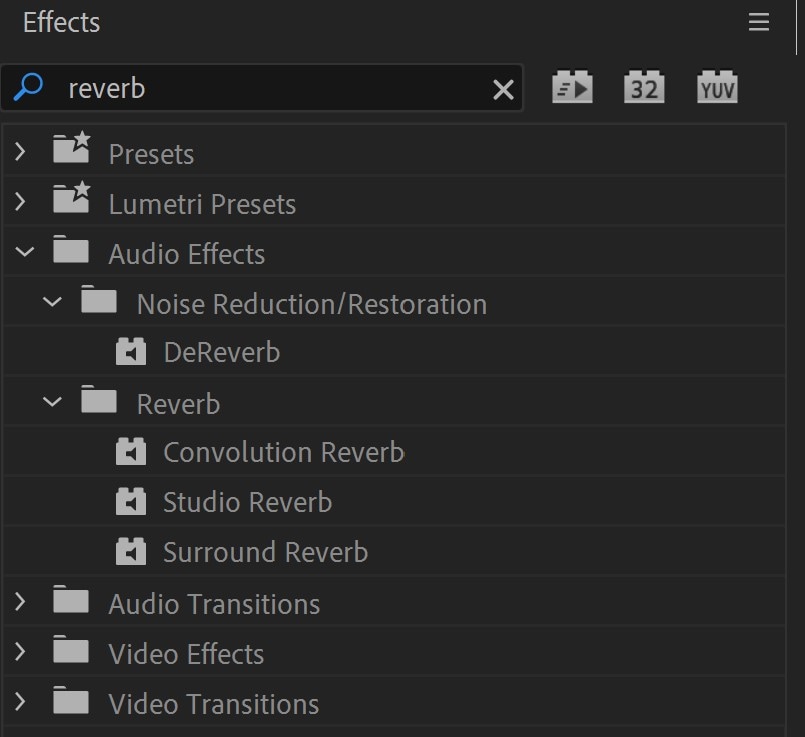
La première étape consiste à rechercher un effet appelé "DeReverb" dans la boîte des effets de l'espace de travail. Une fois que vous le trouverez, vous pouvez facilement l'ajouter à la séquence en question en le faisant glisser et le déposer là. Ensuite, il apparaîtra dans le coin supérieur gauche des contrôles d'effets à l'intérieur de votre séquence audio.

Étape 2Éditer
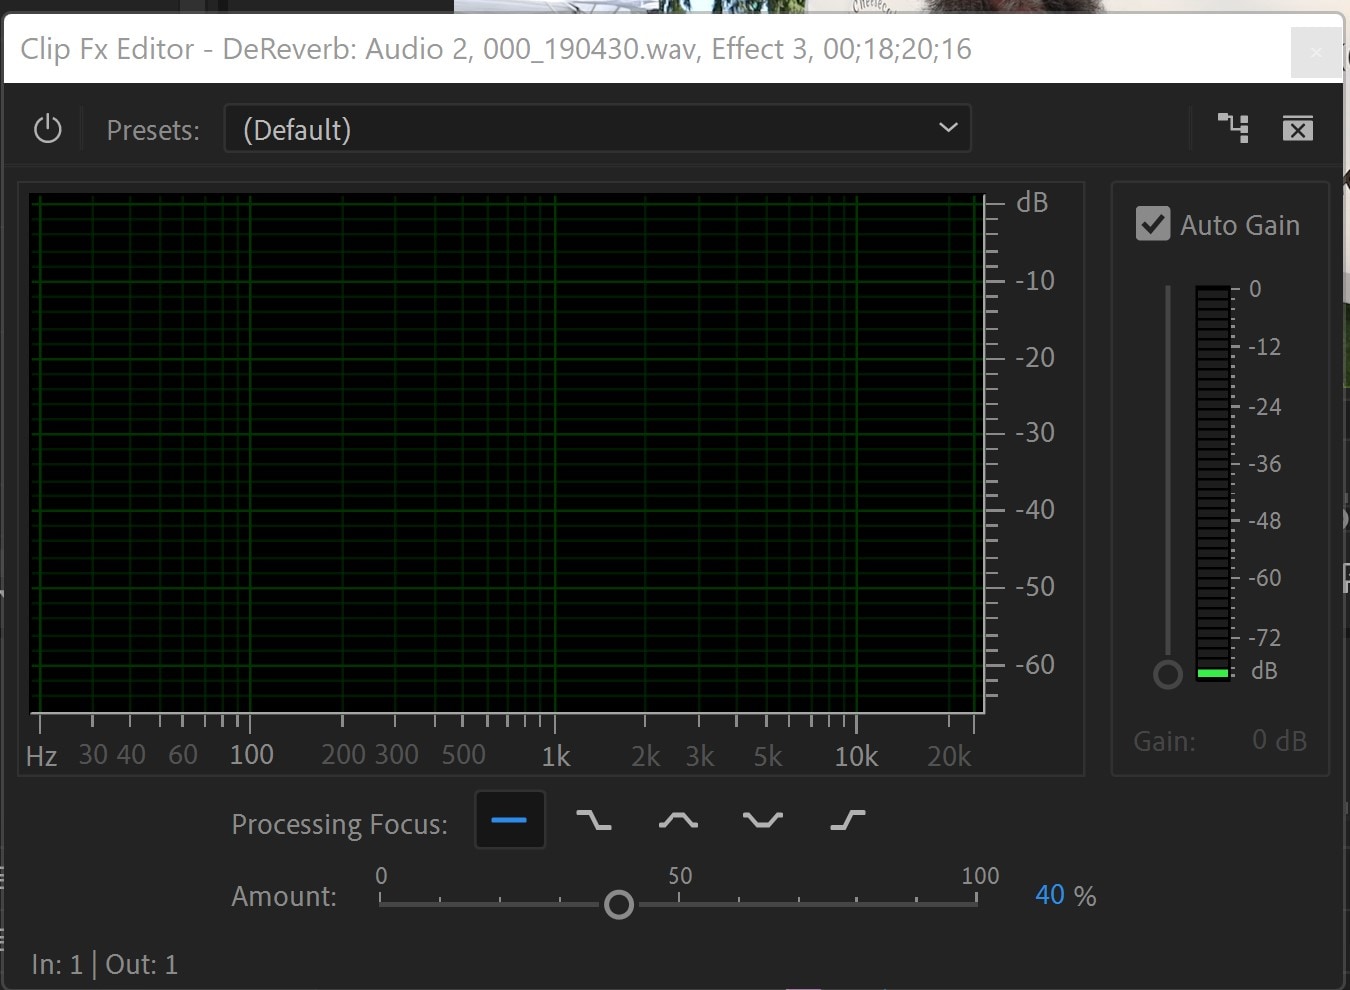
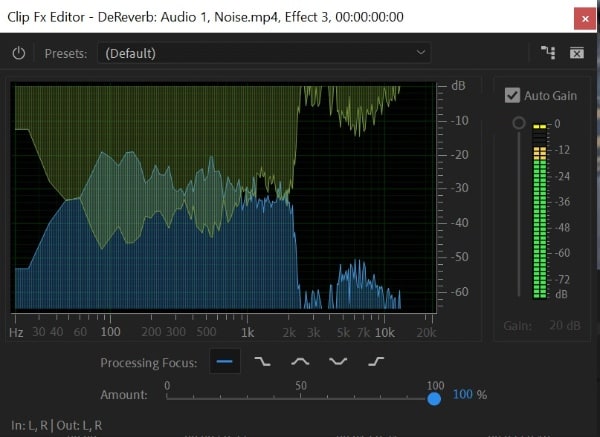
Quindi, seleziona Modifica dal menu a discesa e imposta il livello di frequenza di annullamento trascinando il semplice cursore sotto la clip dallo 0% al 100%. Quando si sposta il cursore vicino al 100%, l'eco dovrebbe iniziare a scomparire, quasi appena lo si fa!
A meno che tu non conosca la frequenza con cui stai elaborando, il focus dell'elaborazione dovrebbe essere attorno alla linea piatta. Inoltre, assicurati che gli effetti siano attivati facendo clic sul pulsante nell'angolo in alto a sinistra della finestra degli effetti.
È importante ricordare che quando si tratta di questo effetto, meno è più perché ha un certo effetto negativo sulla qualità dell'audio che si acquisisce.

Componi ulteriormente nelle tue impostazioni
Una volta raggiunto un livello di frequenza di cancellazione soddisfacente, è possibile applicare altre modifiche all'audio, come compressione ed equalizzatore. Tuttavia, a questo punto dovrebbe sembrare più chiaro e visibile.
Quando si utilizza l'effetto DeReverbremove echo in Premiere ProC'e' un'altra cosa ancora piu' figa. Se si seleziona la casella "guadagno automatico", il volume non diminuirà come quando si rimuove l'eco con questo effetto. Al contrario, il livello del volume rimane lo stesso quando si passa dallo 0% al 100% dell'effetto.

La conclusione è la seguente: quando esci o ti trovi in uno spazio spazioso con molti echi, ecco un modo super semplice per gestire i livelli di eco!
L'opzione "Quantità" in DeReverb consente all'utente di specificare la percentuale di eco che desidera rimuovere. Tuttavia, fare attenzione quando si regola questo parametro, poiché un'impostazione troppo alta può degradare la qualità audio.
Also, applying the DeReverb effect may decrease the audio level; but if you mark the Auto Gain check box, Premiere Pro will compensate for the decrease in volume. Hence, it is advisable to keep the box checked since this is the default configuration. You also can tinker with the Processing Focus settings, which let you zero in on a specific frequency or frequency.
Parte 2: come ridurre il rumore in modo gratuito e semplice?
Video senza pari condivisi da video blogger e registi con una voce chiara. Ma come hanno realizzato un video così buono e silenzioso? Anche se Lei ha le condizioni acustiche ideali, ha un registratore di fascia alta e perfettamente impostato il registratore e tutto il resto, il Suo video raccoglierà comunque alcuni suoni di sottofondo. La riduzione del rumore è un passo fondamentale per realizzare video di alta qualità ed è necessaria per i tuoi video. Dopotutto, un buon audio è essenziale per il video. Tranne che...Remove Audio Echo in Premiere ProQui ci sono altri metodi gratuiti e accessibili.
1. Uso di Wondershare AILab [gratuito online]
Wondershare AILab èRimozione di Echo in Premiere ProUna varietà di strumenti online gratuiti. Non è necessario specificare alcuna impostazione perché l'intelligenza artificiale riconosce ed elimina automaticamente il rumore. In questo modo puoi evitare suoni indesiderati o brezza aspra tra la folla. AILab può aiutarti a creare immagini, suoni e clip più semplici e interessanti.
Étape 1Innanzitutto, utilizzare l'aggiunta dell'audio o trascinare l'audio per il caricamento.

Étape 2Come mostrato nella figura seguente, l'IA elabora automaticamente i file e rimuove i suoni statici.

Step3 That's it. Now, download the updated audio file at this point.
2. Use kapwing [Free and online with a watermark]
Another alternative to reduce echo in Premiere Pro is Kapwing. This noise-canceling program removes the audio in your movies by separating speech patterns, decreasing background noise, and eliminating background hums. It does this by removing background noise, reducing background noise, and removing background noise—no need to become proficient in high-powered and complicated audio editors such as Adobe Audition or iMovie. Suppose you host your podcast or live stream and utilize mics like the Blue Snowball. In that case, you can quickly and easily eliminate annoying background noise from every video you record with just one click.
Étape 1 Upload your video while it still has the background noise you want to remove by either uploading the video file straight from the device into your workplace or copying the URL link of the movie into your workspace.
Étape 2 Reach the "Edit" tab and pick the "Clean Audio" option from the drop-down menu. Kapwing will automatically clean up your video's audio by removing any unwanted background noise. If necessary, you should make any essential extra adjustments to your video, such as adding subtitles, transitions, or sound effects.
Step3 When you have reduced the background noise from your movie, go to the "File" option and choose "Export Project." After a few moments, the improved version of your video will be available for you to download and share.

3. Use Wondershare Filmora untuk mengurangi kebisingan
Editor Video Filmora mudah digunakan dan memberikan berbagai fitur yang lebih unggul dibandingkan editor video lainnya. Oleh karena itu, ini adalah salah satu editor audio/video terbaik untuk mengurangi kebisingan latar belakang. Proses yang akan kami ikuti dibagi menjadi bagian untuk memudahkan pemahaman.
Anda bisa menyebut ini sebagai alternatif terbaik untukmenghilangkan gema dari audio di Premiere Pro.
Étape 1Unggah File dan Pratinjau
Mulailah dengan mengimpor video Anda ke antarmuka Wondershare Filmora. Untuk mendapatkan pratinjau video, potong bagian-bagian tertentu dan hapus yang tidak ingin Anda simpan.
Étape 2Start Editing
You will need to enter "Smart Denoise" into the search bar in the Effects panel. After that, choose Edit Properties from the context menu that appears after right-clicking on the video.

Here, you can alter the clip's opacity, the threshold, and the radius.

Step3Make Changes and Save
In this step, you can keep adjusting the Opacity slider until you get the perfect effect to satisfy your need. Afterward, reach the box beside the Smart Denoise to compare the scene before and after removing the noise and grain.
Finally, save the edited video and share it.
Part 3: FAQs
1. How can an echo be reduced in the sound of an audio recording?
For example, you might use anything that absorbs sound, like a foam pad or acoustic panels. You could alternatively record in a smaller space and use a microphone with a narrower pick-up pattern, or you could use a microphone that already has a filter built into it.
2. How can I get rid of the reverb that is on the video?
Puedes usar tanto la herramienta DeReverb como el ecualizador paramétrico para eliminar la reverberación o remove echo from audio in Premiere Pro.
3. ¿Por qué mi grabación tiene un sonido tan reverberante?
Es posible que estés en una habitación con superficies duras que reflejan las ondas de sonido, o tu micrófono está captando una cantidad excesiva de ruido de fondo. Intenta solucionar el problema grabando en un lugar nuevo, utilizando un micrófono diferente o modificando la configuración de tu programa de grabación. Todas estas opciones están disponibles para ti.
Conclusión
Este artículo presenta cómo eliminar el eco del audio en Premiere Pro y enumera algunas de sus alternativas. ¿Alguna vez te has preguntado por qué tantos creadores de contenido profesionales usan Filmora? Eligen editar su contenido en Filmora porque esta herramienta ofrece un soporte completo y servicios confiables.
Sin embargo, todas las alternativas mencionadas anteriormente, incluido Adobe, te ayudarán a convertirte en un mejor creador de contenido a través de la práctica. Así que elige el mejor software que sea asequible y esté lleno de características profesionales para crear videos impecables y llamativos. Aunque, según mi experiencia, Filmora es la mejor alternativa paraeliminar el eco del audio en Premiere Pro.
 Garanzia di Download Sicuro, zero malware


