Transisi diperlukan untuk membuat video, slideshow, dan presentasi yang menakjubkan. Ini adalah efek khusus yang muncul ketika satu slide atau klip menggantikan yang lain. Oleh karena itu, setiap perangkat lunak pengeditan video tidak lengkap tanpa efek transisi yang mengesankan.
Berdasarkan hal yang sama, Wondershare Filmora menawarkan berbagai transisi video dan audio untuk membantu pengguna. Pengguna Wondershare Filmora dapat membawa transisi terbaik di awal atau akhir video atau di antara dua klip video. Ini bisa digunakan saat mengubah suasana video, mengubah subjek, melewati waktu, menunjukkan perubahan arah, dll.
Tab transisi yang khusus memungkinkan pengguna Wondershare Filmora untuk menerapkan berbagai transisi dengan cepat dan mudah. Mari kita masuk ke detail tentang membuat efek transisi potongan halus di Wondershare Filmora dalam panduan langkah demi langkah ini.
Dalam artikel ini
Langkah-langkah untuk membuat efek transisi potongan halus di Wondershare Filmora:
Wondershare Filmora adalah alat pengeditan video populer yang digunakan oleh para pembuat konten, termasuk influencer media sosial, pemasar, pembuat konten, dll. Berikut adalah langkah-langkah cepat dan detail untuk membuat efek transisi potongan halus di Wondershare Filmora:
Fase 1Scarica e avvia Wondershare Filmora
Prima di passare all'effetto di transizione di taglio liscio in Wondershare Filmora, il primo passo è scaricarlo e avviarlo sul vostro sistema. È facile scaricare questo software su dispositivi Windows e Mac. I rapidi passaggi per scaricare e avviare Wondershare Filmora sono i seguenti:
- Vai aWondershare Filmora.
- Vai al pulsante Download nell'angolo in alto a destra del sito ufficiale.

- Programma di installazione di Filmora verrà scaricato rapidamente per il tuo sistema Windows o Mac.
- Fare doppio clic sul programma di installazione e avviare il processo di installazione. Accetta il menu dei termini e delle condizioni del suggerimento.
- Una volta installato Wondershare Filmora, si avvierà e funzionerà automaticamente sul vostro sistema.
Fase 2फुटेज आयात करें
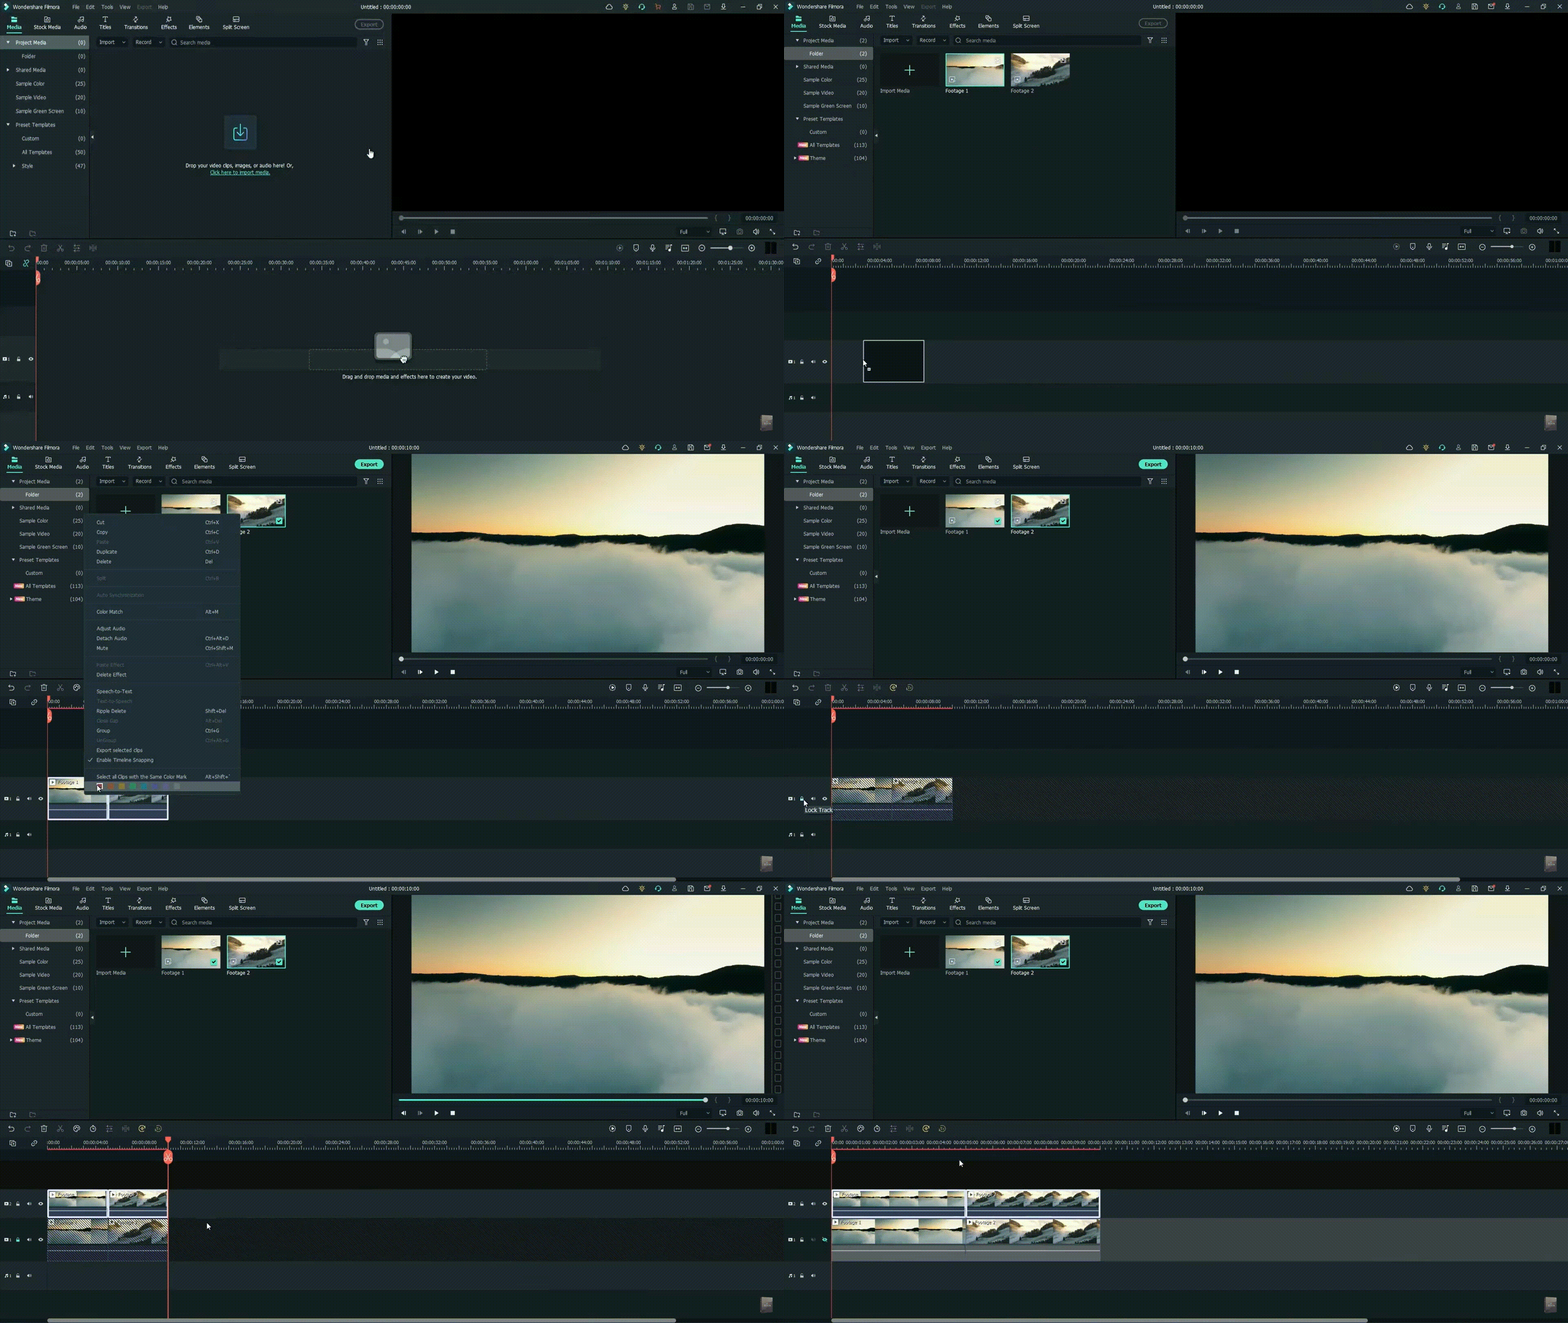
एक स्मूथ कट ट्रांसिशन इफेक्ट बनाने का पहला कदम फुटेज आयात करना है। आपको सिर्फ Wondershare Filmora के ड्रैग-एंड-ड्रॉप की सुविधा का उपयोग करना है। आप नीचे दी गई तेज स्टेप्स का उपयोग करके 2 फुटेज को वीडियो संपादक इंटरफेस में आयात कर सकते हैं।
- दो फुटेज को ड्रैग और ड्रॉप की सुविधा का उपयोग करके टाइमलाइन पर ले जाना शुरू करें।
- अब, वीडियो संपादक में फुटेज को चुनें।
- अगला कदम है, फुटेज की लेयर की प्रतिलिपि बनाना और मौजूदा लेयर को लॉक करना।
- फिर, मौजूदा लेयर को दूसरी फुटेज की ओर पेस्ट करें।
- इस कदम के अंत तक बढ़ने के लिए लेयर को अनलॉक करें। फिर, आपको नीचे दी गई लेयर को छुपाना होगा।
स्टेप3प्रभाव टैब पर जाएं और प्रीसेट सेटिंग्स लागू करें
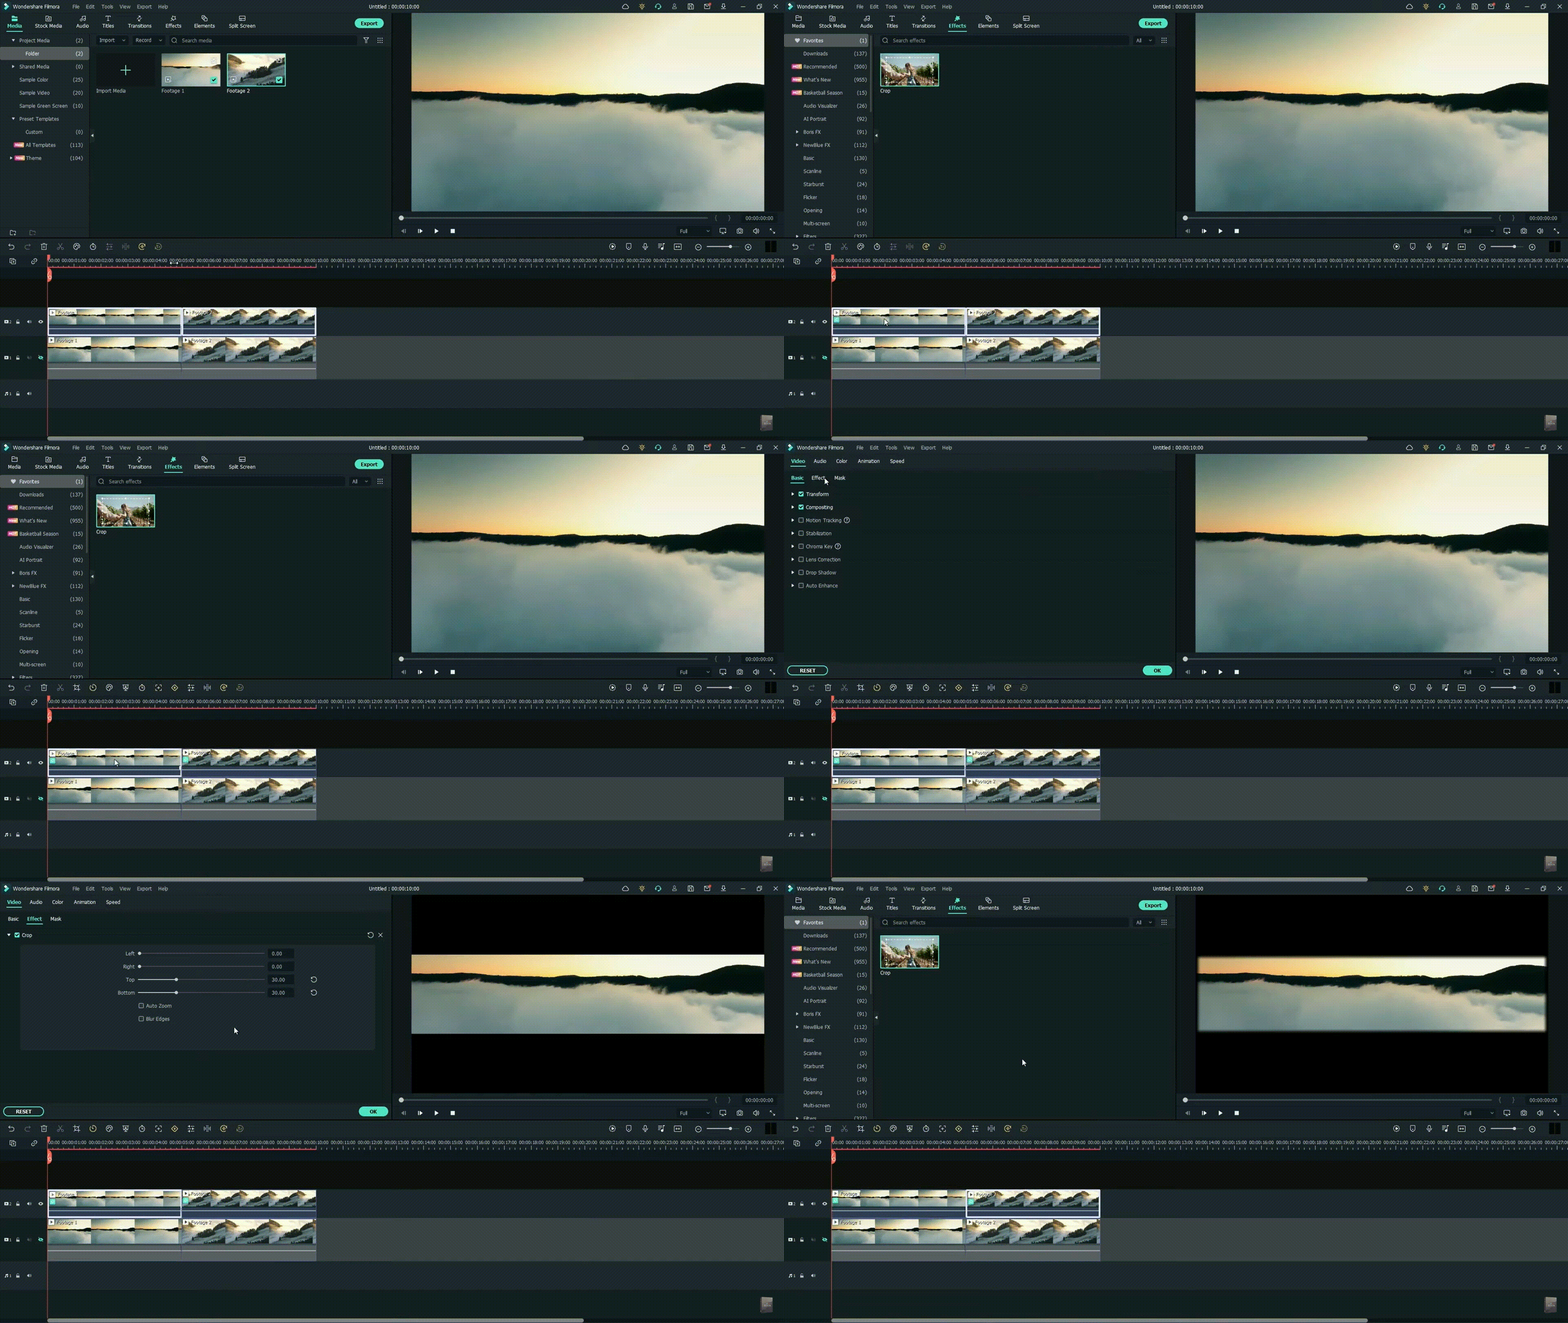
फुटेज आयात करने और विभिन्न लेयर लागू करने के बाद, अगला कदम है Wondershare Filmora में प्रभाव टैब पर जाना। फिर, प्रीसेट सेटिंग्स को फुटेज पर लागू किया जाता है। इसके लिए तेज स्टेप्स निम्नलिखित हैं:
- Start by applying the crop presets to the above-layer footage.
- Select the first footage in the video editor.
- Right-click on properties and open the effects menu.
- Search the settings and change the top and bottom settings to 30
- You can select to blur the edges of the footage by ticking on the option.
- Repeat the same steps for the second footage.
Step4Go to the Transitions tab
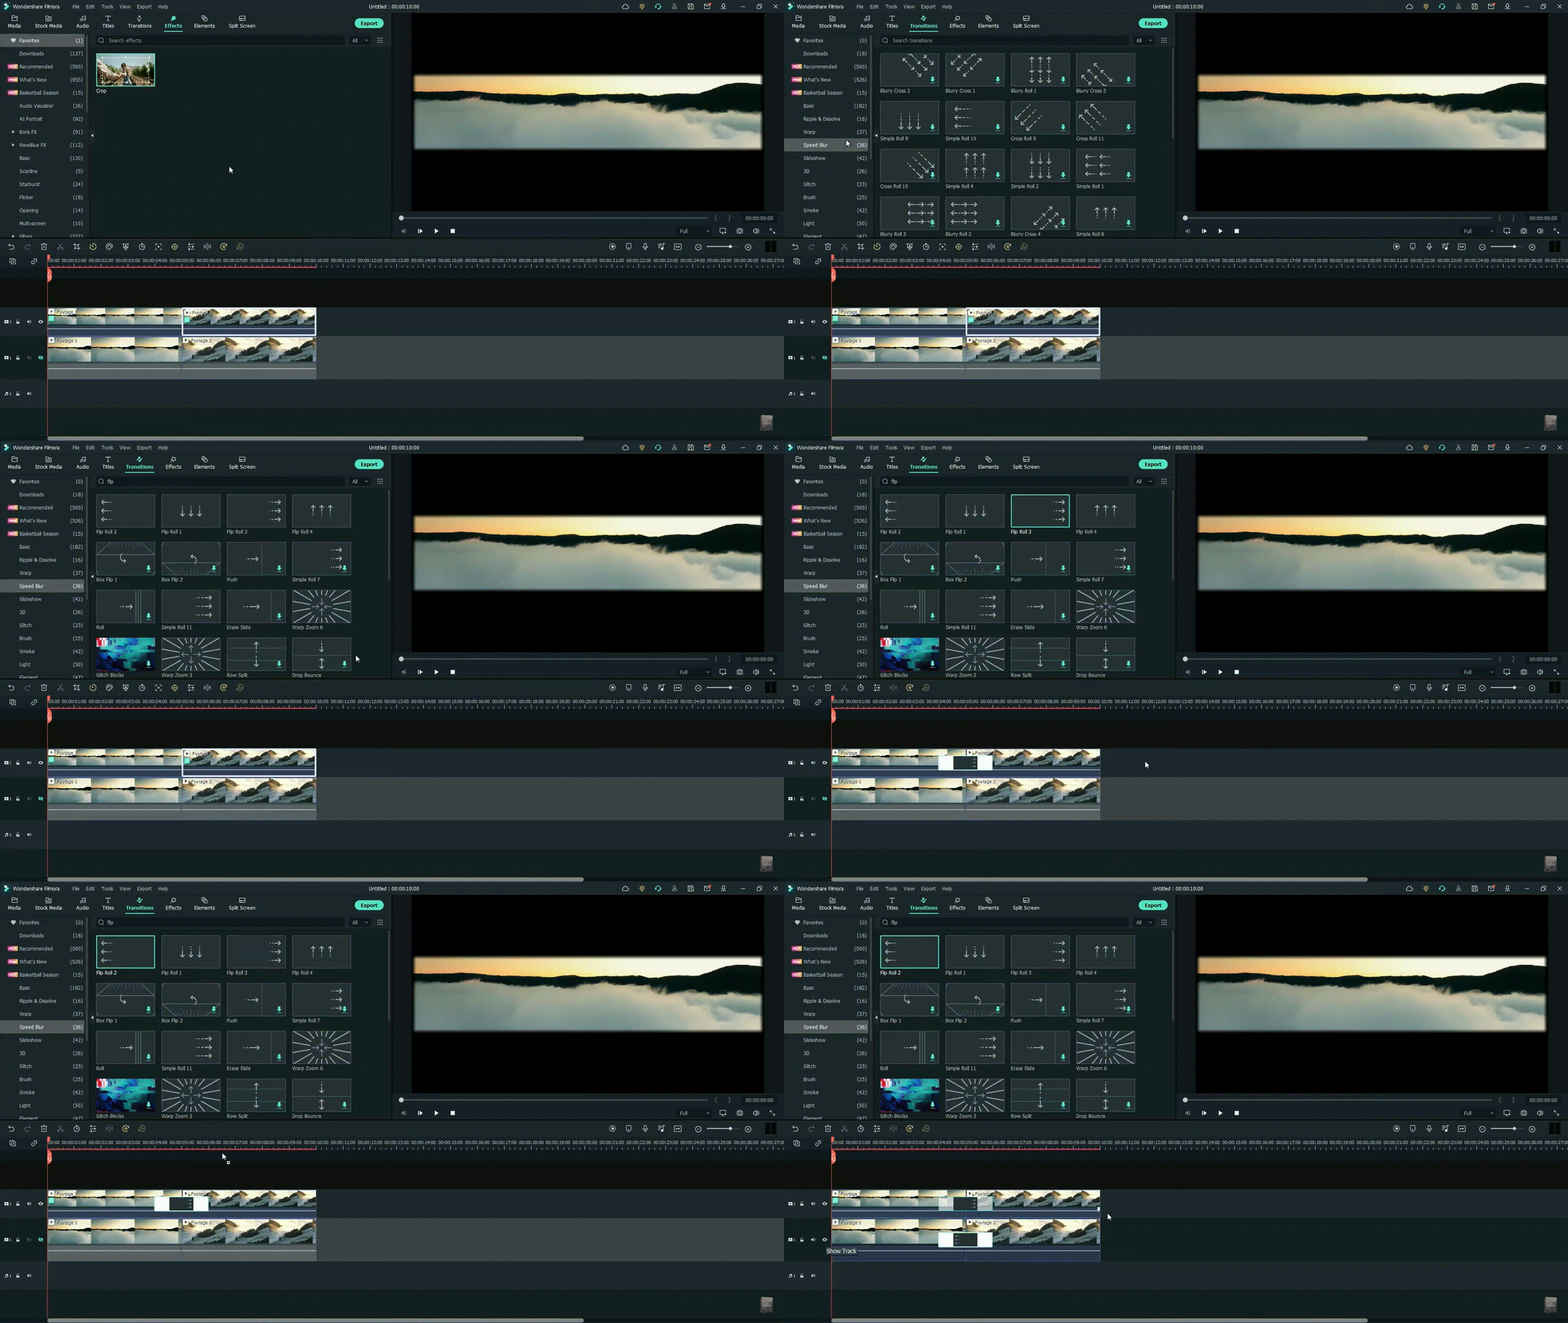
It is time to go to the transitions tab and start putting it in your video clip. The quick steps for the same are:
- Select the speed blur category located on the left side of the interface.
- Go to the search box and type "flip."
- Start placing the transitions on the footage layers.
- Select the first transition, flip all three, and place it on the second layer of the footage.
- Select the second transition, flip all two, and place it on the first layer of the footage.
- Render this video part by unhiding the first layer and moving to the preview step.
Step5Lorem ipsum dolor sit amet eam quas malorum
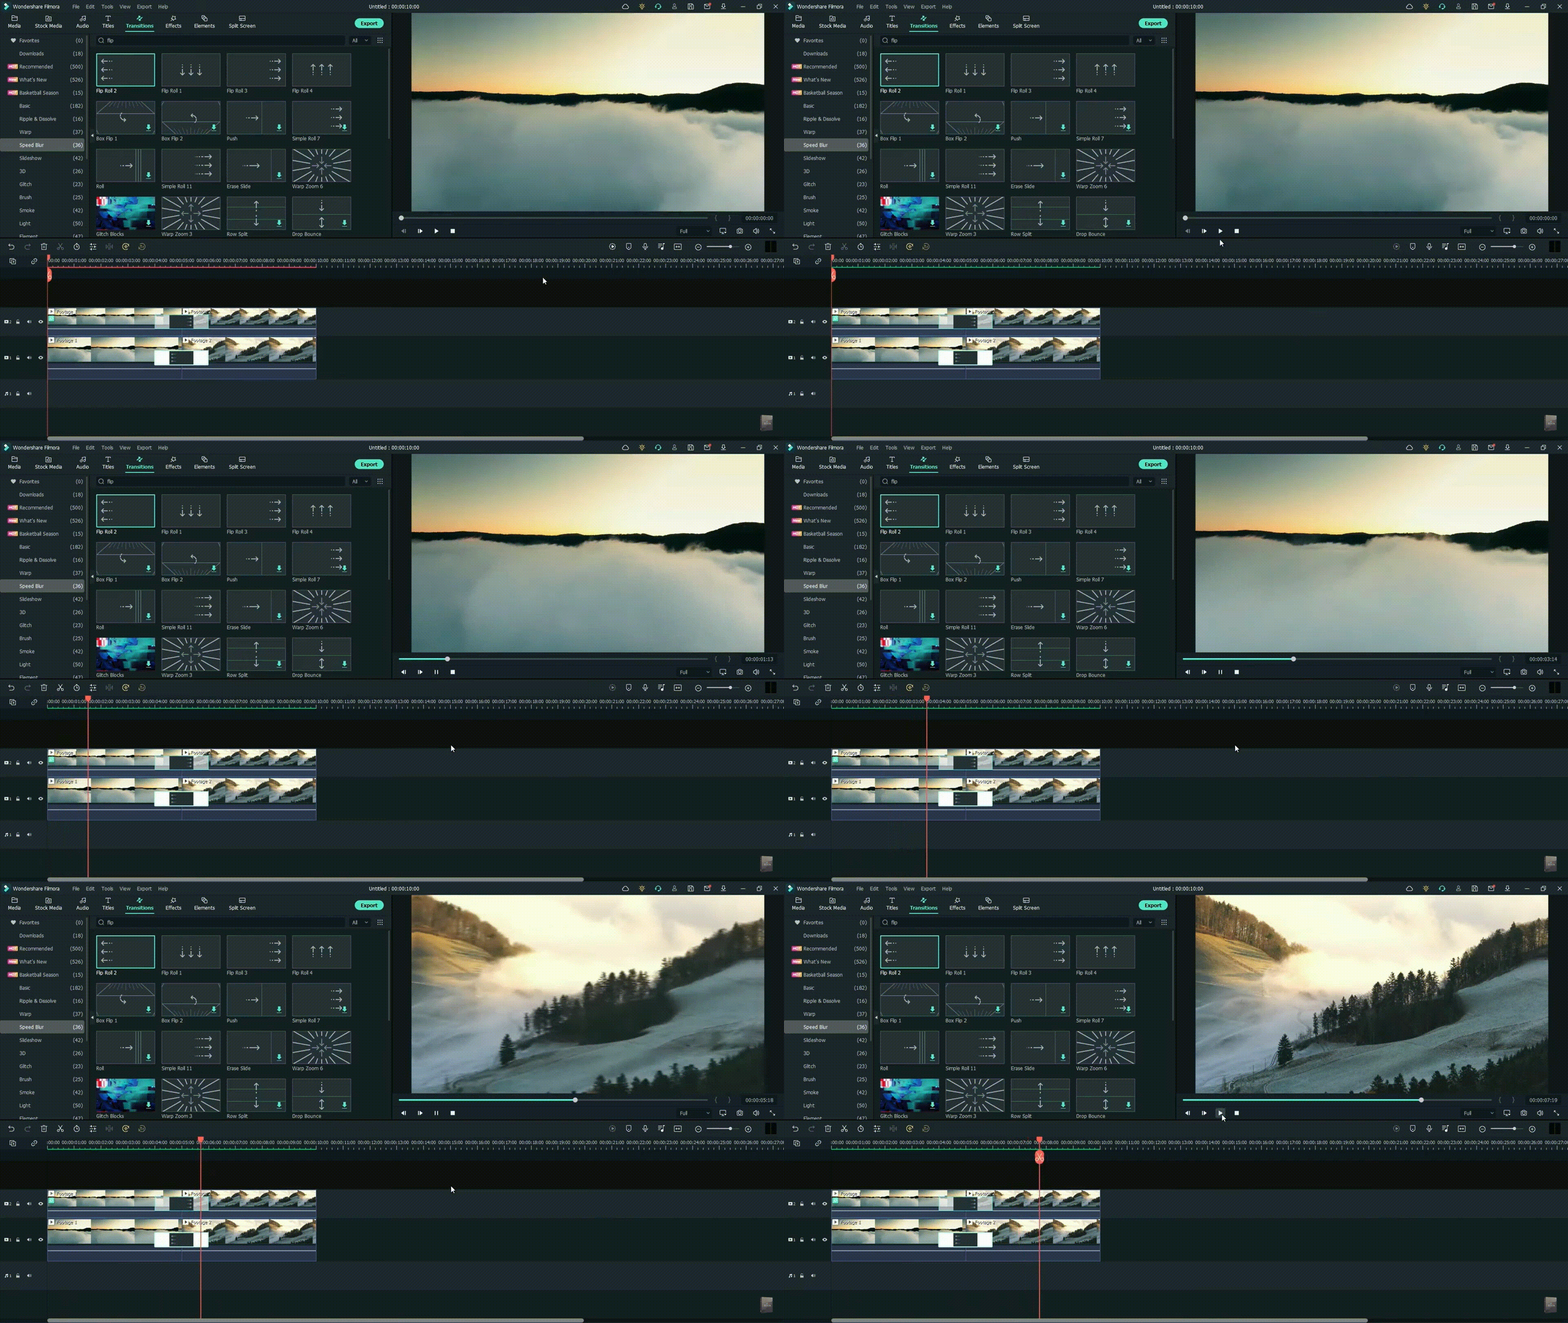
It is time to preview the created video. The render preview option in the Wondershare Filmora ensures that there is no lag in the preview file on any system. It generates the rendered versions of the files placed on the timeline for a quick preview. In addition to it, it is easy to add a top to bottom transition in the video editing in this step only. The quick steps for the same are:
- Preview the created video file and check if there is a need to change the transition.
- If required to add the top to bottom transition, remove the existing transitions.
- Sélectionnez la première séquence et accédez à son menu Propriétés.
- Accédez aux paramètres de recadrage et réinitialisez ces paramètres.
- Modifiez les paramètres droit et gauche dans les réglages à 30.
- Repeat the same steps for the second footage.
- Sélectionnez la deuxième couche et appliquez et retournez les quatre effets.
- Sélectionnez la première couche et appliquez pour retourner un effet.
- Rendez la séquence vidéo et prévisualisez rapidement.
Conclusion :
Ainsi, les utilisateurs de Wondershare Filmora peuvent rapidement créer un effet de transition fluide dans leurs vidéos. Il est facile de le télécharger Wondershare Filmora sur votre système Mac ou Windows. Tout ce que vous avez à faire est d'importer la séquence sur l'interface et d'accéder à l'onglet des effets.
La prochaine étape est d'accéder à l'onglet des transitions. Il est facile d'appliquer ces effets à la première et à la deuxième couche. Il est facile de vérifier l'aperçu de la vidéo créée et, si nécessaire, les utilisateurs peuvent ajouter une transition haut bas ici.
Reinicializar la configuración de recorte del primer metraje y seleccionar los parámetros derecho e izquierdo a 30. Lo mismo se hace con el segundo metraje. Después de agregar los diferentes efectos al video creado, es fácil guardar y previsualizar el metraje final. Principiantes y profesionales pueden seguir estos pasos para incorporar un efecto de transición suave en su próximo video.
 Garanzia di Download Sicuro, zero malware


